|
Editing and Creating the Input Keyboard Style |
  
|
Editing and Creating the Input Keyboard Style
|
Editing and Creating the Input Keyboard Style |
|
Overview
The following presents the options available (A, B and C) to create/edit an Input Keyboard control's style.
Option A
Click the “Change Style” option located on the control's right-click menu (see Editing and Creating Styles). The resulting window displays the following options:
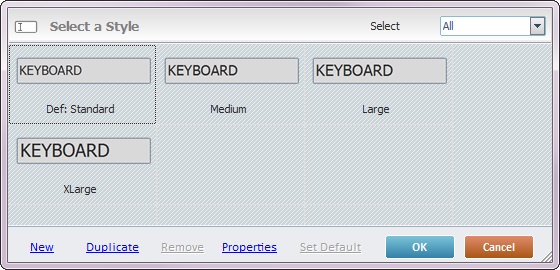
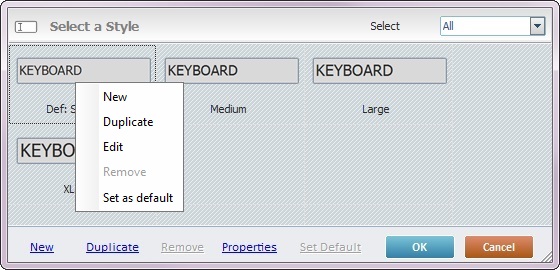
Details of the "Select a Style" window
|
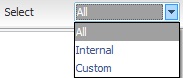
It is possible to filter the displayed styles. Select one of the following options from the drop-down: All – Displays all the styles available. Internal – Displays MCL-Designer V4's standard styles. Custom – Displays the styles you have created. |
|
Opens a “Style Properties” window to create a new style. |
|
Duplicates the selected style. It also enables the edition of the duplicated style in the “Style Properties” window. |
|
Only removes a style that you have created (custom style). |
|
Opens a “Style Properties” window, but only the styles you have created can be modified/edited. |
|
Sets the selected style as the default style ("Def:" is added to the style's designation). Once set, the default style will be adopted by all Input Keyboard controls dragged from the “Control” tab onto the screen. |
Some of these options can also be accessed by right-clicking any style in the "Select a Style" window and opening a menu as shown below:
|
|
Right-click a style |
Right-click a blank space in the "Select a Style" window |
|
Opens a “Style Properties” window to create a new style. |
Duplicates the selected style and enables its edition in the “Style Properties” window. |
|
Opens a “Style Properties” window to display the selected style’s properties. Only the styles you have created can be modified/edited. |
|
Only becomes active if you select a custom style. It deletes styles that you have created. |
|
Defines the selected style as the default style for any Input Keyboard controls that are dragged from the “Control” tab onto the screen. |
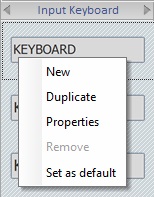
Option B
Right-click the Style Preview section (located below the “Control” tab). This opens a menu list with the following options:
|
New |
Opens the “Style Properties” window to create a new style. |
Duplicate |
Duplicates the selected style and enables its edition in the “Style Properties” window. |
|
Properties |
Opens a “Style Properties” window to display the selected style’s properties. |
|
Remove |
Option only available if you select a custom style (standard styles cannot be removed). |
|
Set as default |
Defines the selected style as the default style for any Input Keyboard controls that are dragged from the “Control” tab onto the screen. |
Whichever the option used (A or B), the creation of a new style occurs in the "Style Properties" window. Take the following steps to fill in/adjust the available options in this window:
1. Open the "Style Properties" window.

2. Enter a name for the new style in the "Name" box.
3. Check the appropriate option (“Classic” or “Advanced”). The "Classic" option is checked by default.
4. Fill in the options according to the project's requirements.
If selecting “Classic”, fill in the following options:
a. Select a text font from the drop-down.
b. Define a character size.
c. Select font properties (BOLD, ITALIC, UNDERLINE or STRIKETHROUGH).
d. Select the text color from the drop-down OR click
e. Choose a background color from the drop-down OR click
f. Define a shape type for the keyboard from the corresponding drop-down.
g. Select the color of the keyboard box border from the drop-down OR click
All these options are displayed in the preview box.
h. Click
|
When selecting “Advanced”, you can substitute the Input Keyboard's default image (step a) or simply edit the options (go to step c).
a. Click
b. Click
c. Back in the "Style properties" window, edit each Input Keyboard state (“A- Enabled”; “B-Focus”; “C-Disabled” and “D-Invalid”) after clicking each tab:
I. Select a text font from the drop-down.
II. Define a character size.
III. Select font properties (BOLD; ITALIC; UNDERLINE or STRIKETHROUGH).
IV. Choose the text color from the corresponding drop-down OR click
V. Select a background color from the drop-down OR click
All these options are displayed in the preview box.
d. Click
|
5. To finish the creating/editing of the Input Keyboard's style, click ![]() . To abort, click
. To abort, click ![]() .
.
Option C
Option C can only be used to transform controls that have already been dragged onto the screen:
•Select the appropriate style displayed in the Style Preview section (below the "Control" tab), drag it onto the control you want to modify. The control will automatically adopt the new style.
![]()
Keep in mind that the styles displayed in the Style Preview section - standard styles - cannot be edited/deleted, their features are locked in (the ![]() is displayed on the upper right corner of the "Style Properties" window).
is displayed on the upper right corner of the "Style Properties" window).