|
How to Work with Resources |
  
|
How to Work with Resources
|
How to Work with Resources |
|
Overview
MCL-Designer projects can include several types of resources such as image, sound, video or text files. These resources are all placed in the "Resources" module. See Navigating the "Resources" Module.
Once a resource is added to this module, you can use it throughout the project (ex: apply an image to an Image Display or Button control, apply a sound file to a "Play Sound" process, etc.).
To Add a Resource to the "Resources" Module
Use one of the following to add a resource to the "Resources" module:
•The right-click menu:
a. Right-click any of the module's sections (except for the "Splash" section), the empty space of the"Resources" module or its title or one of the resources.
b.Click the ![]() option.
option.
c. In the resulting OS browse window, browse and select the required resource.
Regardless of the section you right-click to access the "Add Resource" option, the added resource will be identified and placed in the compatible section.
OR
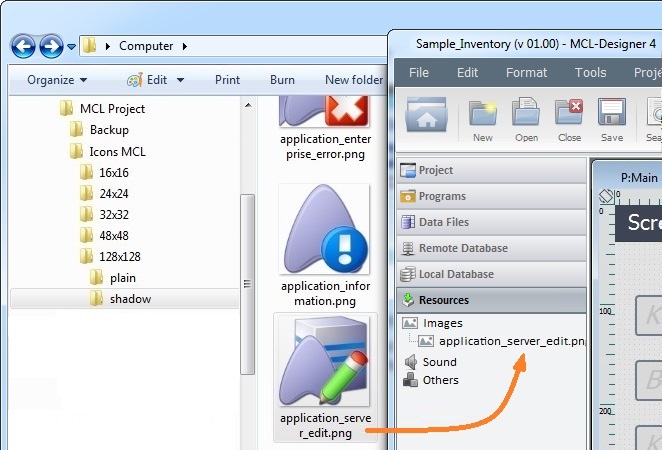
•Use the Drag-and-Drop mechanism – drag a resource file from an OS browse window and drop it into the "Resources" module.
MCL-Designer will identify the type of the resource being added and place it in the appropriate section.
![]() Accepted resource formats:
Accepted resource formats:
Image resources - "*.jpeg", "*.jpg" and/or "*.png" files.
Sound resources - "*.wav" files, preferably, with a 22050 Hz frequency.
Video resources - "*.3gp", "*.mp4", "*.mkv", "*.ts", "*.webm" and/or "*.avi" files.
![]() If required, you can use Drag-and-Drop to reorder the resources within each section.
If required, you can use Drag-and-Drop to reorder the resources within each section.
To Apply an Image Resource to a Control
Image resources can be added to a screen but also to controls that allow for images (ex: a Display Image or a Button control). The image resource is usually applied in the control's corresponding properties window.
Step-by-step
1. Open the properties window of the control you want to add an image to.
2. Select an option from the drop-down OR use one of the following options:
![]()
•Click ![]() , located next to the "Image" option, whenever available.
, located next to the "Image" option, whenever available.
•Right-click the "Image" option's box and select the "Resource Select" option in the resulting window.
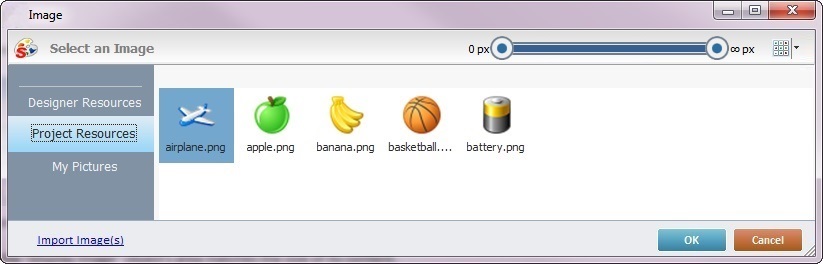
Either of these 2 alternatives opens a window with tabs that contain image resources ("Theme", "Designer Resources", "Project Resources", My Pictures" and a tab representing the folder you previously used as a source for an image import. In the case of the image below, it is the "C:\...\Pictures\" tab).

This window allows you to control the displayed images and provides further options:
•Click
•Use
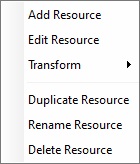
•Right-click an existing image resource to open a menu with several options. The available options vary according to the resource's location (the tab that includes the selected image). Below are all the possible options:
|
a. Open the tab that contains the image you want to use.
b. Select the image.
![]() To avoid image display issues, make sure that the dimension of the selected image resource and the target control's area are almost the same.
To avoid image display issues, make sure that the dimension of the selected image resource and the target control's area are almost the same.
c. Click the window's ![]() to save your image choice and return to the properties window.
to save your image choice and return to the properties window.
3. When you are done editing the control in its properties window, click ![]() to apply the selected image.
to apply the selected image.
![]() Regarding the Display Image control, there are other ways to add an image resource. For instance, you can drag-and-drop an image from the "Resources" module onto a Display Image control that has been added to a screen. See Adding a Display Image Control to a Screen.
Regarding the Display Image control, there are other ways to add an image resource. For instance, you can drag-and-drop an image from the "Resources" module onto a Display Image control that has been added to a screen. See Adding a Display Image Control to a Screen.
![]()
Any image resource that is added to a compatible control is always sent backward in relation to any other control in the screen.
If the added control and the control already in the screen are both image resources, you can alternate their position and send one of the image resources forward/backward, as required.
![]()
When selecting an image, consider its resolution, its purpose and the target device.
We recommend the use of an image with a resolution that matches the resolution of the control it is inserted in.
To Import an Image Resource
Instead of selecting an image already available in the "Select an Image" window, you can import the required image from an outside source into that window - once imported, the image resource will be displayed in the "Project Resources" tab.
Step-by-step
1. In the "Select an Image" window, click ![]() (located on the lower left) to open an OS browse window.
(located on the lower left) to open an OS browse window.
2. Select the image you want to import and click ![]() .
.
No matter which tab you had open when you clicked ![]() , the imported image is placed in the "Project Resources" tab.
, the imported image is placed in the "Project Resources" tab.
3. If you want to add the imported image to the selected control, select it (in the "Project Resources" tab) and click ![]() to apply.
to apply.
To Apply a Video Resource to a Video Player Control
MCL-Designer allows you to add/use video files as a resource for the project.
However, video resources can ONLY be applied to the Video Player control.
Use the Drag-and-Drop mechanism. You can either:
•drag the intended video resource onto a Video Player control that has been added to a screen,
OR
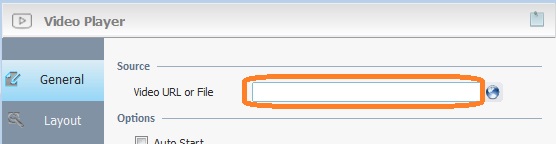
•drop the resource onto the source related field of the Video Player's properties window.
To Apply a File Resource to a Web View Control
The Web View control allows you to display the HTML content of a website or a file.
If the control's data source is meant to be a file that has been imported into the project, specifically, into the "Resources" module, you can use the Drag-and-Drop mechanism to apply the HTML file to the Web View control. Use one of the following methods:
•drag the intended HTML file onto a Web View control that has been added to a screen,
OR
•drop the resource onto the source related field of the Web View's properties window.

![]() Instead of starting with the import of the resource onto the "Resources" module, you can drag the compatible file from an OS browse window and drop it directly onto the Web View on the screen OR onto the "Web URL or File" option in its properties window.
Instead of starting with the import of the resource onto the "Resources" module, you can drag the compatible file from an OS browse window and drop it directly onto the Web View on the screen OR onto the "Web URL or File" option in its properties window.
This Drag-and-Drop triggers an automatic import operation, meaning, the dragged resource is automatically included in the "Resources" module - "Others" section.
To Delete a Resource
Use one of the following to remove a resource from the "Resources" module:
a. Select the resource you want to delete.
b. Click <Delete> in your PC keyboard.

c. Click ![]() to confirm the delete operation.
to confirm the delete operation.
OR
a. Right-click the resource you want to delete.
b.Click ![]() .
.
c. Click ![]() to confirm the delete operation.
to confirm the delete operation.