|
Application Info |
  
|
Application Info
|
Application Info |
|
Overview
The "Application Info" tab displays information that was added when the project was created and provides options to add further information.
Only unpublished projects can have their settings edited.

Most of the information displayed in this tab is editable.
Application Info |
|
App. Name |
If required, modify the application's name. This name represents the application in the MCL App Desktop environment (the name below the application's shortcut icon).
•a to z •0 to 9 •"_"
|
App. Code |
If required, edit the Application Code. This refers to the Unique Application ID (ex: used to identify the project when it is loaded into a device, for application deployments, etc.).
•a to z •0 to 9 •"_" and/or "."
|
Created |
Displays the project's creation date. This information is NOT editable. |
Updated |
Displays the date of the latest project update. This information is NOT editable. |
App. Description |
As an option, add any relevant information regarding the project. |
Publisher Info |
|
Author |
Edit the name of the project's author. |
Company Name |
Edit the name of the project's company. |
Contact |
Enter a contact. |
Define an image for each icon resolution. Depending on the target device's own resolution, it will automatically select the most appropriate icon (with the most compatible resolution) to represent the application in the necessary contexts. |
|
Small (48x48) |
Use one of the following methods to define images for the project icons: •Drag an image onto the intended icon resolution box.
•Click the intended icon resolution box and, in the resulting window, select an available image from one of the tabs at your disposal.
•Click the intended icon resolution box and, in the resulting window, click
•Right-click the intended icon resolution box, click the "Select Icon" option in the resulting menu and select an image from one of the available tabs.
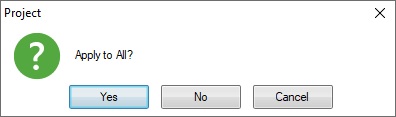
When you drag or select an image for an icon resolution box, you have the possibility to apply that same image to the other project icons at the same time. When you get the pop-up window below (after clicking
Other methods to apply the same image to all the project icons:
▪Right-click the intended image and select "Apply to All" in the resulting menu.
▪Drag-and-drop the intended image onto the icon in the "Project" module (located to the left, above the "Programs" module). That image will automatically be applied/resized to all the icon resolutions. This drag-and-drop only works if the project's "Properties" window is NOT open.
If the selected image is dragged onto an icon with a different resolution, the image will be resized.
Always consider the resolution of the image(s) you intend to use. Depending on the resolution differences, the resizing can distort/blur the image. Ex: To drag a JPG file with a 60 X 49 resolution into the "Large (512 X 512)" icon might create a blurred icon.
When defining your project's icons for the first time, you just have to drag an image onto one icon resolution box and the other ones will adopt the same image with the necessary reconfiguration in terms of size and/or resolution.
To delete an added image, right-click it and select the "Remove Icon" option. This option is only available for images you have previously defined. |
Medium (128x128) |
|
Large (512X512) |
|
Once you have filled in/edited the available options, click ![]() to apply OR proceed to another tab.
to apply OR proceed to another tab.