|
Importing From MCL-Designer V3 |
  
|
Importing From MCL-Designer V3
|
Importing From MCL-Designer V3 |
|
Overview
This feature allows for the importing of projects developed in MCL-Designer V3 to MCL-Designer V4.
Due to key differences between MCL-Designer V3 and V4, the import does not ensure a 100% conversion.
There is an element-by-element conversion (ex: V3 settings are imported into V4; V3 screens/controls are converted into V4, process line V3 to process line V4).
If the V3 project is developed according to its best practices, the rate of conversion will increase.
Converted Project Components
•programs
•screens
•graphical controls
•most of the processes
•project properties (name, device type, profiles)
•settings (data files, variables, ...)
Ending this process, a detailed conversion report is generated with all occurrences and issues (ex: project info, application info, screen by screen images, controls, processes).
To Import an MCL-Designer V3 Project to V4
![]() The main condition to importing an MCL-Designer V3 project into V4 is that the V3 project must have been developed in the last V3 version (v3.21).
The main condition to importing an MCL-Designer V3 project into V4 is that the V3 project must have been developed in the last V3 version (v3.21).
Step-by-step
1. Start MCL-Designer V4.
2. Click “Tools” and, then, select “Import from Designer V3”.
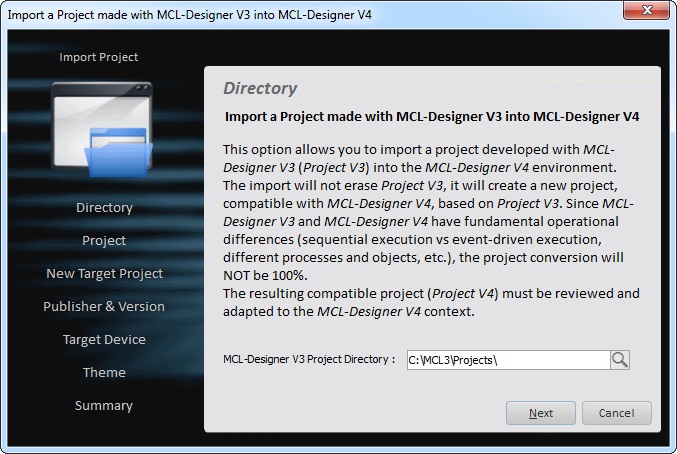
3. In the “MCL-Designer V3 Project Directory” box, maintain the default location, if it is correct, OR click ![]() and browse for the required location.
and browse for the required location.
4. Click ![]() to continue to the next window.
to continue to the next window.
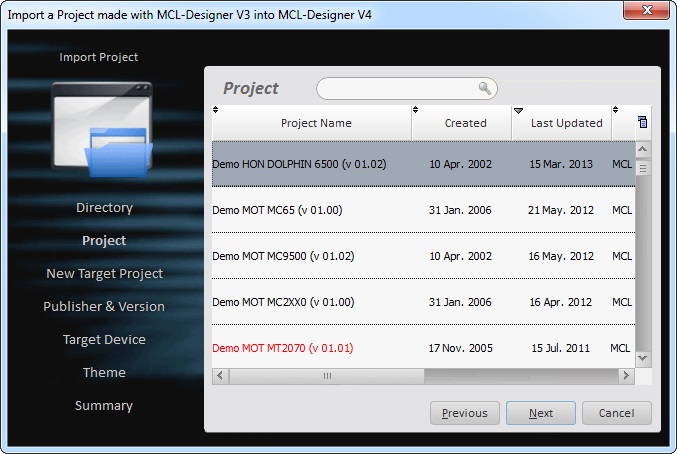
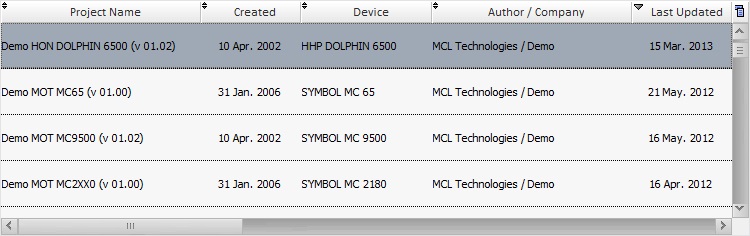
The displayed information regarding each project is ordered according to its last update date:
As an option, use the search box (![]() ) to filter the displayed elements:
) to filter the displayed elements:
a. Enter the value you want displayed
b. To remove the filter, delete the entered value in the search box.
5. Select the V3 project to import.
6. Click ![]() .
.
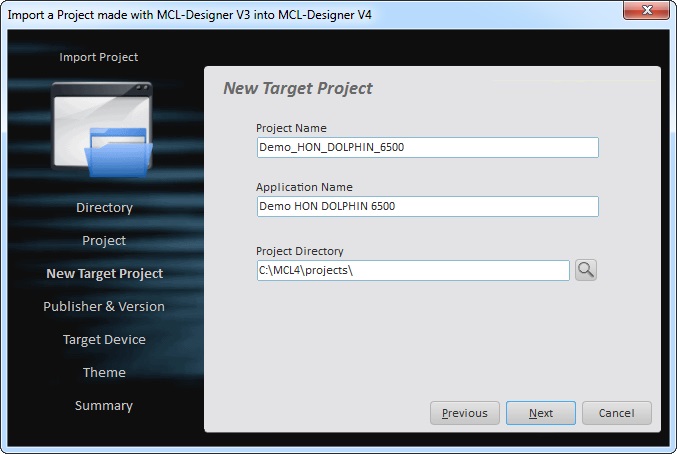
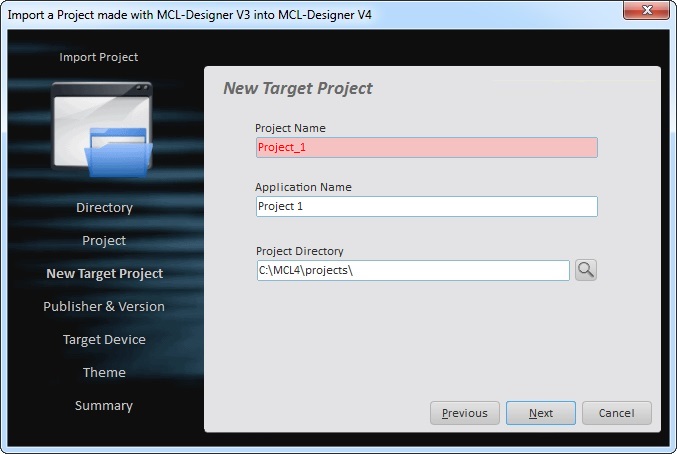
7. Fill in the following options:
•Type a name for the project in the “Project Name” box. The "Application Name" box below fills in automatically with the text entered in the previous box ("Project Name"). The "Application Name" represents the application in the screen of the device (in App Desktop)and can, also, be viewed within MCL-Designer V4.
•In the “Project Directory” box, maintain the default location OR click ![]() and browse for a more appropriate location.
and browse for a more appropriate location.
![]() A project name can only contain alphabetic characters, numbers, and the underscore “_” character (the underscore character is commonly, used to indicate a space).The project name is usually the name of the application as well as the name of the project directory. The project directory contains all the project files and sub-directories. If the project needs to be moved, be sure to copy the entire project directory.
A project name can only contain alphabetic characters, numbers, and the underscore “_” character (the underscore character is commonly, used to indicate a space).The project name is usually the name of the application as well as the name of the project directory. The project directory contains all the project files and sub-directories. If the project needs to be moved, be sure to copy the entire project directory.
8. Click ![]() to continue.
to continue.

9. Maintain the default information or enter new one in the available boxes:
•Enter the name of the project's author.
•Enter the company's or customer's name.
•Maintain or select the creation date. Enter the date or click ![]() to select the appropriate date.
to select the appropriate date.
•Maintain or select the project's version.
•If required, add notes in the corresponding text box.
10. Click ![]() to proceed.
to proceed.
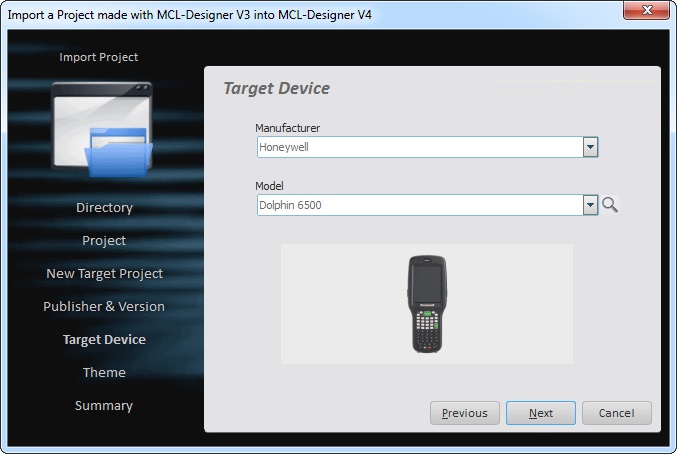
11. According to the imported target device, a manufacturer and device type is suggested. If this is not possible (the device is discontinued or there is no device plug-in), "Manufacturer" and "Model" are left blank. Select the project's target manufacturer and device type (in the "Model" box) from the corresponding drop-downs.
As an alternative, click ![]() to open a "Select Device" window and select a device from the available listed devices:
to open a "Select Device" window and select a device from the available listed devices:
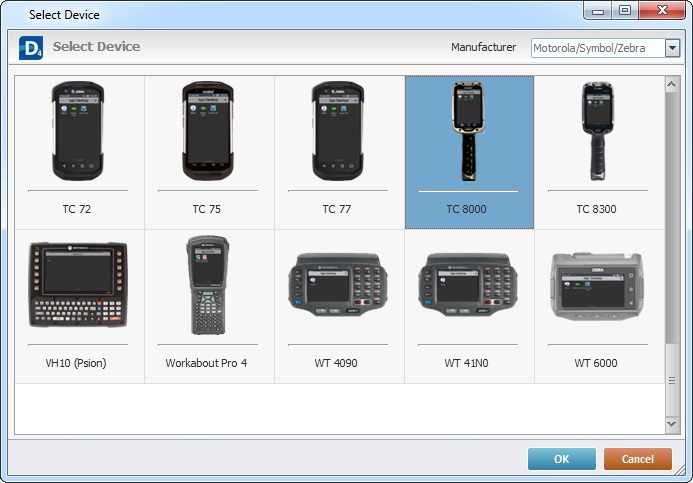
If required, use the "Manufacturer" search box to filter the displayed information and, then, click ![]() to apply your choice.
to apply your choice.
12. Click ![]() to continue.
to continue.
![]() Theme - A theme determines the layout of buttons, menus and other display elements in the screens of a project.
Theme - A theme determines the layout of buttons, menus and other display elements in the screens of a project.
Basically, the theme defines the appearance of everything the operator will see on the device.
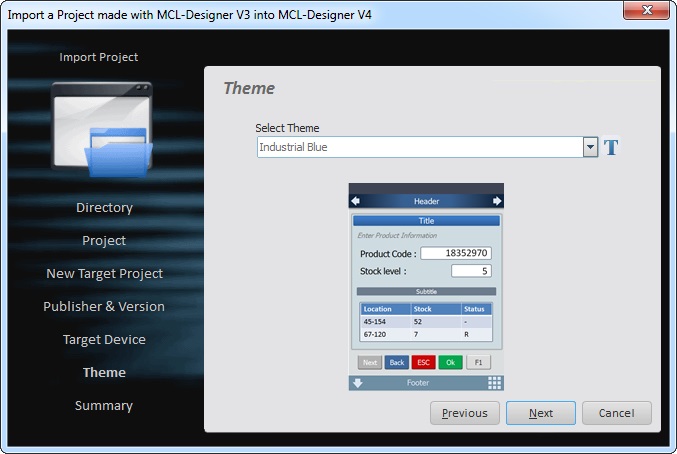
13. Use one of the following to define the project's “Theme”.
a. Select a theme from the drop-down.
b. Use the ![]() button to open a window displaying a preview of the available themes.
button to open a window displaying a preview of the available themes.
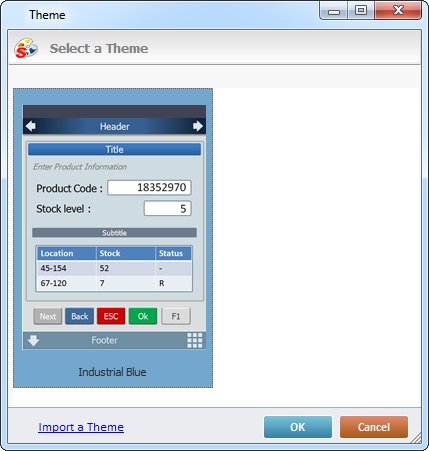
I. Click ![]() .
.
II. Select the theme you want to use.
III. Click ![]() to apply your choice and return to the previous window.
to apply your choice and return to the previous window.
c. Import a theme from an outside source.
I. Click ![]() to open the window with the import option.
to open the window with the import option.
II. Click ![]() to open an OS browse window.
to open an OS browse window.
III. Select the required theme and click ![]() .
.
The image is now available for selection.
IV. Select it.
V. Click ![]() to apply your choice and return to the previous window.
to apply your choice and return to the previous window.
The option selected is previewed below the "Theme" box.
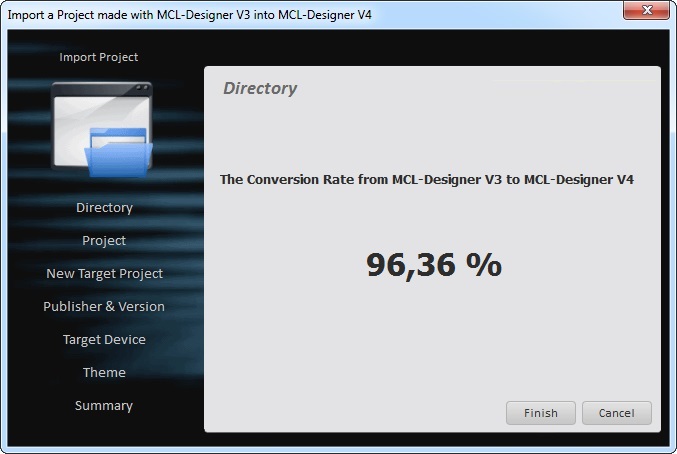
14. Click ![]() to see the summary with the "Conversion Rate".
to see the summary with the "Conversion Rate".
15. Click ![]() to conclude the “Import Project Wizard” and wait for the conversion report to be prepared as well as the conversion process itself.
to conclude the “Import Project Wizard” and wait for the conversion report to be prepared as well as the conversion process itself.
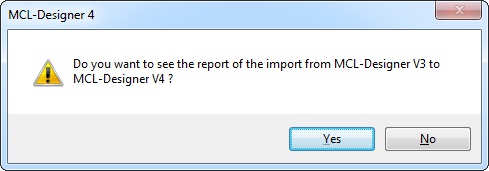
16. Click ![]() to access the pdf report file that is saved to the converted project folder. If you click
to access the pdf report file that is saved to the converted project folder. If you click ![]() , the pdf report file is saved to the converted project folder but not opened.
, the pdf report file is saved to the converted project folder but not opened.
Once the import process is concluded, it becomes available in the MCL-Designer V4 work area.

![]() Review the imported project and, according to the "Conversion V3 V4" report, make the necessary changes to correct any occurrence.
Review the imported project and, according to the "Conversion V3 V4" report, make the necessary changes to correct any occurrence.
![]() Occurrences are represented by the symbol
Occurrences are represented by the symbol![]() in the "Conversion V3 V4" report document.
in the "Conversion V3 V4" report document.
Examples of Conversion/Import Errors
1. Project Name Duplication
If the project's name is already in use, the entered name is displayed in red.
If you click ![]() without entering an alternative project name, a message box opens informing you that the project name already exists.
without entering an alternative project name, a message box opens informing you that the project name already exists.

Click ![]() , return to the previous window and enter a new name.
, return to the previous window and enter a new name.
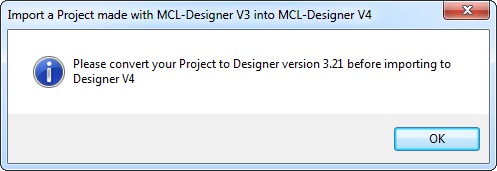
2. Project Conversion Failures
Only projects developed with the latest MCL-Designer V3 version (v3.21) can be converted and imported into MCL-Designer V4.
Projects displayed in red are NOT available for conversion.
If the project was developed in an MCL-Designer V3 version other than v3.21, the following error message appears:
If you attempt to import a V3 Voice project, you will get the following message:
