|
Navigating the Local Database Module |
  
|
Navigating the Local Database Module
|
Navigating the Local Database Module |
|
![]() The "Local Database" module manages the local database created within MCL-Designer V4 - this database is meant to be replicated within the device so it stores application data.
The "Local Database" module manages the local database created within MCL-Designer V4 - this database is meant to be replicated within the device so it stores application data.
You can create tables, add data to them, edit them and index their content. You can also select table fields to create customized views of table data.
If required, you can encrypt the local database so that the stored data can only be viewed/used within the device that has the MCL application installed. See Local Database Setup.
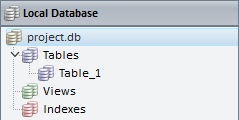
The "Local Database" module includes a default local database that is empty/without any tables (= "Project.db).

Once you add a table, the module will display the following sections:
|
Tables - This section displays the local database tables you create. ONLY becomes visible after you have added a table. Views - This section includes the views you created based on the existing local database table(s). It ONLY becomes visible if, at least, one table is created. Indexes - This section contains the indexes you create. Since an index is meant to organize table data in a specific order, this section will ONLY become visible once a table is created. |
Available Menus
There is a right-click menu with context-related options for every visible element within the module. For instance, if you right-click the name of the local database, you will have access to options that affect the entire local database. If you right-click an existing table, the available options will only concern the selected table.
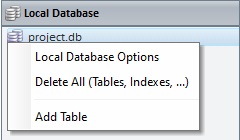
<local database> |
||
|
Local Database Options |
Opens the local database's properties window. See Local Database Setup. |
Delete All (Tables, Indexes...) |
Deletes all existing tables, views and/or indexes, all at once. Once deleted, these elements and stored data CANNOT be retrieved. |
|
Add Table |
It adds the initial table to the local database. ONLY available if there are NO tables already (= empty local database). |
|
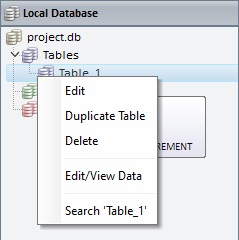
"Tables" Section |
||
|
Add Table |
Access this option by right-clicking the name of the section, in this case, "Tables". It adds a new table. |
|
Edit |
Right-click an added table. It opens the selected table's properties window to edit the table. |
Duplicate Table |
Right-click the intended table. It creates another table based on the selected table's structure. |
|
Delete |
Right-click an existing table. It deletes the selected table. |
|
Edit/View Data |
Right-click the intended table. It opens a window that displays the selected table's content so you can edit it. |
|
Search 'xxxx' |
Right-click the intended table. It opens a "Search" window. See Detail of Search.
|
|
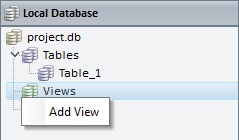
"Views" Section |
||
|
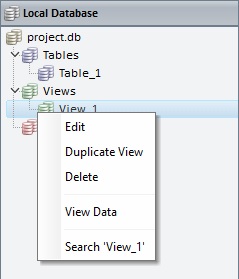
Add View |
This option is accessed if you right-click the name of the section - "Views". It adds a new view. |
|
Edit |
Right-click the intended view. It opens the selected view's properties window so it can be edited. |
Duplicate View |
Right-click the intended view. It duplicates the selected view with its settings. |
|
Delete |
Right-click the intended view. It deletes the selected view. |
|
View Data |
Right-click the intended view. Opens a window with the content that is displayed by the selected view. |
|
Search 'xxxx' |
It opens a "Search" window. See Detail of Search.
|
|
"Index" Section |
||
|
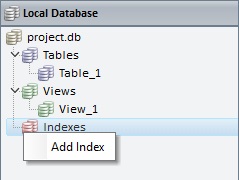
Add Index |
This option is accessed if you right-click the name of the corresponding section. It adds a new index. |
|
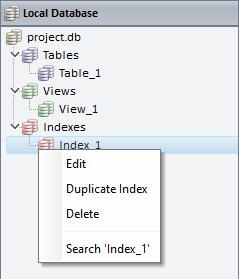
Edit |
Right-click the intended index. It opens the corresponding properties window so it can be edited. |
Duplicate Index |
Right-click the intended index. It duplicates the selected index with its settings. |
|
Delete |
Right-click an existing index. It deletes the selected index. |
|
Search 'xxxx' |
Right-click the required index. It opens a "Search" window. See Detail of Search.
|
|
For more information on these options, see:
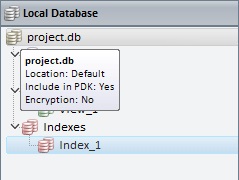
Mouse over the Elements
If you mouse over the local database name and/or the available tables, views and indexes, you get information on that element:
|
|
|
|