|
Import Data into an Opened Data File |
  
|
Import Data into an Opened Data File
|
Import Data into an Opened Data File |
|
Overview
Following the previous chapter (see Populating a Data File for Testing and Simulation Purposes), you can import data from an external file onto a data file instead of filling in the record fields manually.
There are 2 methods you can use:
•![]() (Import a File button) - Import data into a data file using this button which is available in the "File Data Viewer/Editor" window. See To Import Data using
(Import a File button) - Import data into a data file using this button which is available in the "File Data Viewer/Editor" window. See To Import Data using ![]() below.
below.
•Drag-and-Drop - Import data by dragging a file from an OS browse window and dropping it in the "File Data Viewer/Editor" window.
See To Import Data Using Drag-and-Drop.
Both methods replace any existing data in the target data file with the newly imported data. It is not possible to select which data is imported, all the data included in the source external file is imported into the target data file.
When importing data from an external "*.dat" file, make sure the source "*.dat" file's structure is the same as the target data file that will receive the import.
For more detailed information on data import errors, see Possible Import Errors.
Step-by-step
1. Open a "File Data Viewer/Editor" window by clicking ![]() in the target data file's properties window.
in the target data file's properties window.

2. Click ![]() (located on the upper right corner) to access a "File Data Import" window.
(located on the upper right corner) to access a "File Data Import" window.
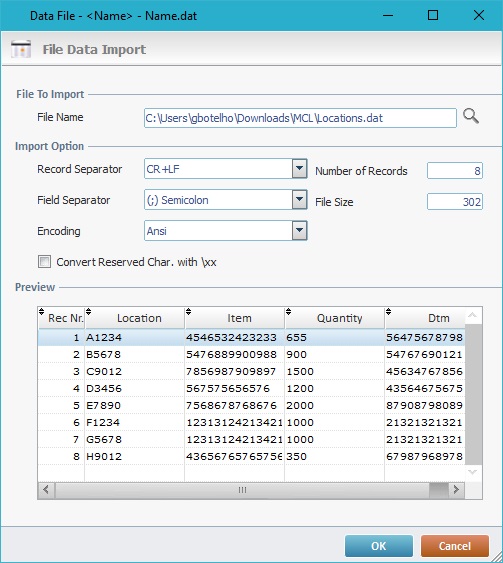
3. In this window, browse for the desired file to import by clicking ![]() in the "File Name" box.
in the "File Name" box.

4. In the resulting OS browse window, select the intended file to import and click ![]() .
.
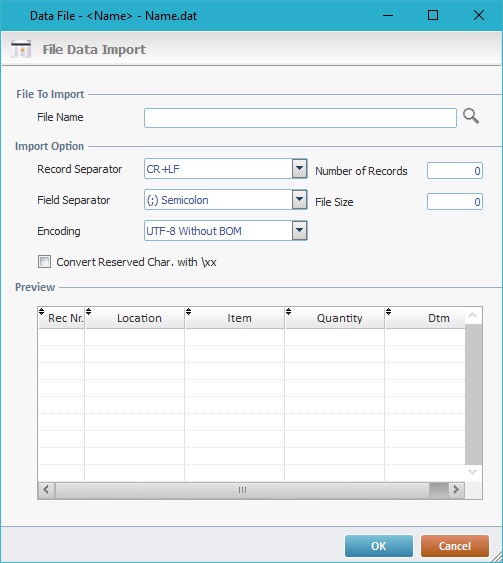
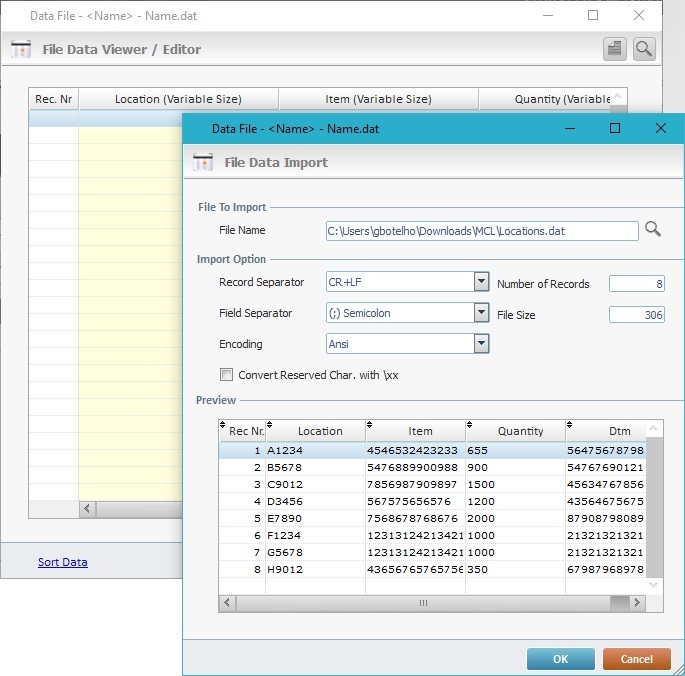
5. If necessary, define the following import options:
“Record Separator”
Select a separator element for the records to import from the drop-down.
"Field Separator”
Select a separator element for the fields to import from the drop-down.
"Encoding"
Select the encoding for the records to import from the drop-down.
![]() The recommended codification for Android developed projects is "UTF-8 Without BOM" (or "UTF-16 Without BOM" if you require the data file's field to have a fixed length and fillers).
The recommended codification for Android developed projects is "UTF-8 Without BOM" (or "UTF-16 Without BOM" if you require the data file's field to have a fixed length and fillers).
![]() When selecting the charset/encoding, consider the characters used in the data file or database in question – some special characters may NOT be displayed if the wrong charset/encoding is defined.
When selecting the charset/encoding, consider the characters used in the data file or database in question – some special characters may NOT be displayed if the wrong charset/encoding is defined.
Ex: The Hindu character “अ” (included in a data file in use) can only be viewed with a “UTF 8” or “UTF-16 without BOM” encoding.
The recommended codification for Android developed projects is "UTF-8" (or “UTF-16 without BOM”, if "UTF-8" is not available).
“Convert Reserved Char. With \xx”
Check this option to enable the conversion of any hexadecimal characters (with reserved format\xx ) into its decimal character.
The adjacent “Number of Records” and "File Size" fields are NOT editable. They display the corresponding information regarding the selected source file:
"Number of Records” - The number of records included in the selected external file that will be imported.
"File Size” - The size (in bytes) of the file to be imported.
The "Preview" section presents a preview of the "import options" defined in step 5.
6. Click ![]() .
.
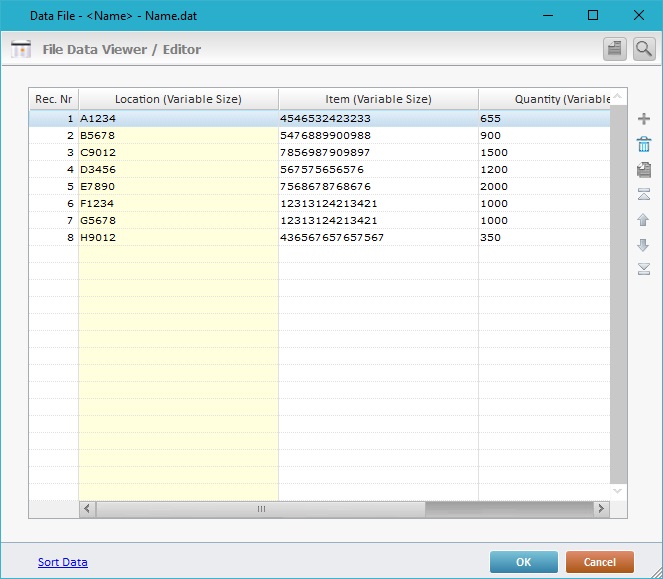
7. Back in the "File Data Viewer/Editor" window, click ![]() to conclude the "import" operation.
to conclude the "import" operation.
To Import Data using Drag-and-Drop
Step-by-step
1. Open a "File Data Viewer/Editor" window by clicking ![]() in the data file's properties window.
in the data file's properties window.
2. Open the OS browse window were the external source "*dat" file is (Ex: "Locations.dat").
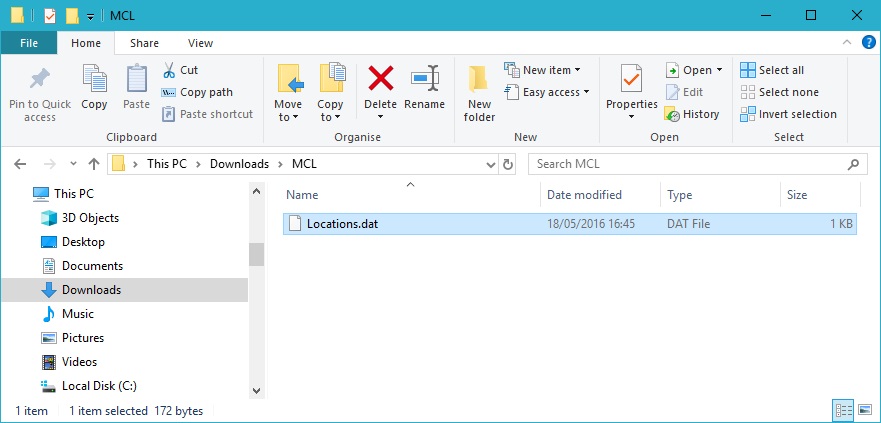
3. Drag the file from the OS Browse window to the target data file's "File Data Viewer/Editor" window.
The "File Data Import" window opens with its options already filled in with the information concerning the dropped file.
4. If necessary, change the following import options:
“Record Separator”
Maintain or select another separator element for the records to import from the drop-down.
"Field Separator”
Maintain or select another separator element for the fields to import from the drop-down.
"Encoding"
Maintain or select another encoding for the records to import from the drop-down.
![]() The recommended codification for Android developed projects is "UTF-8 Without BOM" (or "UTF-16 Without BOM" if you require the data file's field to have a fixed length and fillers).
The recommended codification for Android developed projects is "UTF-8 Without BOM" (or "UTF-16 Without BOM" if you require the data file's field to have a fixed length and fillers).
![]() When selecting the charset/encoding, consider the characters used in the data file or database in question – some special characters may NOT be displayed if the wrong charset/encoding is defined.
When selecting the charset/encoding, consider the characters used in the data file or database in question – some special characters may NOT be displayed if the wrong charset/encoding is defined.
Ex: The Hindu character “अ” (included in a data file in use) can only be viewed with a “UTF 8” or “UTF-16 without BOM” encoding.
“Convert Reserved Char. With \xx”
Checking/unchecking this option means enabling/disabling the conversion of any hexadecimal characters (with reserved format\xx ) into its decimal character.
The adjacent “Number of Records” and "File Size" fields are NOT editable. They display the corresponding information regarding the "drag-and-dropped" source file.
"Number of Records” - The number of records to be imported.
"File Size” - The size (in bytes) of the file to be imported.
If you edited the "import options" defined in step 4, the "Preview" section will refresh and present an updated preview of the data to import.
5. Click ![]() to continue.
to continue.
6. Back in the "File Data Viewer/Editor" window, click ![]() to conclude the "import" operation.
to conclude the "import" operation.

Occurrence: When importing data from an external file.
Cause: The target data file's structure is different from the structure of the import source file.
Action: It is only possible to import data from external files with the exact same structure as the one from the target data file.
Close this window and repeat the import with a file that has the same structure as the data file.