|
The Work Area |
  
|
The Work Area
|
The Work Area |
|
Overview
MCL-Designer V4's interface is designed specifically to keep track of all the essential project components at a glance. The work area resembles most traditional Rapid Application Development (RAD) tools, such as Microsoft Visual Studio.
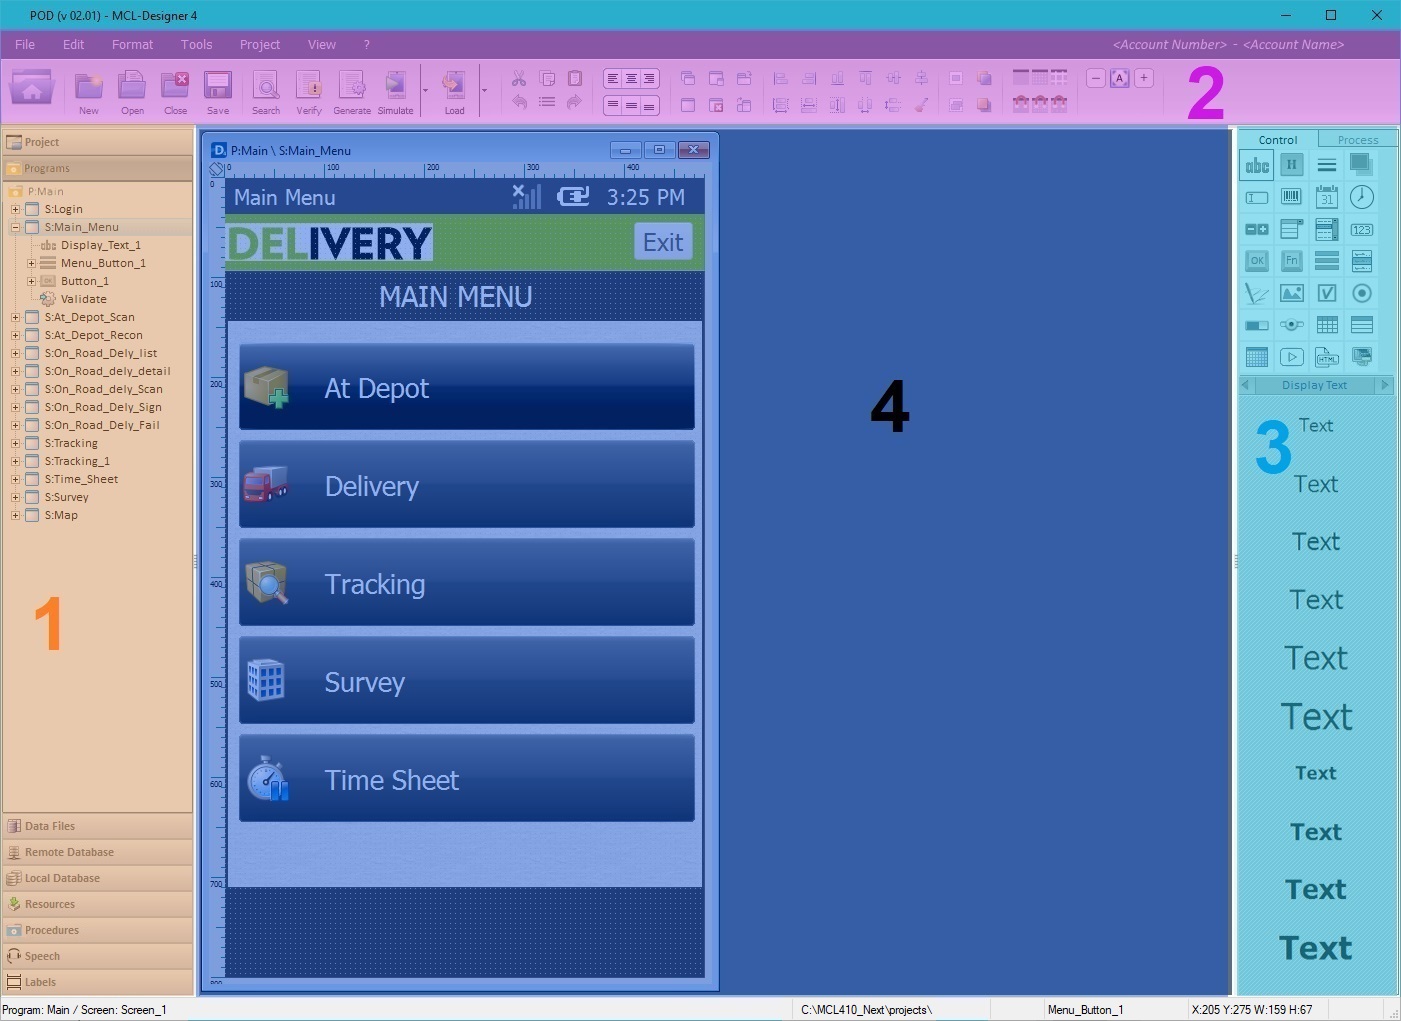
The image below indicates the 4 main areas of MCL-Designer V4.
1 – Project Modules Area
Whenever a control within a screen is selected, the status bar (located at the footer of the "Work Area") displays some information regarding it:

Clicking the project's path opens the current project's directory. As an alternative, you can also press SHIFT + F10 in your PC keyboard.
If you click the project path while pressing SHIFT, it will open the working directory. This location can also be opened using F10.
If necessary, you can re-dimension the "Project Modules" and the "Tools" area - drag the dividing line left or right to expand or reduce the exposed area.
This is useful if, for instance, you want to view the full name of programs, screens, global procedures, etc., in the "Project Modules" area, to your right.
It is also a way to expand the "Working" area, if needed - simply reduce the "Project Modules" and "Tools" areas.
This resizing is memorized - if you edit the dimensions of an area and, then, close the MCL-Designer session, the next time you open MCL-Designer, the edited areas will still have the dimensions you defined earlier.