|
Working with Library |
  
|
Working with Library
|
Working with Library |
|
Overview
In MCL-Designer V4, a Library refers to a folder with the specific purpose of storing data files, programs, routines, global and background procedures, screens, global events and label profiles that have been or will be used in MCL-Designer V4 projects. In other words, the Library is the "source folder" for the import of data files, programs, routines, global procedures, screens, global events and label profiles as well as the "target folder" for their export.
Some of the exportable elements (programs, global/background procedures and/or global events events) can be locked, meaning, they cannot be edited in the project they will be imported into. This is performed during the export into Library.
The Library is included in two MCL-Designer operations:
•Exporting elements from a project into Library. See Export to Library.
•Importing elements from Library into a project. See Import from Library.
To Open the "Library Manager" Window
Use one of the following methods to access the "Library Manager" window.
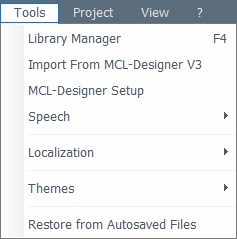
A. Go to the Menu Bar, click "Tools" and, in the resulting menu, select "Library Manager".
B. Click <F4>.
C. Use the "Import ..." option whenever available in the "Library" drop-down (an option included in several right-click menus).
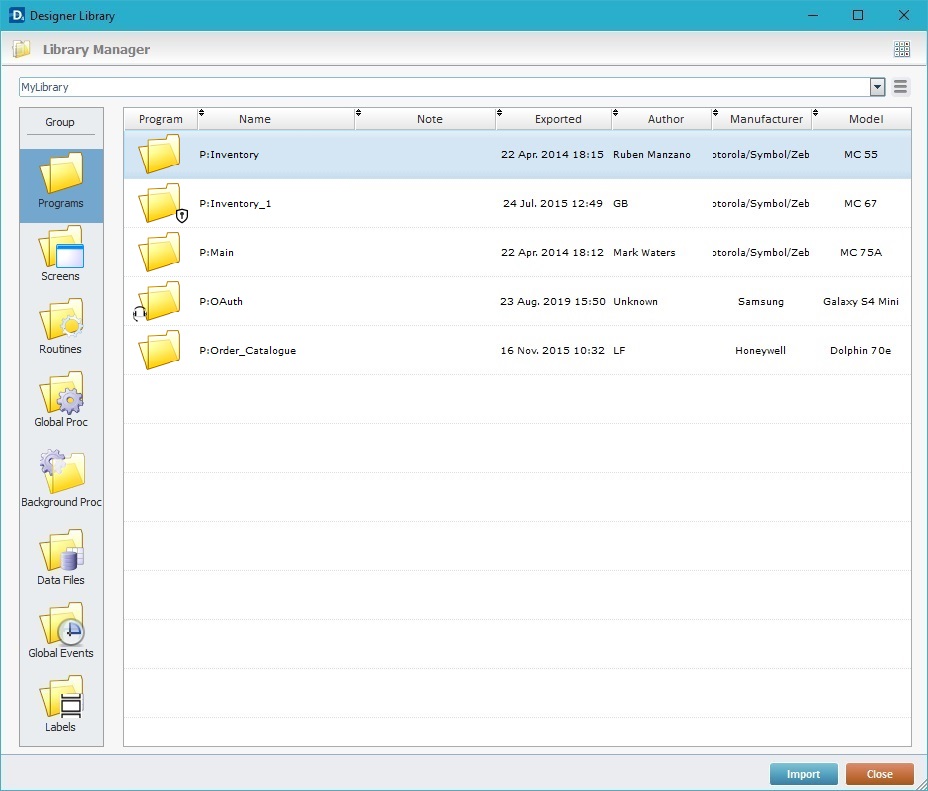
"Library Manager" Window View
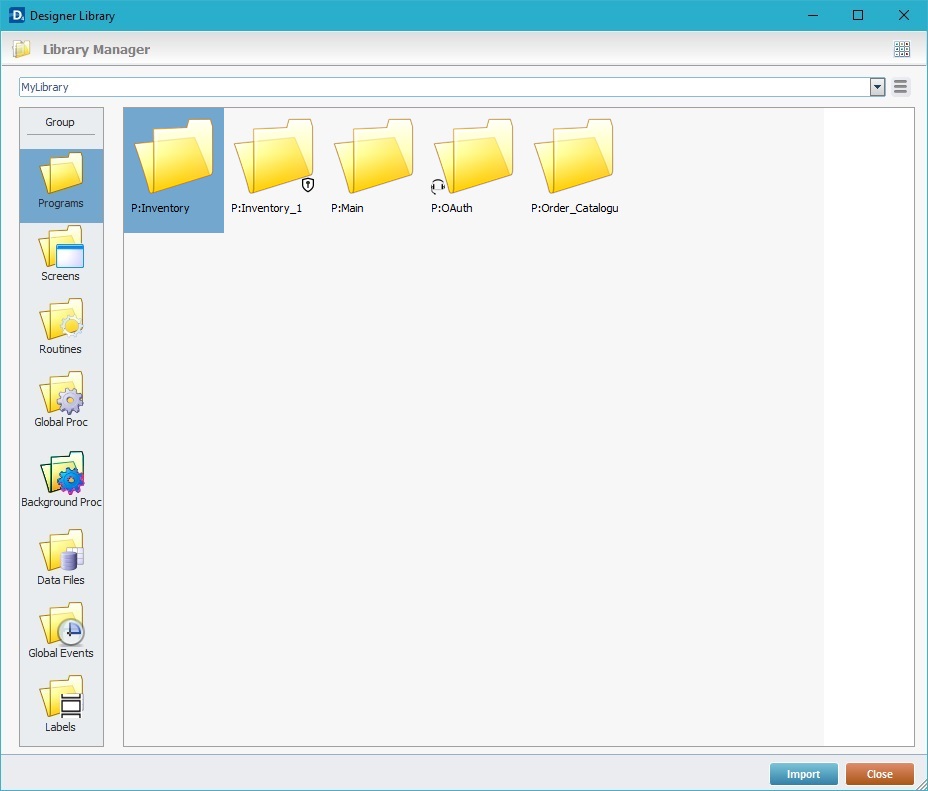
If required, click ![]() to have a "Large Icon" view.
to have a "Large Icon" view.
Default "Library Manager" view |
"Library Manager" view when clicking |
|
|
To select the appropriate element to be imported (a program, screen, routine, global and background procedure, data file, global event or label profile) into a project, it is important to have information regarding each element contained in the Library. The default "Library Manager" view displays the following information:
1st column |
The column title takes the name of the selected element type and displays the corresponding icon. |
Name column |
Displays the element's name. |
Note column |
Displays any notes associated to the element. |
Exported column |
Displays the date of the element's addition to the library. |
Author column |
Displays the element's author. |
Width column |
Displays the screen width of the element's target device. |
Height column |
Displays the screen height of the element's target device. |
DPI column |
Displays the screen resolution of the element's target device. |
Manufacturer column |
Displays the element's target device manufacturer. |
Model column |
Displays the element's target device model. |
![]()
Unless there is a previous export (of elements such as programs, routines, global and background procedures, screens, data files, global events and/or label profiles) into the defined Library, the "Library Manager's" window will have nothing to display/provide for import.
![]()
The "Library Manager" window only displays the elements contained in the folder you have defined as Library. If you have more than one Library folder or directory and want to use them, click ![]() to define another Library. See To Define a Library.
to define another Library. See To Define a Library.
![]()
The Library elements that were locked during export and, therefore, can no longer be edited, are identified with a ![]() (ex: "P:Inventory_1"). This icon is displayed in the "Library Manager" window and in the tree view of the destination project.
(ex: "P:Inventory_1"). This icon is displayed in the "Library Manager" window and in the tree view of the destination project.
![]()
The Library elements with speech attributes (exported from speech projects) are identified with a ![]() . These speech elements can only be imported into projects that have enabled speech features.
. These speech elements can only be imported into projects that have enabled speech features.
![]()
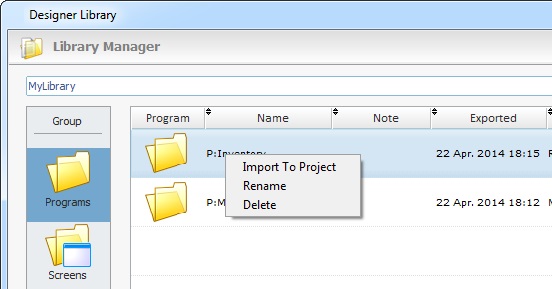
If required, right-click a displayed element to access a menu with the option to import, rename or delete it.
1. Open "Library Manager" and select the required element type.
2. Right-click the intended element:
|
Import To Project |
Use this option to import the selected element into the current project (it opens an "Import into project" window). |
|
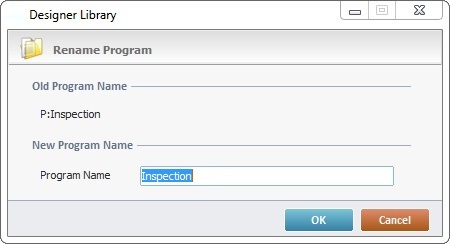
Rename |
Click this option to rename the selected element.
|
||
Delete |
Use this option to delete the selected element. Click |
To Order the "Library Manager" Elements
In the default view, clicking ![]() (located on the upper left corner of each column) allows you to organize the information by ascending (
(located on the upper left corner of each column) allows you to organize the information by ascending (![]() ) or descending (
) or descending (![]() ) order, according to the content of each column.
) order, according to the content of each column.
To Change the Display of "Library Manager's" Columns
Step-by-step
1. There are two options available:
a. Right-click the column's name area (in the default view).
![]()
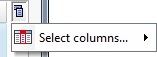
b. Click the ![]() button (which is located on the upper right corner of the table).
button (which is located on the upper right corner of the table).
2. Mouse over the ![]() button to access a list with all the columns contained in the "Library Manager".
button to access a list with all the columns contained in the "Library Manager".
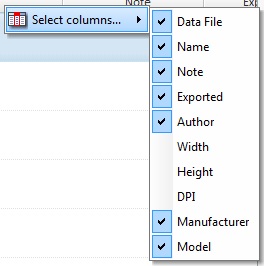
3. Check/uncheck the columns, depending on the columns you want displayed.
The view changes immediately, according to what you have checked/unchecked.
MCL-Designer V4 provides a default library folder named "MyLibrary" but you can rename it or define another folder, in another directory, to operate in the same way. See To Change Library.
Step-by-step
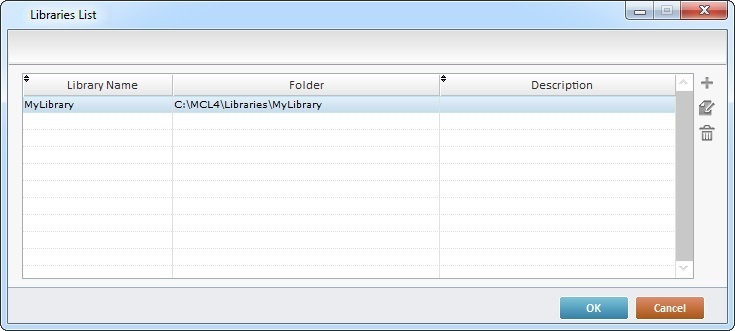
1. Click ![]() (button located on the "Library Manager" and "Export to Library" windows) to open the following window:
(button located on the "Library Manager" and "Export to Library" windows) to open the following window:
2. Either maintain the default option (continue to step 9) OR click ![]() to create a new library (proceed to step 3).
to create a new library (proceed to step 3).
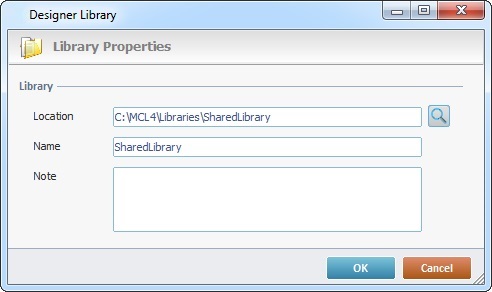
3. Click ![]() to open a "Library Properties" window:
to open a "Library Properties" window:

4. Click ![]() to browse for one.
to browse for one.

5. If required, create a new folder by clicking "Make New Folder".
6. Click ![]() to conclude the new library location and return to the "Library Properties" window.
to conclude the new library location and return to the "Library Properties" window.
7. In the "Name" option, maintain the suggestion (the location's folder name)or enter a new name for the new library.
8. If required, enter information in the "Note" box.
9. Click ![]() in the "Library Properties" window to conclude OR
in the "Library Properties" window to conclude OR ![]() to abort the operation.
to abort the operation.

Step-by-step
1. Click ![]() (located on the "Library Manager" and "Export to Library" windows) to open the following window:
(located on the "Library Manager" and "Export to Library" windows) to open the following window:
2. Select the library you want to edit from the displayed list.
3. Click ![]() (to the right of the table).
(to the right of the table).
4. Make the necessary changes.
5. Click ![]() to apply the changes and conclude the operation.
to apply the changes and conclude the operation.
![]()
As an alternative, you can create a new Library Folder in the "Export to Library" window of an exportable element.

a. Once you have initiated the export process of the intended element and opened the corresponding "Export to Library" window, replace the existing library name with the new folder name (and path) you want to create.
As you enter the path + name of a folder that does not exist yet, the field's background turns to red and you get the following message:

b. Check the new path + folder name and click ![]() to confirm the creation of the new folder being defined as the destination library folder.
to confirm the creation of the new folder being defined as the destination library folder.
The new folder is created in the entered path containing the exported element and added to the Library List.
To Delete a Library
Step-by-step
1. Click ![]() (located in the "Library Manager" and "Export to Library" windows) to open a list of existing libraries.
(located in the "Library Manager" and "Export to Library" windows) to open a list of existing libraries.
2. Select the library you want to delete.
3. Click ![]() .
.

4. Click ![]() to confirm the delete operation.
to confirm the delete operation.
Export/Import Behavior Concerning Resources/Dependencies
Resources - A resource is a file that is used within a control or a screen. For instance, an image file, a sound file, a localization file (a file that contains all the localization tags of a given language), etc.
Resources are independent from the element (program, screen, routine, global or background procedures, data file, global event or label) that uses them.
Dependencies - A dependency can be a set of specific parameters (ex: a barcode or RFID profile), a connection setting (ex: a Host or web service profile) or a structure (ex: the structure of a data file) that is referred to/called by a program, screen, routine, global procedure, data file, global event or label. Dependencies are intrinsic to the element that calls them.
•When exporting an element, it is possible to attach resources that are not used by the element being exported, meaning, other project resources. Ex: Due to its nature, a data file cannot use image resources. However, you can attach image resources, used with other elements throughout the project, to the data file and export both.
This is done during the export procedure within the "Export to Library" window:
a. Click ![]() to open the project resource list.
to open the project resource list.
b. Check the intended resources (the resources in use by the element being exported are already checked).
c. Conclude the export.
The project resources you attach during export will be available when you import the element into another project. You can control which resources, if any, you want to import:
a. In the "Import into project" window, click ![]() to open the project resource list.
to open the project resource list.
b. Check the resource(s) you want to import.
c. Conclude the import.
•When importing an element with resources that already exist in the target project (with the same name), those resources do NOT overwrite the existing resources, they are simply NOT imported. Ex: A control’s custom style from an imported program is not imported into the destination project if this project already includes a custom style with the same name.
Regarding localization file resources, if the target project already includes a localization file for the same language, the imported and the existing localization files are merged.
Operationally speaking, if a localization tag of the imported “loc” file does NOT exist in the destination project’s “loc” file, it will be added to it. If the localization tag already exists, nothing happens.
•An exportable element (program, screen, routine, global or background procedures, data file, global event, label) can refer to/call other elements - these are considered dependencies (ex: Barcode, Host, Aux, RFID, Label, Web Service profiles and data files). If you export an element with a dependency, that dependency is automatically attached to the element being exported. Afterward, when the element is imported, those dependencies will also be available in the target project. For instance, if you export a program with screens or controls containing processes that call a data file ("Companies. Dat"), a barcode scanner profile ("BarcodeEAN8") and a host profile ("Host5"), they will automatically be attached to the program's export and future import. The target project for the import will receive the program and the "Companies. Dat", "BarcodeEAN8" and "Host5" dependencies - they will be available in the "Data Files" module and the project properties' "Barcode" and "Host" tabs, respectively.
This is an automatic internal MCL-Designer fail safe, the developer does NOT interfere.