Overview
Deployments are responsible for delivering configurations to devices within a device group. These tasks can be planned in the "Deployment" sub-module (see Deployments), but, also, in the "Device Groups" sub-module. Depending on the amount of device groups involved in the deployment planning, it can be done in the "Device Groups" page (for one or more compatible device groups) or in a particular device group's "Device Group Details" page.
Planning a Deployment in the Device Groups page
![]() This method can be used to plan a deployment for one or more device groups. Make sure that the selected device groups share the same device type.
This method can be used to plan a deployment for one or more device groups. Make sure that the selected device groups share the same device type.
Step-by-step
1. In the Site Dashboard's "Control Panel", click ![]() and, in the resulting row below, select
and, in the resulting row below, select ![]() to open the "Device Groups" page.
to open the "Device Groups" page.
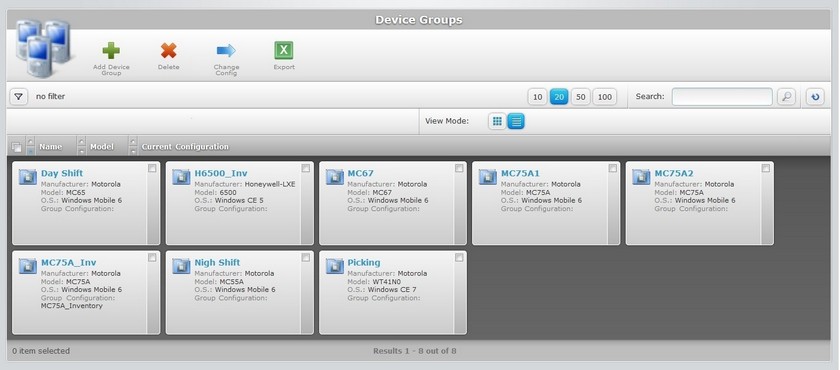
2. Check the corresponding ![]() of the device group(s) you want to assign a deployment to.
of the device group(s) you want to assign a deployment to.
3. Click ![]() .
.
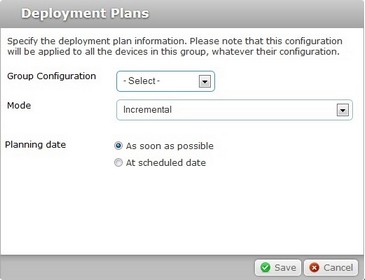
4. Select an available configuration from the drop-down list.
5. Select one of the available modes:
Incremental: Only components present in the deployed configuration, that are not present on the device, will be implemented.
Clean & install: Deletes all the applications/firmwares and forces the installation of the components present in the deployed configuration.
6. Check the most appropriate planning option:
As soon as possible - The deployment starts the moment the devices, included in the device group, contact the account and the deployment criteria are met.
At a scheduled date - The deployment is planned for a specified date and time.
If you have checked the first option ("As soon as possible"), proceed to step 13.
If you have checked the second option ("At scheduled date"), you must, define the date and time of the deployment. Continue to step 7
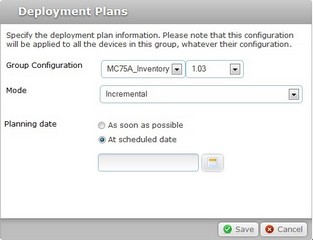
7. Click ![]() to open a calendar displaying the current date.
to open a calendar displaying the current date.
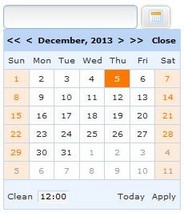
8. Select the intended day for the deployment. Use the <</</>/>> to navigate the months/years.
If you want to deploy on the day you are scheduling the deployment, click ![]() .
.
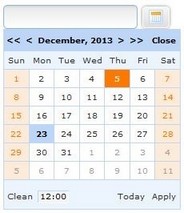
9. Click the box with the hour (default hour is 12:00) to access further options.
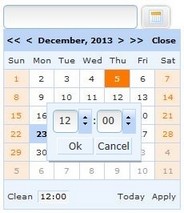
10. Select the desired hour/minutes with the scroll arrows (ex: 15:00) or enter the information in the corresponding boxes.
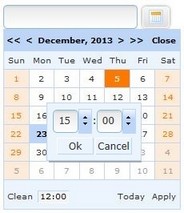
11. Click ![]() to apply or
to apply or ![]() to abort the hour selection.
to abort the hour selection.
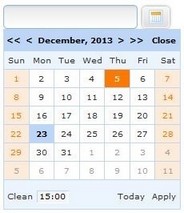
If you want to return to the default options, click ![]() .
.
If you want to exit the calendar, click ![]() .
.
12. When the date/time is defined, click ![]() and your choices are displayed in the "Planning date" field of the "Deployment Plans" window.
and your choices are displayed in the "Planning date" field of the "Deployment Plans" window.
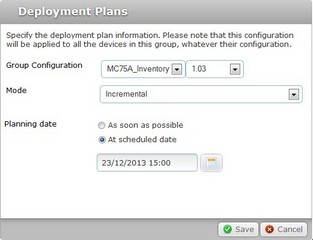
13. Conclude the deployment planning operation by clicking ![]() .
.
![]() As an alternative, enter the desired date and time for the deployment in the
As an alternative, enter the desired date and time for the deployment in the ![]() box and click
box and click ![]() .
.
Enter the information with the following format - DD/MM/YYYY(space)HH:MM. Ex: ![]() .
.
Planning a Deployment in the Device Group Details page
![]()
This method can only be used to plan a deployment for a single device group.
Step-by-step
1. In the Site Dashboard's "Control Panel", click![]() and, in the resulting row below, select
and, in the resulting row below, select ![]() to open the "Device Groups" page.
to open the "Device Groups" page.

2. Select the device group you want to assign a deployment to by clicking its name (displayed in light blue).
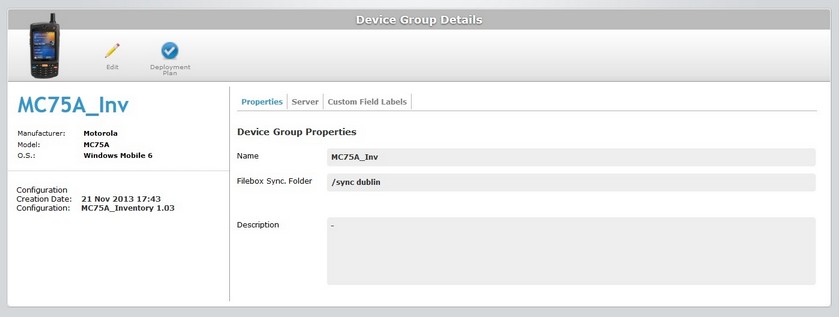
3. Click ![]() to open a "Deployment Plans" window.
to open a "Deployment Plans" window.
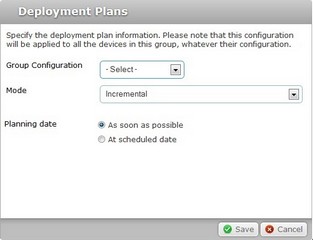
4. In the "Group Configuration" drop-down box, select the required configuration.
5. Select one of the available modes:
Incremental: The deployed configuration implements new features to the current version on the devices.
Clean & install: Deletes all previous applications/firmware and installs only the deployed configuration.
6. Check the most appropriate planning option:
As soon as possible - The deployment starts the moment the devices, included in the device group, contact the account and the deployment criteria are met.
At a scheduled date - The deployment is planned for a specified date and time.
If you have checked the first option ("As soon as possible"), proceed to step 13.
If you have checked the second option ("At scheduled date"), you must, define the date and time of the deployment. Continue to step 7.

7. Click ![]() to open a calendar displaying the current date.
to open a calendar displaying the current date.

8. Select the intended day for the deployment. Use the <</</>/>> to navigate the months/years.
If you want to deploy on the day you are scheduling the deployment, click ![]() .
.

9. Click the box with the hour (default hour is 12:00) to access further options.

10. Select the desired hour/minutes with the scroll arrows (ex: 15:00) or enter the information in the corresponding boxes.

11. Click ![]() to apply or
to apply or ![]() to abort the hour selection.
to abort the hour selection.

Use ![]() whenever you want to return to the default options.
whenever you want to return to the default options.
12. When the date/time is defined, click ![]() and your choices are displayed in the "Planning date" field of the "Deployment Plans" window.
and your choices are displayed in the "Planning date" field of the "Deployment Plans" window.

13. Click ![]() to conclude the deployment planning operation.
to conclude the deployment planning operation.
![]() As an alternative, enter the desired date and time for the deployment in the
As an alternative, enter the desired date and time for the deployment in the ![]() box and click
box and click ![]() .
.
Enter the information with the following format - DD/MM/YYYY(space)HH:MM. EX: ![]() .
.