|
Associating Actions to a Screen or a Control |
  
|
Associating Actions to a Screen or a Control
|
Associating Actions to a Screen or a Control |
|
Overview
Within MCL-Designer, an Action represents a specific action, usually performed by the operator, which triggers the execution of something in the application, namely, processes. In other words, an action will trigger the execution of the processes that have been defined by the programmer. See Adding and Editing Processes.
Every control includes a specific default action. In the case of the screen, there is no default action to start with so the necessary actions must be added to it.
Not all controls accept actions/processes - Display Line, Display Shape, SoftKey, Gauge, Video Player and Web View controls are exceptions that do NOT contain an "Actions" tab.
List of Actions available:
Change
Click
Hotkey
Ready
Validate
RFID (see The RFID Action)
Power
Timer - This action occurs due to the "lack of activity" on the part of the operator. It triggers the intended process(es) after a specified time frame.
Button # - This action is only associated to the Advanced List Box control, if the control contains button elements in its style.
Barcode - (see Barcode)
NFC (see NFC)
Receive Message - This action is ONLY applicable if the device is associated to a subscription that includes a Messagebox Service.
It is triggered whenever a message is received by the device using the Messagebox Service provided by MCL-Mobility Platform. See Receive Message.
Refer to the MCL-Mobility Platform User Guide for more information.
Custom Actions - If required, you can create customized actions to notify the MCL application about MCL-Client actions/share specific data (custom actions have their own parameters).
See Custom Actions.
For more information on the available actions for screens or controls refer to:
Actions Associated to Controls
To Add Actions to a Screen or Control
Step-by-step
1. Go to the "Actions" tab of either screen or specific control (in the properties window).

2. Click ![]() (at the bottom of the "Actions" tab) and open the "Action" window.
(at the bottom of the "Actions" tab) and open the "Action" window.
![]() If the
If the ![]() option is not available, it means the existing action is the only possibility for the selected element and all processes must be added to that action.
option is not available, it means the existing action is the only possibility for the selected element and all processes must be added to that action.
Ex: A Display Image control only accepts the Click action. Once it exists in the "Actions" tab, there are no more compatible actions to add so the ![]() button is deactivated.
button is deactivated.
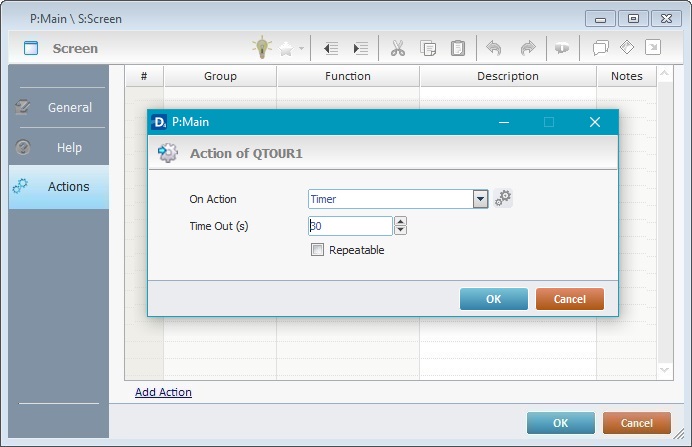
3. In the "Action" box, select an action from the drop-down.
![]()
Remember that not all the actions are available for each screen or control. The drop-down varies according to the selected element (screen or control).
![]() Click
Click ![]() to add a Custom Action. See To Add a Custom Action to a Screen.
to add a Custom Action. See To Add a Custom Action to a Screen.
4. Click ![]() to apply your options.
to apply your options.
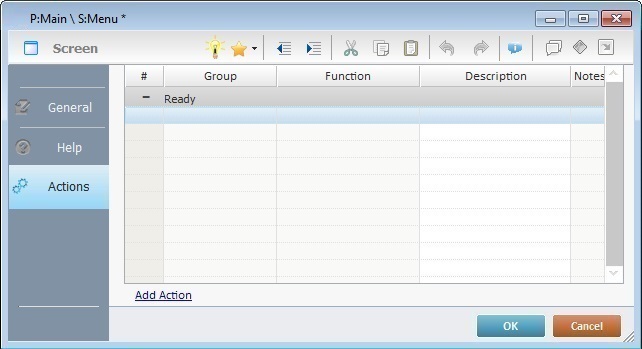
All of the actions (whether default or added ones) are displayed in the tree view (in the "Programs" module).
If you right-click an action, displayed in the tree view, you access the "Delete" option.

Double-clicking an action, in the tree view, opens the properties window of the element it is inserted in (screen or control), directly in the "Actions" tab. This enables the adding of processes to that action.
See Adding and Editing Processes.