|
Creating a New Project |
  
|
Creating a New Project
|
Creating a New Project |
|
Overview
To create a new project, proceed as follows:
Step-by-step
1. Start MCL-Designer V4.
2. Click “File” and, then, select “New” OR select ![]() in the Icon Shortcut Bar.
in the Icon Shortcut Bar.
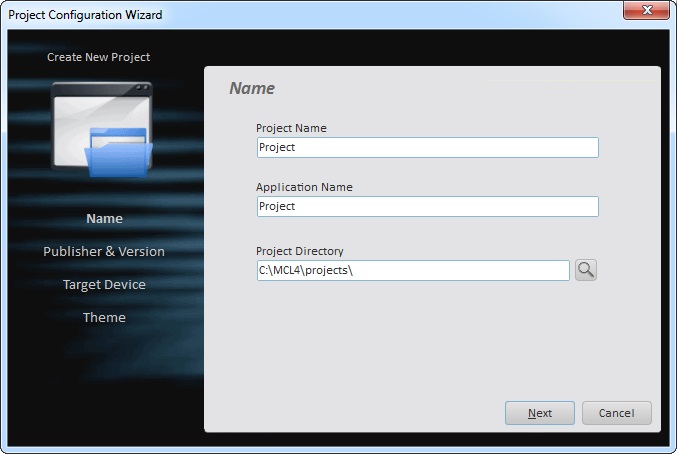
3. Fill in the following options:
•Type a name for the project in the “Project Name” box. The "Application Name" box below fills in automatically with the text entered in the previous box ("Project Name"). The "Application Name" represents the application in the screen of the device (in App Desktop) and can also be viewed within MCL-Designer.
•In the “Project Directory” box, select a location to save the project by clicking ![]() , if the default location is not useful.
, if the default location is not useful.
![]() A project name can only contain alphabetic characters, numbers, and the underscore “_” character (the underscore character is commonly, used to indicate a space). The project name is usually the same as the application name (entering a "project name" automatically fills in the "Application Name" field).
A project name can only contain alphabetic characters, numbers, and the underscore “_” character (the underscore character is commonly, used to indicate a space). The project name is usually the same as the application name (entering a "project name" automatically fills in the "Application Name" field).
![]() The project directory contains all the project files and sub-directories. If the project needs to be moved, be sure to copy the entire project directory.
The project directory contains all the project files and sub-directories. If the project needs to be moved, be sure to copy the entire project directory.
![]() The project directory's name should be the same as the "App Code" (= the application's Unique ID that is used to, for instance, identify the project when it is deployed onto devices for testing purposes). The project directory's name should ONLY have alphabetic/numeric characters, "_" and/or ".".
The project directory's name should be the same as the "App Code" (= the application's Unique ID that is used to, for instance, identify the project when it is deployed onto devices for testing purposes). The project directory's name should ONLY have alphabetic/numeric characters, "_" and/or ".".
![]()
If the entered project name already exists, the name letters are displayed in red. If you click ![]() without entering an alternative project name, a message box opens informing you of the project name's duplication.
without entering an alternative project name, a message box opens informing you of the project name's duplication.

Click ![]() , return to the previous window and enter a new project name.
, return to the previous window and enter a new project name.
4. Click ![]() to continue to the next window.
to continue to the next window.
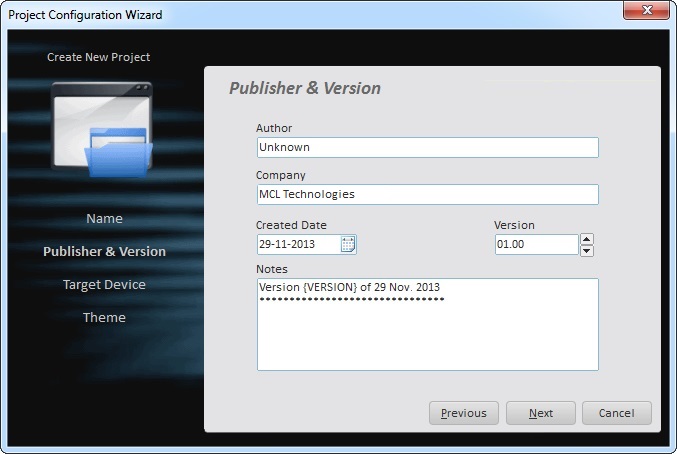
5. Fill in the various boxes in this window:
•Type in the name of the project's author.
•Type in the company's or customer's name.
This field includes a suggestion for the company name - it displays the name of the company you defined when registering your MCL-Designer product license (perpetual license or subscription).
You can keep the suggestion or enter another name.
•Maintain or select the creation date. Enter the date or click ![]() to select the appropriate date.
to select the appropriate date.
•Maintain or select the project's version.
•If required, add notes in the corresponding text box.
6. Click ![]() to proceed.
to proceed.
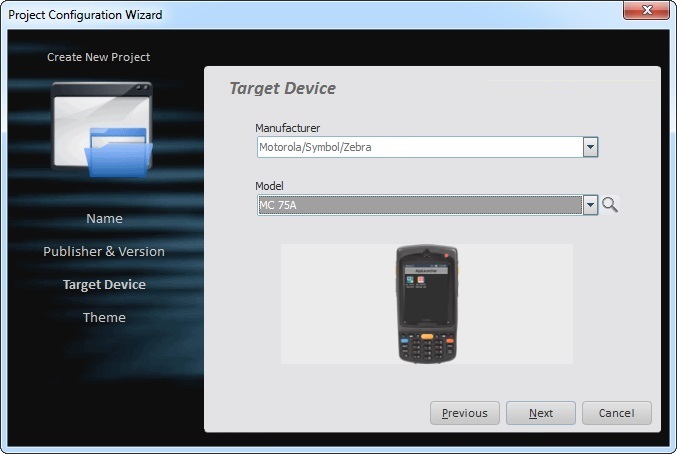
7. Select the manufacturer and the device type (in the "Model" box) for which the application is being designed for, from the drop-down.
As an alternative, click ![]() to open a "Select Device" window and select a device from the available listed devices:
to open a "Select Device" window and select a device from the available listed devices:
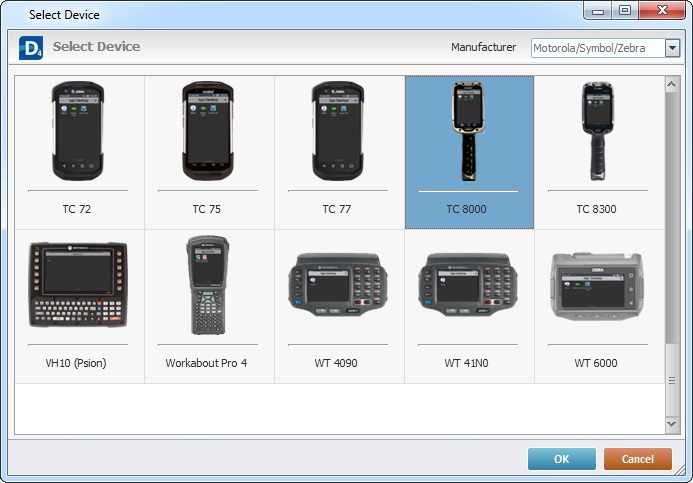
If required, use the "Manufacturer" search box to filter the displayed information and, then, click ![]() to apply your choice.
to apply your choice.
![]()
If you intend to customize the screen of the project's target device, select the "<Generic>" manufacturer.

In the "Model" drop-down, you can select one of the predefined resolutions & sizes OR select"<Custom>" and define the values for screen width, height and size in the corresponding boxes (that have become active when you selected "<Custom>").

For more details on this subject, see Tips on Screen Density (for "<Generic>"/"<Custom>" Target Devices).
8. Click ![]() to continue to the next window.
to continue to the next window.
![]() Theme - A theme determines the layout of buttons, menus and other display elements in the screens of a project.
Theme - A theme determines the layout of buttons, menus and other display elements in the screens of a project.
Basically, the theme defines the appearance of everything the operator will see on the device.
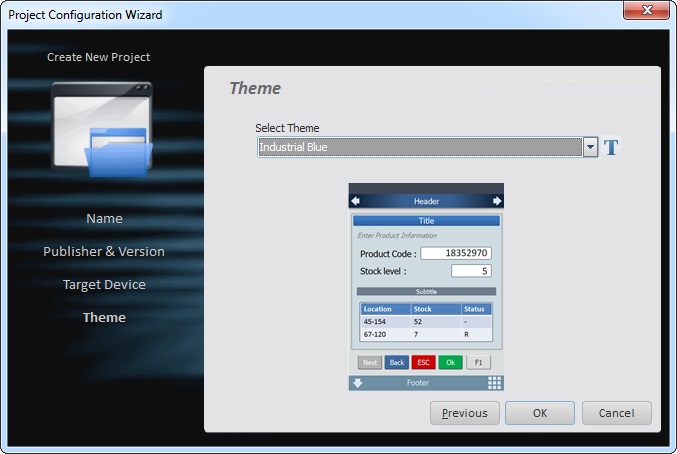
9. Select the preferred project's “Theme” from the drop-down OR click ![]() and select an available theme.
and select an available theme.
If you use the ![]() option, a window opens displaying a preview of the available themes.
option, a window opens displaying a preview of the available themes.
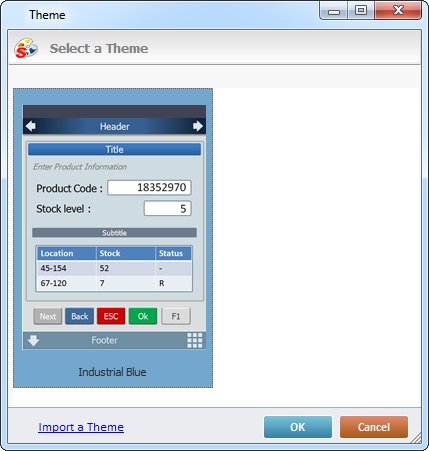
Select the one you want OR click ![]() to import a theme from an outside source.
to import a theme from an outside source.
Click ![]() to apply your choice.
to apply your choice.
The option selected is previewed below the "Select Theme" box.
10. Click ![]() to finish the “Project Configuration Wizard” and enter MCL-Designer V4's interface.
to finish the “Project Configuration Wizard” and enter MCL-Designer V4's interface.
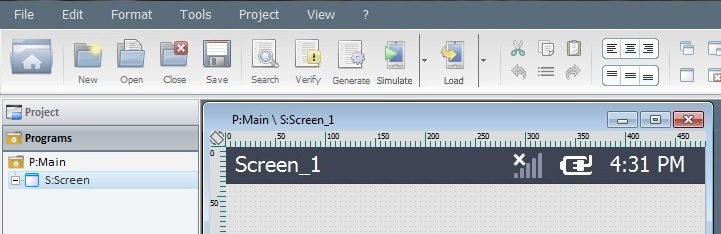
The first program (“Main”) and screen (“Screen_1”) are automatically created. The "Main" program's name cannot be changed, however, "Screen 1" can be renamed. Both elements are ready to work with and can be viewed in the tree view of the "Programs" module.
![]() From this point forward, the theme can only be changed by selecting from the previewed "Tools" list or importing a theme from an outside source.
From this point forward, the theme can only be changed by selecting from the previewed "Tools" list or importing a theme from an outside source.
Themes can be exported from the project by selecting "Export" from the “Tools” menu and, then, selecting the theme to be exported.
![]() The icons that represent the application (on the device, when being launched and on MCL-Mobility Platform) are defined at a later point. See Application Info.
The icons that represent the application (on the device, when being launched and on MCL-Mobility Platform) are defined at a later point. See Application Info.
By default, MCL-Designer V4 maintains a set of default icons named "UNDER CONSTRUCTION" that can be viewed in the "Project Info" tab.
![]() If your MCL-Designer V4 subscription includes Speech attributes and you want to develop a speech project, proceed to the "Speech" tab of the project properties to enable all speech related options. See Speech tab.
If your MCL-Designer V4 subscription includes Speech attributes and you want to develop a speech project, proceed to the "Speech" tab of the project properties to enable all speech related options. See Speech tab.