|
Editing a PDK |
  
|
Editing a PDK
|
Editing a PDK |
|
Overview
The MCL-PDK Builder allows you to edit existing PDKs. This edition ranges from the adding/removing/editing of a PDK component (file) to the modifying of the PDK's configuration file (the parameters of the "*.inf" file).
To Open an Existing PDK
There are three ways to open a PDK within MCL-PDK Builder:
a. Click ![]() .
.
b. Open the "File" menu and click "Open".
c. Drag the PDK into MCL-PDK Builder. Depending on the application's current state, the use of the Drag-and-Drop mechanism leads to distinct behaviors:
I. If there is no open PDK, drop the "*.pdk" file into the MCL-PDK Builder's main window. It will automatically fill in with the dropped PDK's information.
II. If you already have a PDK open, drag-and-drop the PDK outside the "Files" table. This will replace the currently open PDK with the one you just dropped.
It is possible to edit the components of a PDK (meaning, the included files) in the Work Section.
Step-by-step
1. In the MCL-PDK Builder's main window, use one of the following to open the PDK you want to edit:
a. Drag-and drop the intended "*.pdk" file into the MCL-PDK Builder's main window. (Proceed to step 3.)
![]() When using drag-and-drop to open a PDK, remember the possible behaviors:
When using drag-and-drop to open a PDK, remember the possible behaviors:
•If you drop a PDK anywhere in MCL-PDK Builder and there is NO PDK currently open, this opens the dropped PDK.
•If you drop a PDK outside the "Files" table of MCL-PDK Builder and there is currently another PDK open, this closes the previous PDK and opens the one you dragged and dropped.
b. Open the "File" menu and click "Open". (Proceed to step 2.)
c. Open the "File" menu and click "Open". (Proceed to step 2.)

2. In the resulting OS browser window, select the PDK you want to edit.
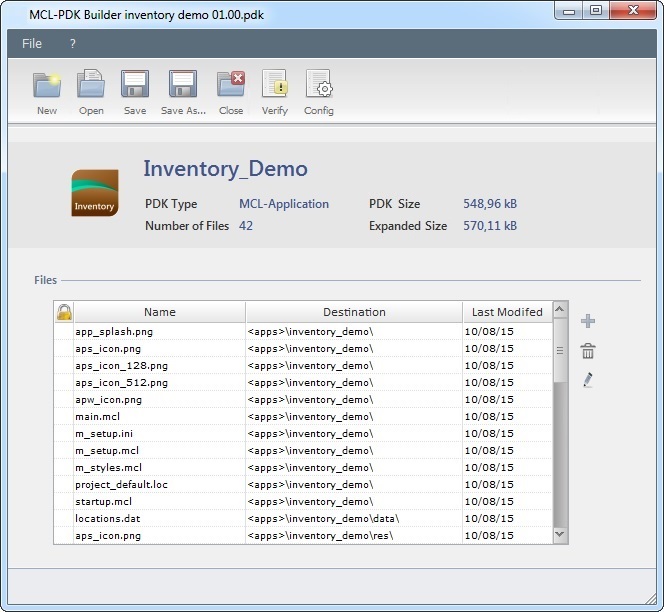
3. Select the component (file) you want to edit.
4. Depending on what you want to execute, click one of the buttons to the right of the table.
|
To add a file:
a. Click b. Select the file you want to add to the PDK.
The new file is displayed in the table and the number of files is incremented. |
|
To remove the selected file:
a. Select the file you want to remove. b. Click
The selected file is removed from the table and the number of files decreases accordingly. |
|
To edit the properties of the selected file:
a. Select the file you want to edit. b. Click c. Depending on the type of file being edited, the window will have different options. See Detail of File Properties Windows below. d. Execute the necessary changes and click |
![]() As an alternative, right-click a row with a component/file to access a menu with the same options as the buttons to the right:
As an alternative, right-click a row with a component/file to access a menu with the same options as the buttons to the right:

![]()
You can also use drag-and-drop to add components to the currently open PDK. Simply drag the intended file(s) into the "Files" table.
Detail of "File Properties" Windows
These are some of the possible "File Properties" windows you can come across.
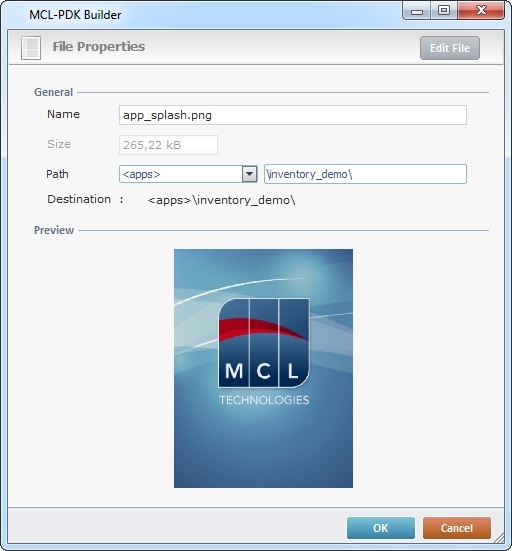
"File Properties" window of a "*.png" file |
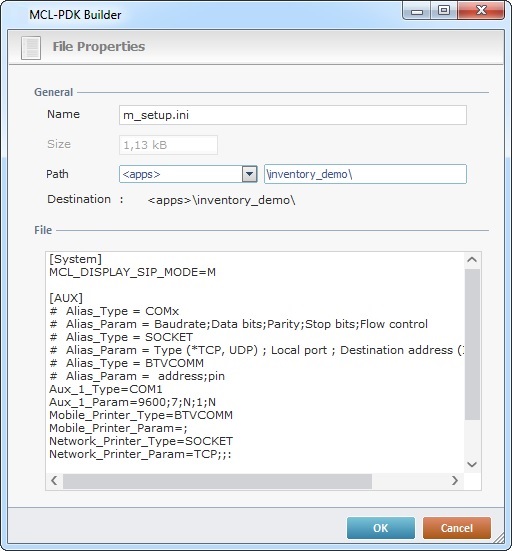
"File Properties" window of an "*.ini" file |
|
|
This window allows you to edit the following information: |
This window allows you to edit the following information: |
a. The name of the file. |
a. The name of the file. |
b. The path to the file. I. Select the Alias from the drop-down. See PDK Builder Aliases. II. Edit the name of the installation folder (within the selected Alias) where the PDK component will be placed. |
b. The path to the file I. Select the Alias from the drop-down. See PDK Builder Aliases. II. Edit the name of the installation folder (within the selected Alias) where the PDK component will be placed. |
c. The image itself. Use |
c. The parameters displayed in the "File" box. You can cut, copy, paste and delete them. |
|
|
![]()
In the case of an MCL PDK, if you intend to edit one of its "*.mcl" files, you will get a warning message when you click ![]() in the "File Properties" window.
in the "File Properties" window.
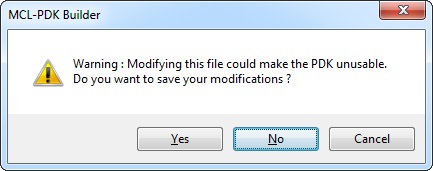
Click ![]() to save the changes,
to save the changes, ![]() to close the "File Properties" window without saving the changes or
to close the "File Properties" window without saving the changes or ![]() to maintain the "File Properties" window open.
to maintain the "File Properties" window open.
5. Click ![]() to save your changes in the same PDK OR
to save your changes in the same PDK OR ![]() to save them into a PDK with another name.
to save them into a PDK with another name.
![]() Be sure of your alterations so they do not invalidate the edited component (file), and consequently, make the PDK unusable.
Be sure of your alterations so they do not invalidate the edited component (file), and consequently, make the PDK unusable.
If you, specifically, want to edit the parameters of the PDK's configuration file ("*.inf"), see The Configuration File.
Below are the most common aliases and corresponding paths used within the MCL Designer environment.
![]() Always consider the OS of the target device when defining an alias for the PDK file - some of the presented aliases do not have a straightforward/default path, meaning, that path will depend on the target device's model and OS.
Always consider the OS of the target device when defining an alias for the PDK file - some of the presented aliases do not have a straightforward/default path, meaning, that path will depend on the target device's model and OS.
Alias |
Relative Path |
Absolute Path for Windows |
Absolute Path for Android |
<mcl> (represents the folder where MCL components are installed) |
━ |
No default absolute path - it depends on device model and OS. |
No default absolute path - it depends on device model and OS. |
<apps> |
<MCL>\Apps |
MCL\Apps |
files\apps |
<default> |
<MCL>\Apps\"running application" |
MCL\Apps\"running application" |
files\apps\"running application" |
<flash> |
━ |
No default absolute path to the flash memory disk - it depends on device model and OS. |
No default absolute path to the flash memory disk - it depends on device model and OS. |
<ram> |
━ |
No default absolute path to the RAM disk - it depends on device model and OS. |
No default absolute path to the RAM disk - it depends on device model and OS. |
<sd> |
━ |
No default absolute path to the SD card - it depends on device model and OS. |
No default absolute path to the SD card - it depends on device model and OS. |
<shared> |
<MCL>\Shared |
MCL\Shared |
The path to the root of the "external storage" disk depends on device model and OS. |
<data> |
<DEFAULT>\Data or .\data |
MCL\Apps\"running application"\data |
files\apps\"running application"\data |
<res> |
<DEFAULT>\Res or .\res |
MCL\Apps\"running application"\res |
files\apps\"running application"\res |
<filebox> |
<MCL>\Filebox |
MCL\filebox |
files\filebox |
<log> |
<MCL>\Log |
MCL\log |
files\log |
<voice> |
<MCL>\Voice |
MCL\Voice |
files\voice |
<voicelog> |
<MCL>\Log |
MCL\log |
files\log |
<asr> |
<VOICE>\ASR |
MCL\voice\asr |
files\voice\asr |
<tts> |
<VOICE>\TTS |
MCL\voice\tts |
files\voice\tts |
<operators> |
<VOICE>\Operators |
MCL\voice\operators |
files\voice\operators |
If the target device is a Windows device, you can use the following aliases (each one points to a default Windows folder):
Alias |
Windows OS Folder |
<%appdata> |
Appdata |
<%desktop> |
Desktop |
<%fonts> |
Fonts |
<%mymusic> |
My Music |
<%personal> |
Personal |
<%program_files> |
Program Files |
<%programs> |
Programs |
<%startup> |
StartUp |
<%windows> |
Windows |
<%mypictures> |
My Pictures |
<%myvideo> |
My Videos |
<%favorites> |
Favorites |
<%startmenu> |
Start Menu |
<%desktopdirectory> |
Desktop |