|
Creating a PDK |
  
|
Creating a PDK
|
Creating a PDK |
|
Overview
MCL-PDK Builder is used to create Shortcut PDKs (see To Create a Shortcut PDK below) and/or Custom PDKs (see To Create a Custom PDK).
To Create a Shortcut PDK
A Shortcut PDK is a specific PDK type designed to allow App Desktop to display non-MCL application shortcuts.
Proceed as follows to create a Shortcut PDK:
Step-by-step
1. In the MCL-PDK Builder's main window, click ![]() OR open the "File" menu and click "New".
OR open the "File" menu and click "New".

2. Select the "Shortcut" option and click ![]() .
.

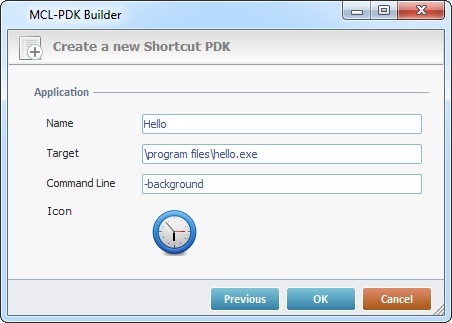
3. Fill in the available boxes as follows:
Application |
||
Name |
Enter the name of the non-MCL application that is called by the Shortcut PDK. |
|
Target |
Enter the absolute path to the non-MCL application you want to run/call from App Desktop. Example of a path to an application within a WM device - \program files\hello.exe Example of a path to an application within an Android device - com.adobe.reader (ex. Android package name) |
|
Command Line |
If the target device is a Windows Mobile device, you can enter command line parameters. NOT applicable for Android target devices. |
|
Icon |
|
If required, select an image to be the non-MCL application's icon. Click
|
Example of a Shortcut PDK for a WM Target Device |
Example of a Shortcut PDK for an Android Target Device |
|
|
![]()
Always consider the target device's OS when you define the absolute path to the application to be called.
The "Command Line" option does NOT apply to Android target devices.
4. Click ![]() to proceed and return to the MCL-PDK Builder's main window.
to proceed and return to the MCL-PDK Builder's main window.
If you want to go back to the first window, click ![]() . To abort the Shortcut PDK creation, click
. To abort the Shortcut PDK creation, click ![]() .
.
The new Shortcut PDK and its components (ex: the "aps_icon.png" file) are displayed in MCL-PDK Builder's Work Section.
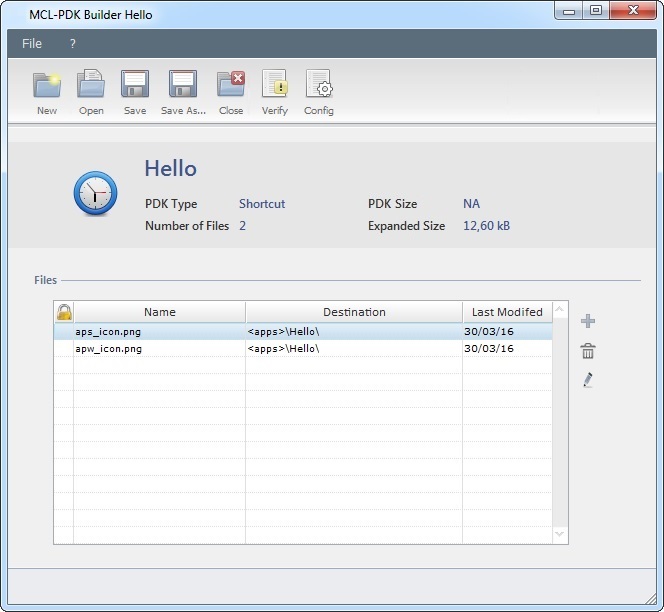
If you want to add more components (files) to the newly created PDK, use ![]() to the right of the table. You can also edit the existing file's properties with
to the right of the table. You can also edit the existing file's properties with ![]() .
.
If you want to edit the parameters of the new PDK, use the ![]() button or the "Config" option in the "File" menu.
button or the "Config" option in the "File" menu.
5. Click ![]() to save and conclude the Shortcut PDK creation.
to save and conclude the Shortcut PDK creation.
You can create a Custom PDK.
Step-by-step
1. In the MCL-PDK Builder's main window, click ![]() OR open the "File" menu and click "New".
OR open the "File" menu and click "New".
2. Select the "Custom" option.
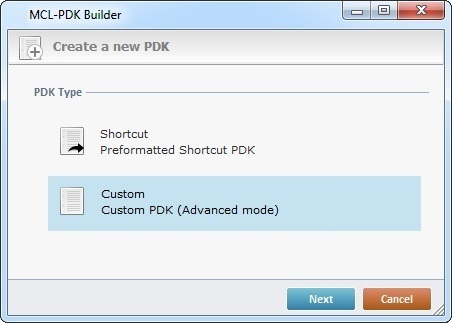
3. Click ![]() .
.
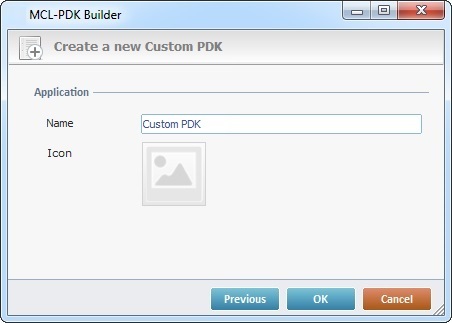
4. Enter a name for the PDK/the application included in the PDK.
5. If you want to have an icon to represent the PDK/the application, click ![]() . It opens an OS Browse window so you can select the appropriate image.
. It opens an OS Browse window so you can select the appropriate image.
![]() The recommended image resolution is 48X48.
The recommended image resolution is 48X48.

6. Click ![]() to proceed and return to the MCL-PDK Builder's main window,
to proceed and return to the MCL-PDK Builder's main window, ![]() to go back to the previous window or
to go back to the previous window or ![]() to abort the operation.
to abort the operation.
The new customized PDK and its components (ex: the "aps_icon.png" file) are displayed in MCL-PDK Builder's Work Section.
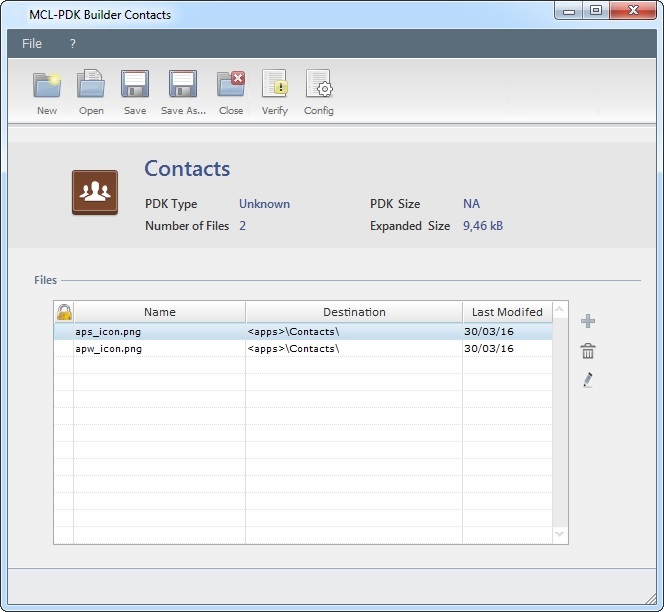
If you want to add more components (files) to the newly created PDK, use ![]() to the right of the table. You can also edit the existing file's properties with
to the right of the table. You can also edit the existing file's properties with ![]() .
.
If you want to edit the parameters of the new "*.pdk" file, use the ![]() button or the "Config" option in the "File" menu.
button or the "Config" option in the "File" menu.
7. Click ![]() to save and conclude.
to save and conclude.
Custom PDK Examples
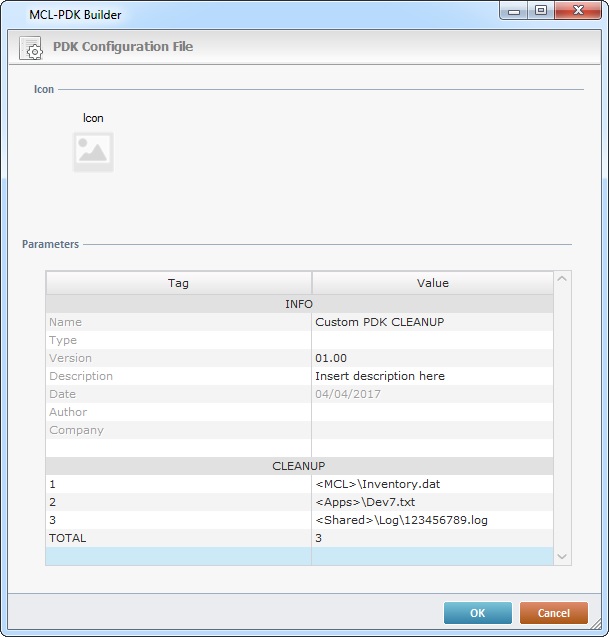
Below are some examples of Custom PDK applications which use the "CLEANUP" instruction in the PDK's configuration file for different purposes.
This particular instruction requires the defining of paths and the use of the “TOTAL” parameter to ensure that all the parameters are executed.
Example 1 Purpose: a Custom PDK that deletes specific files. ("<MCL>\Inventory.dat"; "<Apps>\Dev7.txt"; "<Shared>\Log\123456789.log" will be deleted.) |
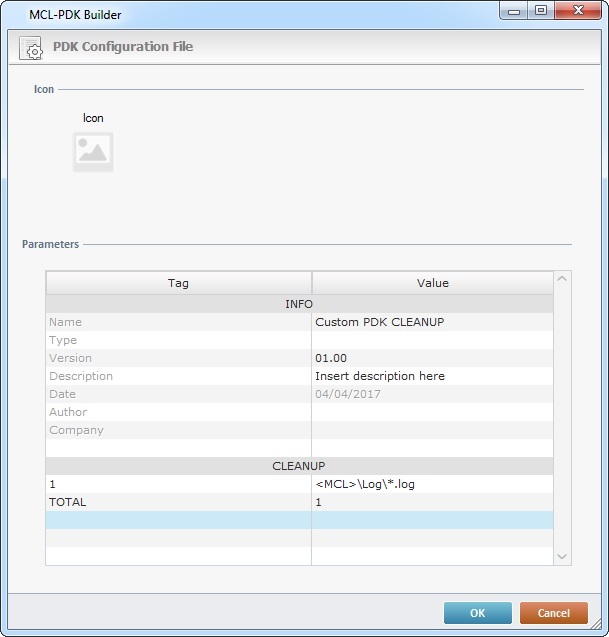
Example 2 Purpose: a Custom PDK that deletes the files with a specific extension included in the defined location. (All "*.log" files are deleted from the "Log" folder.) |
|
|
The "Tag" column includes the parameter's line number for the file(s) to delete and the "TOTAL" parameter. The "Value" column contains the path to the files to be deleted and the total number of parameters. |
|
Example 3 Purpose: a Custom PDK that deletes the defined folder along with the files contained in it. (The "Catalog" folder and its content is deleted from the "<Shared>" location.) |
Example 4 Purpose: a Custom PDK that deletes the content of a folder - it is left empty. (All the files contained in the "Master" folder are deleted leaving the folder empty.) |
|
|
The "Tag" column includes the parameter's line number and the "TOTAL" parameter. The "Value" column contains the path to the folder/files to be deleted and the total number of parameters. |
|
![]()
Before entering a path into the PDK's Configuration File, see PDK Builder Aliases for more information on the aliases that can be used.