|
Working with Start Android Activity Process |
  
|
Working with Start Android Activity Process
|
Working with Start Android Activity Process |
|
Process Purpose
The "Start Android Activity" process is used to initiate activities (meaning, intents with a GUI component) outside the MCL application environment. For instance, perform a Google search, create an event in the Android OS Calendar, sending an SMS, etc.
This process is based on Android Intents so, it ONLY applies to Android target devices.
![]()
The "Start Android Activity" process ONLY initiates/launches external applications that contain a graphical user interface.
![]()
Be aware that this process is based on Android intents which are NOT developed/managed by MCL.
These intents can be changed, at any moment, without MCL knowledge, so we recommend you check the Android developer support page for specific information on Android intents and standard examples.
When you add a process, you are required to define its settings. This occurs in the process's properties window which is displayed automatically after having added the "Start Android Activity" process. In this case, the properties window includes several tabs - "General", "Send", "Receive" and "Error".
If any subsequent edition is required, double-click the process to open its properties window and enter the necessary modifications.
"General" tab
 .
.
Fill in the following options:
Android Activity to Start |
|
Action |
Define the general action/intent to be performed. You can use known actions such as "ACTION_VIEW"; "ACTION_EDIT", etc. OR enter an explicit action string (ex: android.bluetooth.devicepicker.action.LAUNCH). Enter an action directly OR select an available action from the drop-down OR click |
URI |
Define the data to operate on (ex: a record/entry on a contacts database). Enter the intended target data in URI format OR click |
MIME type |
If required, specify the MIME type of the intended target data. If this option is left empty, the type is inferred by the data itself. |
Component |
If required, explicitly define the component that will handle the action/intent. Select one from the drop-down OR click |
Proceed to the "Send" tab.
"Send" tab
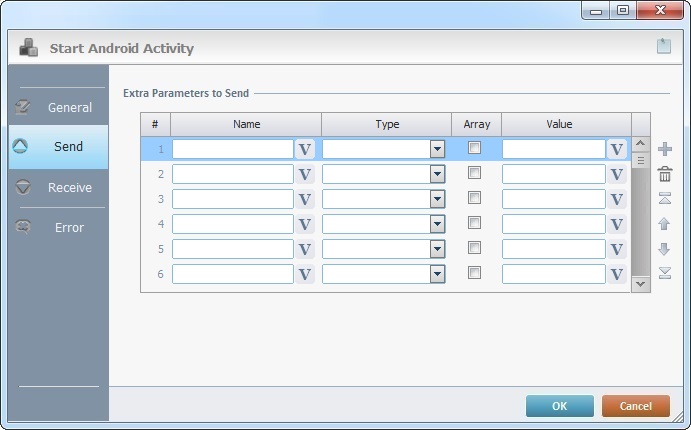
Fill in the following options:
Extra Parameters to Send |
|
Name |
Enter the name of the intended extra parameter OR click |
Type |
Select the type of the extra parameter from the drop-down. |
Array |
Check the corresponding check box, if you want to send the parameter value(s) as an array. |
Value |
Enter a value for the extra parameter OR click |
Use the editing icons to the right of the table to move the rows up and down and to delete or add more rows.
Click the "Receive" tab to continue.
"Receive" tab
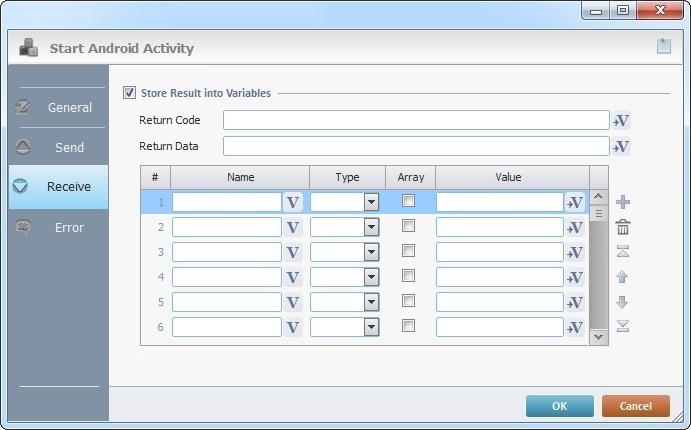
If required, check the "Store Result into Variables" option to receive and store the expected data/parameters related to the defined action/intent.
You must know beforehand, the name/type of the parameter(s) that will be returned.
Once the option is checked the following options/table are activated:
Store Result into Variables |
|
Return Code |
Click |
Return Data |
Click |
Name column |
Enter the name of the parameter you want to receive and store OR click |
Type column |
Select the type of the parameter to be received from the available options in the drop-down. |
Array column |
Check the corresponding check box, if you want to receive the parameter value(s) as an array. |
Value column |
Click |
Use the editing icons to the right of the table to move the rows up and down and to delete or add more rows.
Click the "Error" tab to continue.
"Error" tab

Fill in the available option:
If Error |
|
Go to |
Select a target location from the drop-down OR the
|
Detail of a ![]() window:
window:

"S:Menu" is a screen included in the same program as the process.
"R:Routine_1" is a routine included in the same program as the process.
If required, use the![]() icon to attach any relevant notes to this process. Click it and enter your notes in the resulting text box. These notes will be displayed in the corresponding "Actions" tab or "Process" window (in the "Notes" field) and in the "Developer Report".icons on the top of the properties window.
icon to attach any relevant notes to this process. Click it and enter your notes in the resulting text box. These notes will be displayed in the corresponding "Actions" tab or "Process" window (in the "Notes" field) and in the "Developer Report".icons on the top of the properties window.
After filling in the required options, click ![]() to conclude, or
to conclude, or ![]() to abort the operation.
to abort the operation.
The added process is displayed in the corresponding "Actions" tab or "Process" window.
"Start Android Activity" Examples
The following examples were created for Android 8 or 9 target devices.
![]()
Since Android intents are NOT managed by MCL and subject to changes, we recommend you visit the Android developer page to check if the intents used in the provided examples are still valid.
This example describes how to call the "Google Maps" app and display the map section that contains the intended location.
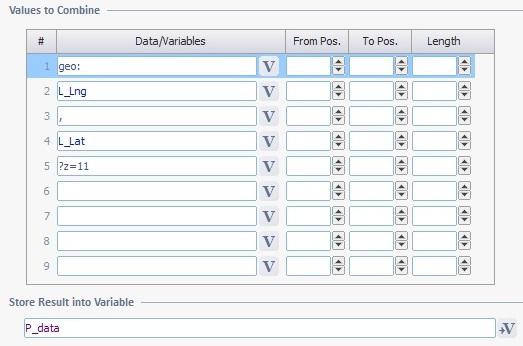
1. Prepare the data to send to "Google Maps" by using the "Variable Combine" process:
"Google Maps" needs to receive a specific string that includes the URI intent definition (ex: the "geo" URI) and the coordinates of the intended locations: Ex: Brussels Longitude 50.8503 included in the variable L_Lng Latitude 4353517 contained in the variable L_Lat
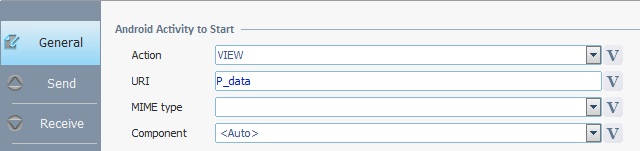
2. Define the following values in the "General" tab of the "Start Android Activity" process:
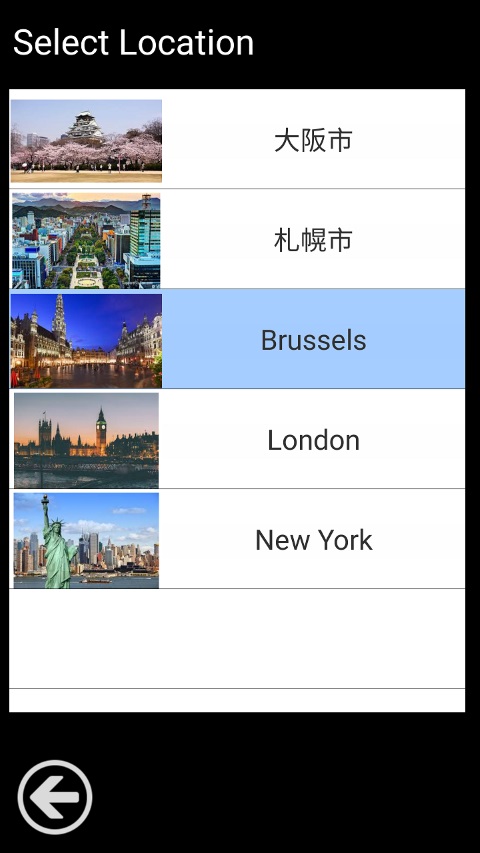
3. Example of the screen sequence when selecting "Brussels":
|
This example describes how to call the "Sygic" app to show the selected destination in a map and/or the corresponding driving route.
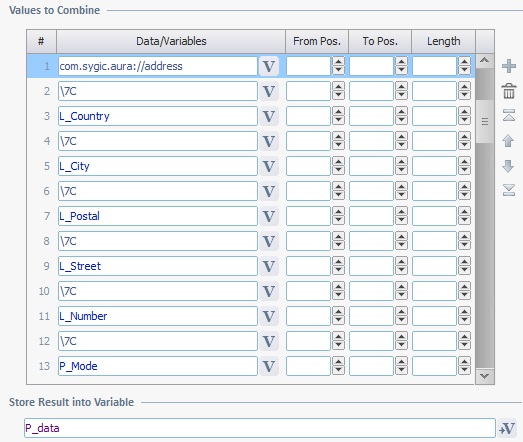
1. Prepare the data to send to the "Sygic" app by using the "Variable Combine" process:
•The "Sygic" app needs to receive a specific string that includes the URI intent definition - ex: "com.sygic.aura://address".
•"Sygic" also requires a destination address - "São Bento" train station: "Portugal" in variable L_Country, "Porto" in variable L_City, "" in variable L_Code, "Praça Almeida Garret" in variable L_Street) and "" in var L_Number.
•The value contained in the variable P_Mode defines what "Sygic" will display: - Use the value "show" to view a map with the given address - Use the value "drive" to view the driving route to the given address Ex: The variable P_Mode contains the "show" value.
•All this information must be passed to "Sygic" using "|" as a field separator (ex: \7C).
2. Define the following values in the "General" tab of the Start Android Activity process:
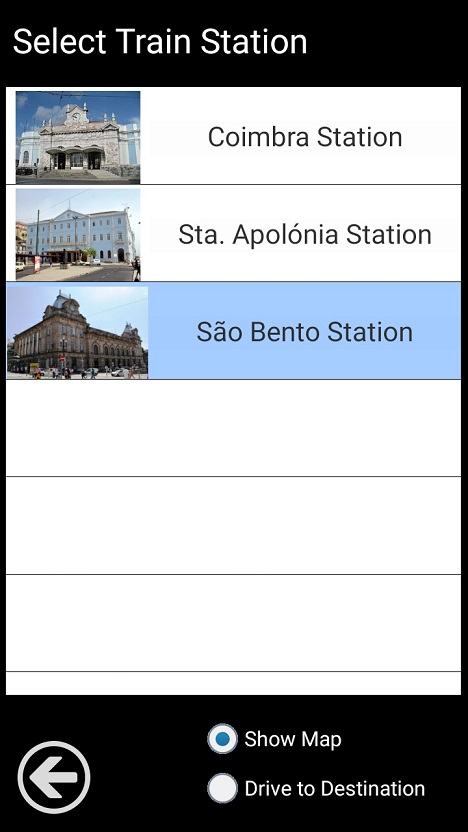
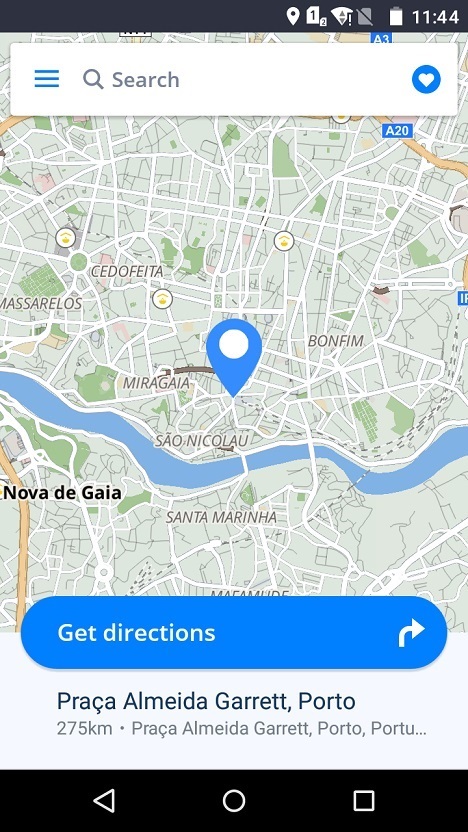
3. Example of the screen sequence when selecting "São Bento Station" as the destination:
|
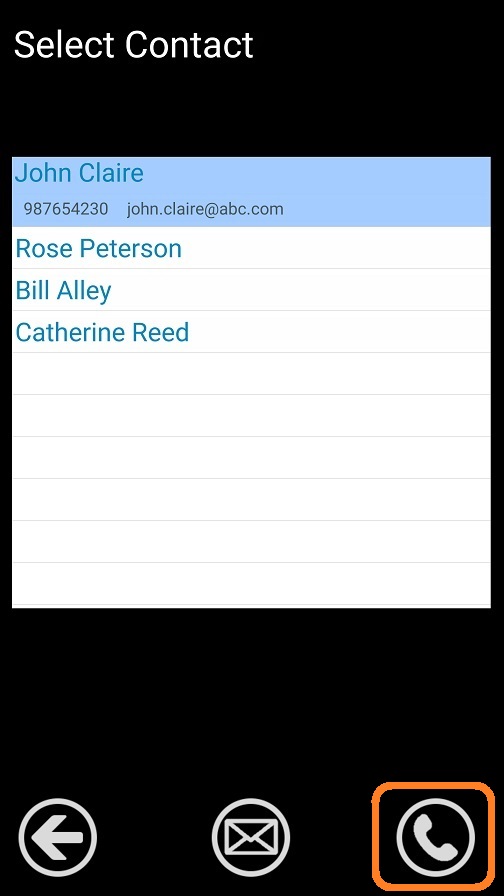
This example describes how to call the device's "Phone" app to make a call.
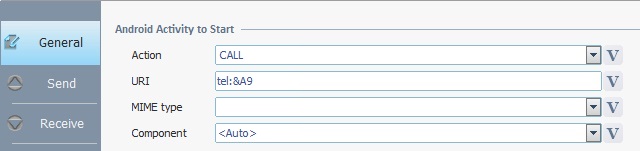
1. Define the following values in the "General" tab of the Start Android Activity process:
The defined "Action" is "CALL" and the required URI intent is "tel:" along with the intended phone number - the value "987654230" is included in a variable ("&A9").
2. Example of the screen sequence when selecting a contact from the list:
|
This example describes how to call the device's "Email" app to send an email.
1. Define the following values in the "General" tab of the Start Android Activity process:
The defined Action is "SENDTO" and the required URI intent is "mailto:" along with the intended email address - the value "rose.peterson@abc.com" is included in a variable ("&B0").
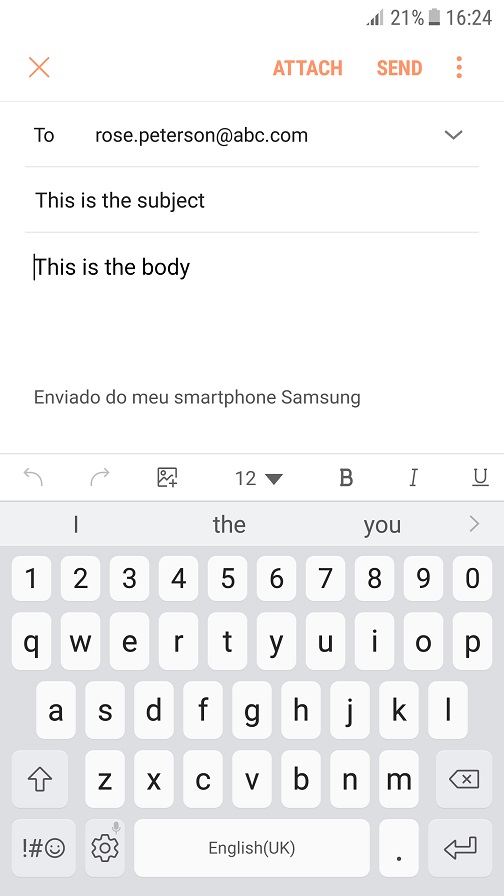
2. Alternatively you can define the following values in the "Send" tab:
The defined "mailto:" Android intent allows you to send additional parameters such as the email's subject (using the "android.intent.extra.SUBJECT" parameter) and body (using the "android.intent.extra.TEXT" parameter). As soon as the email window is opened, the corresponding subject and body are already mapped with the values transmitted to the intent.
3. Example of the screen sequence when selecting a contact from the list:
|
![]() If you want to use a label as a target destination, you can use the "Auto-Label" mechanism. This alternative to the "Set Label" process allows you to create a label in the properties window of a process - specifically, in the fields used to define target destinations (ex: the "If Error..." type fields). See To Automatically Create a Label.
If you want to use a label as a target destination, you can use the "Auto-Label" mechanism. This alternative to the "Set Label" process allows you to create a label in the properties window of a process - specifically, in the fields used to define target destinations (ex: the "If Error..." type fields). See To Automatically Create a Label.
![]()
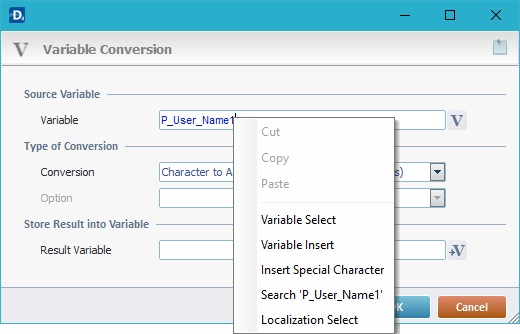
Use the right-click in MCL-Designer's input boxes to access some related options as well as the general "Cut", "Copy"; "Paste"; "Search" actions (active/inactive according to the current context).
Ex: If you right-click the "Variable" input box (included in a "Conversion's" properties window), you are provided with general editing/search actions and other more specific options such as "Variable Select" (see "Variable Select"); "Variable Insert" (see "Variable Insert"); "Insert Special Character" (see To Insert Special Characters into a Control's Text Input Field) and "Localization Select" (see Localization List).
If you right-click another input box, it may provide other possibilities.