Overview
Importation is another way to add operators to a site.
Step-by-step
1. Click ![]() (in the Control Panel section) and, in the resulting row below, select
(in the Control Panel section) and, in the resulting row below, select ![]() to open the "Operators" page.
to open the "Operators" page.
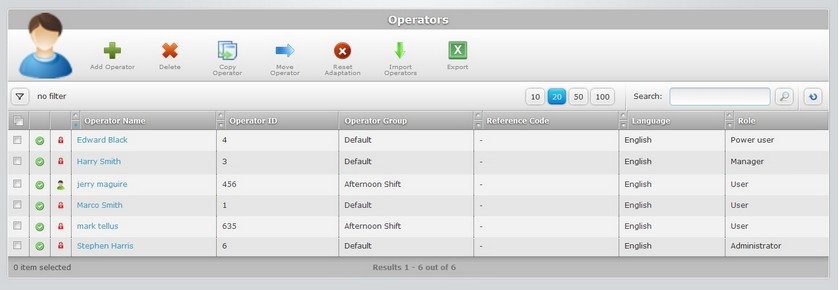
2. Click ![]() to open the "Import New Operators step 1 (Properties tab)" wizard page.
to open the "Import New Operators step 1 (Properties tab)" wizard page.
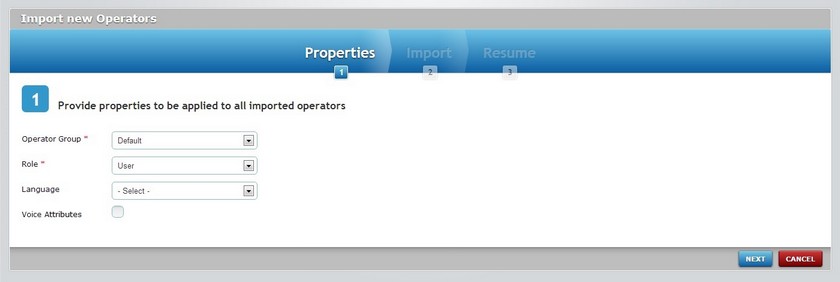
3. Define the properties to be applied to the imported operators by filling in the available options:
Operator Group * |
Select the operator group that will include the imported operators from the drop-down list. See Operator Groups. If the selected device group has Voice attributes, more options regarding Voice are activated. |
Role * |
Select the role in the application for all imported operators from the drop-down list. |
Language |
Select the language to be used by the imported operators from the drop-down list. |
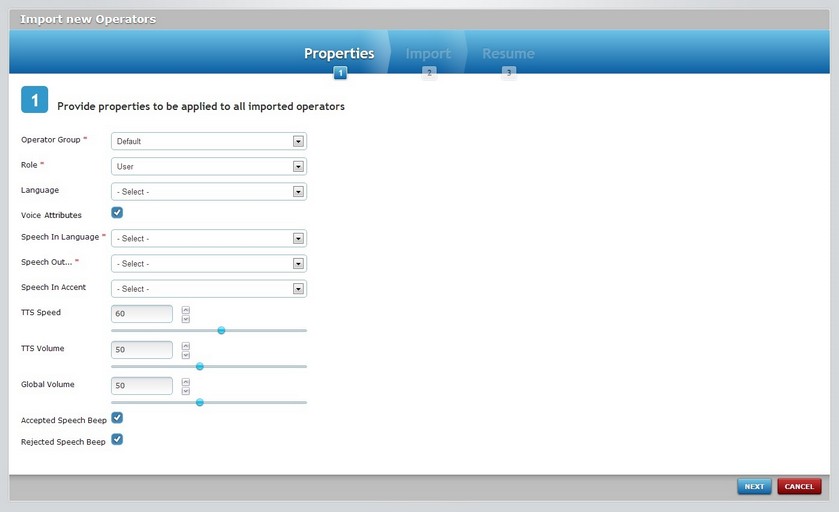
4. Check the "Voice Attributes" option if the imported operators are to work with voice devices. Checking this option, enables more fields. Continue to step 5.
If no voice attributes are required, proceed to step 6.
![]() If the previously selected operator group includes voice attributes (see Operator Group Details), those parameters will be applied to the new operator, meaning, you will have automatic access to all the options in the "Speech In/Out" and "Advanced Voice Settings" tabs with the values filled in. This allows you to continue to step 6.
If the previously selected operator group includes voice attributes (see Operator Group Details), those parameters will be applied to the new operator, meaning, you will have automatic access to all the options in the "Speech In/Out" and "Advanced Voice Settings" tabs with the values filled in. This allows you to continue to step 6.
5. Define the advanced voice settings by filling in the following options:
Speech In Language * |
Select the language the operators from this operator group can use to interact with the Voice application. |
Speech Out...(Language) * |
Select the language the operators from this group will hear from the voice device. |
Speech in Accent |
Select the accent file that stores the fine tuning of voice recognition. |
TTS Speed |
Define the speed to be used by the TTS (text to Speech) engine. Enter a number in the box or use the slider. |
TTS Volume |
Define the speech volume to be used by the TTS (text to Speech) engine in the corresponding box. |
Global Volume |
Define the global audio volume for the voice device in the corresponding box. |
Accepted Speech Beep |
Check this option to enable a success/confirmation beep. |
Rejected Speech Beep |
Check this option to enable an unsuccessful/rejection beep. |
6. Click ![]() to proceed to the step 2 (Import tab) wizard page.
to proceed to the step 2 (Import tab) wizard page.

To return to the step 1 (Properties tab)wizard page, click ![]() .
.
7. Click ![]()
![]()
The first time you click ![]() , your OS file explorer window opens automatically to allow you to select a file. When you repeat the process, the following window opens:
, your OS file explorer window opens automatically to allow you to select a file. When you repeat the process, the following window opens:
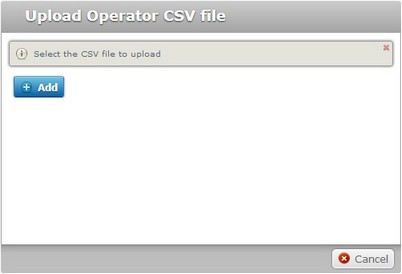
8. Click ![]() which opens an OS file explorer window.
which opens an OS file explorer window.
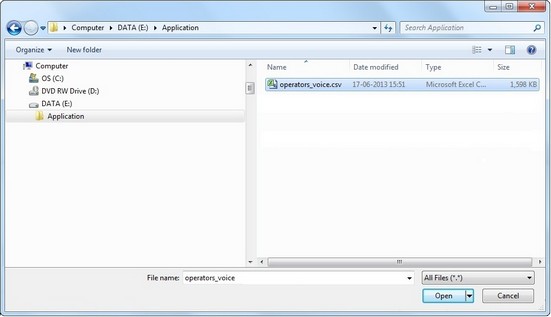
9. Select the appropriate file and click ![]() .
.
![]()
Consider the information that was provided in the step 2 (Import tab) wizard page regarding the file to be selected:
| • | When dealing with operators without voice attributes,the import file must be a .csv file and contain records with the "<OperatorID>*;<Firstname>;<Lastname>;"fields. |
| • | When dealing with operators with voice attributes, the import file must be a .csv file and the records must contain the "<OperatorID>*;<Firstname>;<Lastname>;<Spokenname>"fields. |
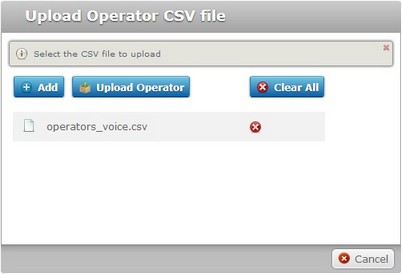
Files have to be added one by one. If you want to add more files, repeat steps 8 and 9.
The added file(s) can be deleted at any time. To do so, click the corresponding ![]() . If you want to delete all files at once, click
. If you want to delete all files at once, click ![]() .
.
10. Once you have all the required files displayed in the "Upload Operator CSV file" window, click ![]() . The selected file is uploaded.
. The selected file is uploaded.
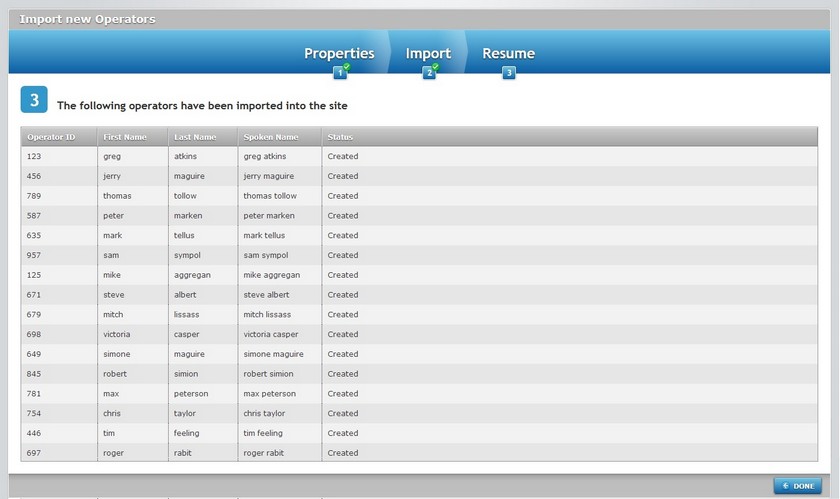
The step 3 (Resume tab) wizard page displays the content of the imported .csv file.
![]() The account allows for a predefined number of operator profiles. If the operator profile limit is reached, the import will fail.
The account allows for a predefined number of operator profiles. If the operator profile limit is reached, the import will fail.
The step 3 (Resume tab) wizard page will display the following information:

Before attempting another import, remove or disable the status of some of the existing operator profiles
11. Click ![]() to conclude the import operation.
to conclude the import operation.
The newly imported operators are displayed and available in the "Operators" page.