Overview
An Operator is the person who uses devices to perform certain tasks (inventories, picking operations, etc.). Operators do NOT have access to the account or site dashboard. They are organized into operator groups which vary according to the location's internal structure (for instance, a "Day Shift" operator group and a "Night Shift" operator group).
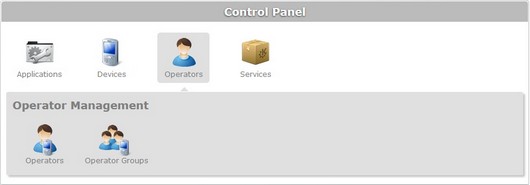
To access the Operators sub-module, click ![]() (in the Control Panel section) and, in the resulting row below, select
(in the Control Panel section) and, in the resulting row below, select ![]() .
.

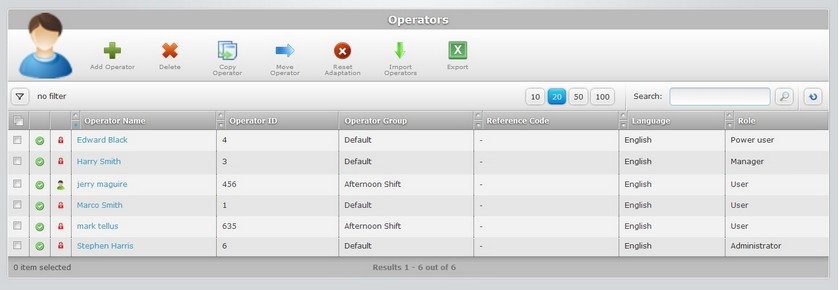
The image below illustrates the page that is accessed when clicking ![]() .
.

This page displays the operators included in a site.
You can adopt the "All groups" view or filter the operators display:
| • | Since operators are always a part of an operator group, you can filter the display by operator group, meaning, the page only displays the selected operator group with all its operators. |
To do so, click ![]() (located below the operator icon). This enables the "Group:" drop-down box with a list which includes the "All groups" and "Default" options, by default, and the operator groups you have created.
(located below the operator icon). This enables the "Group:" drop-down box with a list which includes the "All groups" and "Default" options, by default, and the operator groups you have created.
| • | Not only can you filter the view (by operator groups) you also control the displayed information regarding operators by selecting the most appropriate view (Properties or Status). |
To do so, click ![]() (located below the operator icon) and, in the "View" drop-down box, select the most appropriate view for the information you want to have displayed.
(located below the operator icon) and, in the "View" drop-down box, select the most appropriate view for the information you want to have displayed.
Status Icons associated to Operators
The display of operators is associated to a range of icons that inform you of their current status.
Below is a list with those icons and what they represent:
Icon |
Description |
|---|---|
|
Operator status “Enabled”. |
|
Operator status “Disabled” or "Locked". |
|
Operator is logged off. |
|
operator is logged on. |
Available View Modes
To select the most appropriate view, click ![]() (located below the operator icon) to access the "View" drop-down box and select one of the available options.
(located below the operator icon) to access the "View" drop-down box and select one of the available options.
Each view displays specific information according to the selected view's criteria.
![]() Properties view
Properties view

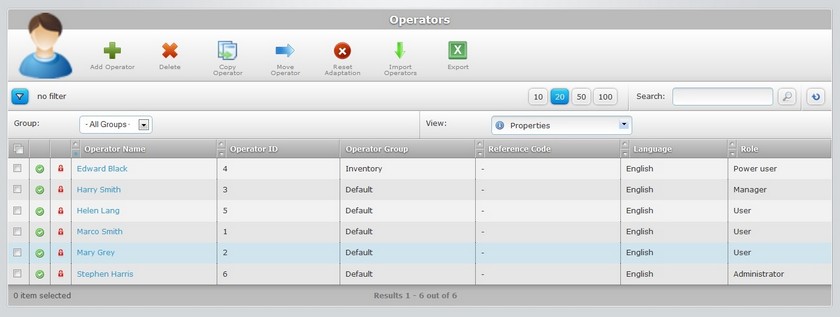
The "Properties" view displays the following information:
Status columns |
The initial columns display status icons regarding the operator's current status. |
|---|---|
Operator Name |
The operator's name. |
Operator ID |
The operator's identification number in the account. |
Operator Group |
The operator group the operator is included in. |
Reference Code |
The operator's identification in the customer's own management software system (ex: ERP or WMS systems). |
Language |
The language used by the operator in the application. |
Role |
The operator's role within the application. |
![]() Status view
Status view

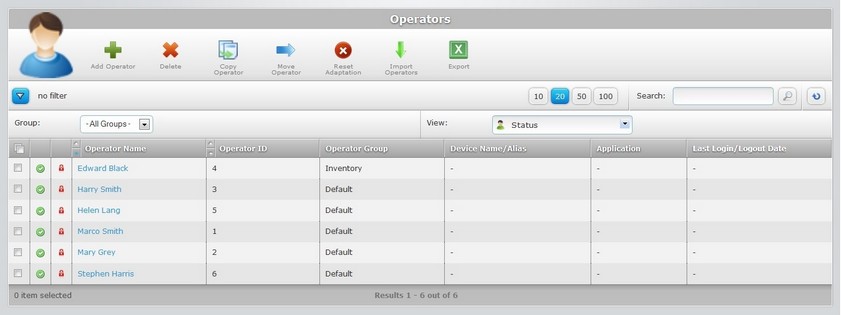
The "Status" view displays the following information:
Status columns |
The initial columns display status icons regarding the operator's current status. |
|---|---|
Operator Name |
The operator's name. |
Operator ID |
The operator's identification number. |
Operator Group |
The operator group the operator is included in. |
Device Name/Alias |
The name/alias of the device the operator is currently logged in. |
Application |
The application in the device being handled by the operator. |
Last Login/Logout Date |
The date of the operator's last login and log out. |
The "Operators" page offers the following options to control the displayed information:

![]() Use this button to display hidden options. In this case, when clicked, it expands to display the "Group:" and "View:" filters.
Use this button to display hidden options. In this case, when clicked, it expands to display the "Group:" and "View:" filters.
![]() Use these buttons to control how many items are displayed at a time. Click one of the options (10 items per page/20 items per page/50 items per page/100 items per page).
Use these buttons to control how many items are displayed at a time. Click one of the options (10 items per page/20 items per page/50 items per page/100 items per page).
![]() Use the search box to look for specific list items.
Use the search box to look for specific list items.
a. Enter what you want to search for.
b. Click ![]() or press <ENTER> in your PC keyboard to initiate the search.
or press <ENTER> in your PC keyboard to initiate the search.
c. To conclude the search operation, empty the search box and click ![]() or press <ENTER> in your PC keyboard.
or press <ENTER> in your PC keyboard.
![]() Click this button to refresh the page's information.
Click this button to refresh the page's information.
![]() Use the buttons, included in this bar, to organize the listed items of the corresponding column:
Use the buttons, included in this bar, to organize the listed items of the corresponding column:
| • |
| • |
![]() Click this button to select all the listed items. In this case, all the operators.
Click this button to select all the listed items. In this case, all the operators.
Available Operations
To add an operator to an operator group, use the ![]() button. For more information, see Adding an Operator.
button. For more information, see Adding an Operator.
To delete an operator, use the ![]() button. For more information, see Deleting an Operator.
button. For more information, see Deleting an Operator.
To copy an operator, use the ![]() button. For more information, see Copying an Operator.
button. For more information, see Copying an Operator.
To move an operator to another operator group,use the ![]() button. For more information, see Moving an Operator.
button. For more information, see Moving an Operator.
To reset an operator's adaptation, use ![]() . For more information, see The Adaptation Process.
. For more information, see The Adaptation Process.
To import operator profiles, use the ![]() button. For more information, see Importing Operators.
button. For more information, see Importing Operators.
To export the displayed device list, click ![]() and proceed as follows:
and proceed as follows:
![]()
Since the export only includes the information on current display, make sure the displayed operator list includes all the information you want to export. This requires selecting the operator group to be displayed as well as the view, because each view provides different information concerning the operators.
Step-by-step
1. To view the "Group" and "View" drop-down boxes, click ![]() (located below the operator icon).
(located below the operator icon).

2. Select the required operator group and view in each corresponding drop-down box.
3. Click ![]() .
.

4. Click ![]() to conclude the operation. The operator list is exported to an Excel File format.
to conclude the operation. The operator list is exported to an Excel File format.
The conclusion of the export operation depends on the web browser used. You should be able to save the Excel file in your local computer or open it directly after the download.
This chapter includes all the aspects associated to operators (operator profile details, adding an operator to an operator group, moving operators from one group to another, deleting an operator profile, etc.). The table below refers the user profiles that have access to the described operations:
![]()
Keep in mind that the Account Administrator and/or the Site Manager, at a lower level, can restrict other users' access rights. This user guide is presenting all the possibilities in terms of access.
Topic/Operation |
Description |
User access |
|---|---|---|
View the operator's profile and current status information. |
Account Administrator Site Manager Site User |
|
Add operators to operator groups. |
Account Administrator Site Manager Site User |
|
Add operators to operator groups by importing operator lists. |
Account Administrator Site Manager Site User |
|
Copy an operator profile. |
Account Administrator Site Manager Site User |
|
Edit the operator's profile. |
Account Administrator Site Manager Site User |
|
Move an operator profile from one operator group to another. |
Account Administrator Site Manager Site User |
|
Delete an operator profile. |
Account Administrator Site Manager Site User |