|
Edit Host Profiles section |
  
|
Edit Host Profiles section
|
Edit Host Profiles section |
|
Overview
The "Edit Host Profiles" section concerns the profiles with the communication settings that are required for the MCL application/device to connect to the intended host via MCL-Net V4, a Web Service or TCP/IP. There are 3 types of host profiles - "MCL-Net V4", "Web Service/Web Site" and "TCP/IP".
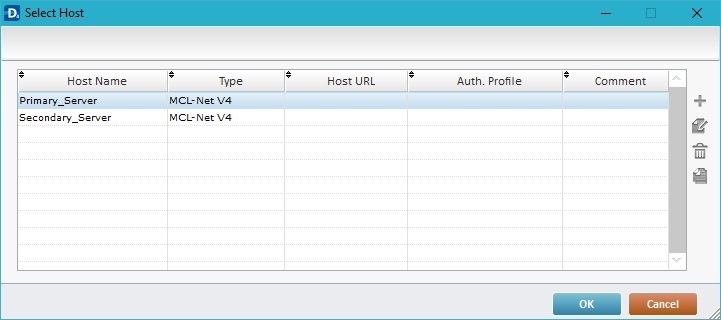
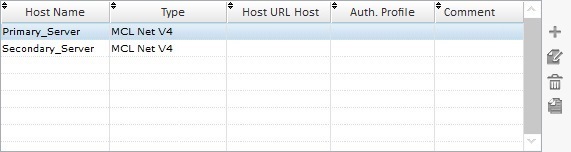
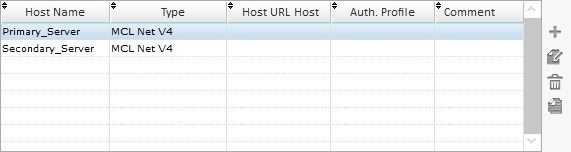
The "Edit Host Profiles" table includes the default Host profiles ("Primary_Server" and "Secondary_Server") and both use an MCL-Net V4 server.
![]() The communication between application and Host can be synchronous or asynchronous. Consider the best type of communication for your project when creating a Host profile (server type selection) because it will affect the application's workflow. Check the details/behavior of a synchronous and an asynchronous communication within the MCL environment.
The communication between application and Host can be synchronous or asynchronous. Consider the best type of communication for your project when creating a Host profile (server type selection) because it will affect the application's workflow. Check the details/behavior of a synchronous and an asynchronous communication within the MCL environment.
Synchronous Communication |
Asynchronous Communication |
|
Details |
•Occurs in real time •Is executed in the foreground •Is affected by a defined time out (in the Host profile) |
•May or may not occur in real time •Is executed in the background •Application/host connection guaranteed by a background mechanism •The time out and/or the retries (defined in the Host profile) affect the background mechanism |
Behavior |
The application workflow stops until communication between application and host is successful or a communications error is established (ex: after a time out runs out). |
The application workflow does NOT stop The data being sent/received is put "in queue" and a background mechanism takes care of the communication to the Host. |
Depending on the operation you need to perform, follow the best suited link provided below:
To Create an Authorization Profile with a Basic/Digest Authentication
To Create an Authorization Profile with "OAuth 2.0" Authentication
To Edit an Authorization Profile
To Delete an Authorization Profile
Host Profiles
Host profiles can be created in the "Host/Aux" tab of the "Project Properties" window but, also, within the processes included in the Host Services, Web Services and Remote Database process groups. See Working with Host Services Processes Group OR Working with Web Services Processes Group OR Working with Remote Database Processes Group.
Choose the most appropriate step-by-step according to your project requirements.
MCL-Net V4 is an MCL product. This server type is used in the default "Primary" and "Secondary" servers.
Step-by-Step
1. Use one of the following methods to access the host profiles' table:
a. Open the "Project" menu (located in the Menu Bar), select the "Properties" option and open the "Host/Aux" tab. The existing host profiles are displayed in a table in the "Edit Host Profiles" section.
b. Click
2. Click
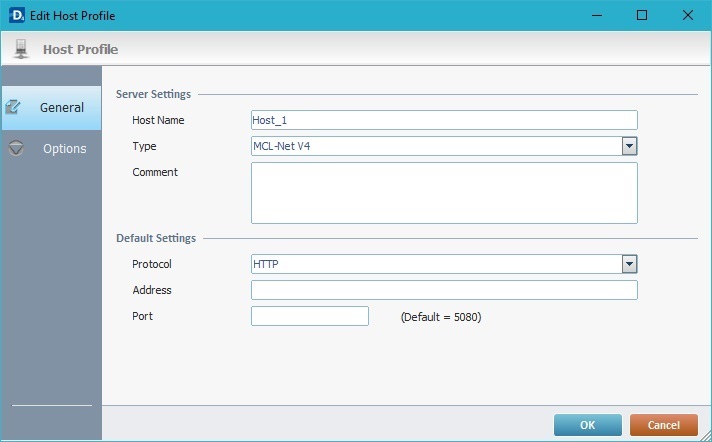
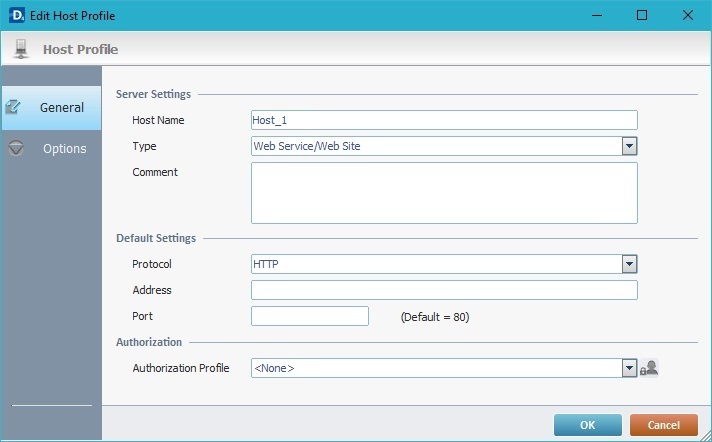
3. In the "General" tab (open by default), fill in the following options:
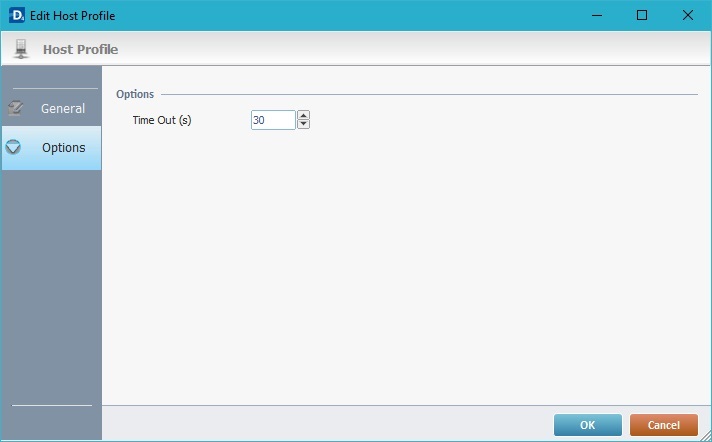
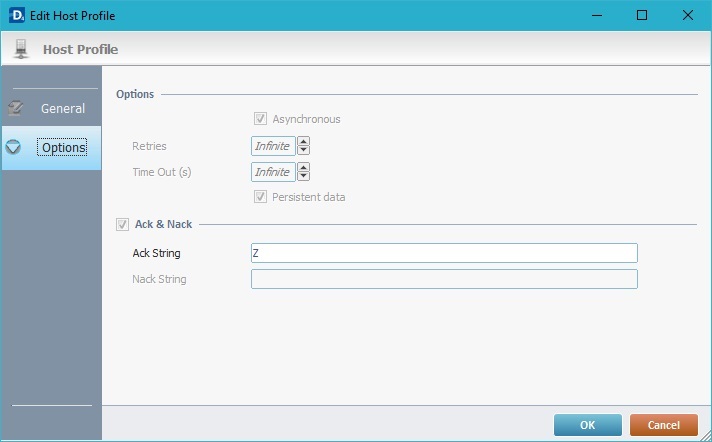
4. Open the "Options" tab.
5. Define a time out (in seconds) for the data communication to occur. See Time Out.
6. Click
|
||||||||||||||||
The "Web Service/Web Site" host type is used to call web services. Web Service related processes ONLY use "Web Service/Web Site" type Hosts.
Step-by-Step
1. Use one of the following methods to access the Host profiles' table:
a. Open the "Project" menu (located in the Menu Bar), select the "Properties" option and open the "Host/Aux" tab. The existing host profiles are displayed in a table in the "Edit Host Profiles" section.
b. Click
2. Click
3. In the "General" tab (open by default), fill in the following options:
4. Open the "Options" tab.
5. Define a time out (in seconds) for the data communication to occur.See Time Out. NOT applicable, if the option is inactive.
6. Click
|
||||||||||||||||||||
The "TCP IP" type Host uses a TCP IP socket on a specific port.
Step-by-Step
1. Use one of the following method to access the Host profiles' table:
a. Open the "Project" menu (located in the Menu Bar), select the "Properties" option and open the "Host/Aux" tab. The existing host profiles are displayed in a table in the "Edit Host Profiles" section.
b. Click
2. Click
3. In the "General" tab (open by default), fill in the following options:
4. Open the "Options" tab.
5. Define the following:
6. Click
|
||||||||||||||||||||||||||||||
Step-by-Step
1. Use one of the following methods to access a Host profiles' table:
![]()
Consider the Host profile you want to edit before choosing a or b to access a Host profile table. If you open the "Host/Aux" tab, you will view all the project's Host profiles. If you use a process to open a Host profiles table, only the Host profiles that are compatible with that process will be available.
a. Open the "Project" menu (located in the Menu Bar), select the "Properties" option and open the "Host/Aux" tab. The existing Host profiles are displayed in the related table.
b. Click ![]() (if available) in the properties window of a Host related process. This opens another table displaying the Host profiles that can be used within the currently open process.
(if available) in the properties window of a Host related process. This opens another table displaying the Host profiles that can be used within the currently open process.

2. Select the host profile you want to edit.
3. Click ![]() (located to the right of the table) to open the corresponding properties window.
(located to the right of the table) to open the corresponding properties window.

4. Edit the required options in the tab(s).
5. Click ![]() to apply your changes.
to apply your changes.
Step-by-step
1. Use one of the following methods to access a Host profiles' table:
![]()
Consider the Host profile you want to delete before choosing a or b to access a Host profile table. If you open the "Host/Aux" tab, you will view all the project's Host profiles. If you use a process to open a Host profiles' table, only the Host profiles compatible with that process will be available.
a. Open the "Project" menu (located in the Menu Bar), select the "Properties" option and open the "Host/Aux" tab. The existing host profiles are displayed in the related table.

b. Click ![]() (if available) in the properties window of a Host related process. This opens another window with a table displaying the host profiles that can be used within the currently open process.
(if available) in the properties window of a Host related process. This opens another window with a table displaying the host profiles that can be used within the currently open process.

2. Select the Host profile you want to remove.
3. Click ![]() (located to the right of the table).
(located to the right of the table).
4. Click ![]() in the resulting window to confirm the deletion.
in the resulting window to confirm the deletion.
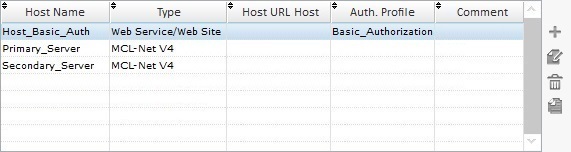
![]() When deleting a "Web Service/Web Site" Host profile with an Authorization Profile (visible in the "Auth. Profile" column), the Authorization Profile is not deleted.
When deleting a "Web Service/Web Site" Host profile with an Authorization Profile (visible in the "Auth. Profile" column), the Authorization Profile is not deleted.
An Authorization Profile provides the necessary user information (username and password) required by the web service being targeted. MCL-Designer authorization profiles can use a basic/digest or OAuth 2.0 authentication method to provide those credentials.
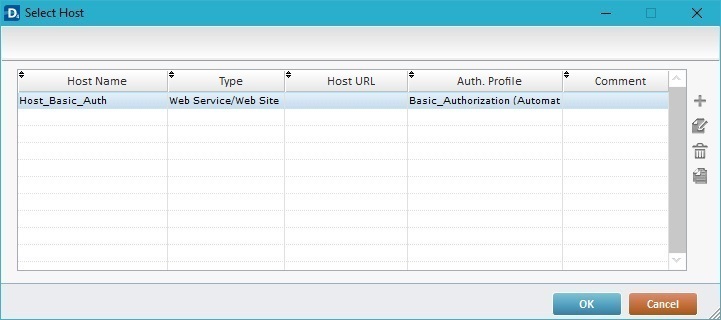
Authorization Profiles are NOT an autonomous element, they are always associated to/used by a "Web Service/Web Site" type Host Profile. They are displayed in the Host Profiles table, specifically, in the "Auth. Profile" column, and can also be accessed in the properties window of Web Services processes. See Working with Web Services Processes Group.
Authorization profiles allow for 1 of the following authentication methods:
•Automatic (Basic or Digest) - This authentication method provides the intended web service with the required user identification (User, Password). This information is available to the MCL application/exposed in the host profile's connection string.
•OAuth 2.0 - This authentication method uses the OAuth 2.0 authorization protocol. The MCL application contacts an identity server with the required user information to verify if the user attempting to contact the web service is authorized to do so. The user credentials are NOT disclosed to the MCL application.
In terms of access to the identity server, this method considers 3 possible "Grant" types - "Authorization Code" (recommended), "Client Credentials" and "Password".
Authorization Profiles are always associated to Host Profiles so, to create one you must, first, create a "Web Service/Web Site" Host profile, as this is the Host profile type that uses Authorization Profiles.
You can reach the Host profiles table:
•Via the "Host/Aux" tab (a project properties tab). It provides access to ALL the Host Profiles and associated Authorization Profile within the current project.
OR
•Via a Web Services process, meaning, via its properties window. In this case, you ONLY have access to the Host Profiles (and attached Authorization Profile) that are compatible with the selected process.
To Create an Authorization Profile with a Basic/Digest Authentication
To Create an Authorization Profile with "OAuth 2.0" Authentication
To Edit an Authorization Profile
To Delete an Authorization Profile
To Create an Authorization Profile with a Basic/Digest Authentication
To create (or edit) authorization profiles, you must first access the Host profile table and create a "Web Service/Web Site" type Host profile.
Proceed as follows to create an authorization profile with a Basic/Digest authentication - this type of authentication only requires user and password credentials.
Step-by-Step
1. Start by creating a "Web Service/Web Site" type Host profile. If you need help, see Step-by-Step on Web Service/Web Site Host Creation.
Selecting "Web Service/Web Site" as the Host profile type enables the "Authorization" section:

2. Click ![]() (located to the right of the "Authorization Profile" field) to open a table with a list of the available authorization profiles.
(located to the right of the "Authorization Profile" field) to open a table with a list of the available authorization profiles.

3. Click ![]() (located to the right of the table) to open the properties window of the new authorization profile.
(located to the right of the table) to open the properties window of the new authorization profile.

4. Fill in the following options:
Authorization Profile Settings |
|
Name |
Enter a name for the new authorization profile. |
Method |
Select the "Automatic (Basic or Digest)" method from the drop-down. |
Comment |
As an option, add comments to the authorization profile. |
Credentials |
|
User |
Enter a user name for the basic or digest authentication. |
Password |
Enter a user password for the basic or digest authentication. |
5. Click ![]() to apply your choices and return to the "Authorization Profile List" window.
to apply your choices and return to the "Authorization Profile List" window.

6. Click ![]() to complete the operation and return to the "Host/Aux" tab or the properties window of the selected process. The newly created "Web Service/Web Site" Host profile and corresponding authorization profile are displayed in the "Host/Aux" table.
to complete the operation and return to the "Host/Aux" tab or the properties window of the selected process. The newly created "Web Service/Web Site" Host profile and corresponding authorization profile are displayed in the "Host/Aux" table.

To Create an Authorization Profile with "OAuth 2.0" Authentication
To create an authorization profile, you must first access the Host Profile table and create a "Web Service/Web Site" type Host profile.
Proceed as follows to create an authorization profile with an OAuth 2.0 authentication - OAuth 2.0 is the recommended authorization protocol and used as an industry-standard. It uses an identity server that is contacted by the MCL application to verify if the user is authorized to communicate with the intended web service. The MCL application does NOT have access to actual user information (grant type "Authorization Code"), it only receives a confirmation of access authorization and uses it to contact the web service.
Step-by-Step
1. Start by creating a "Web Service/Web Site" type Host profile. If you need help, see Step-by-Step on Web Service/Web Site Host Creation.
Selecting "Web Service/Web Site" as the Host profile type enables the "Authorization" section:

![]() Web Service/Web Site Host Profiles with an OAuth 2.0 type authorization profile must have an HTTPS protocol.
Web Service/Web Site Host Profiles with an OAuth 2.0 type authorization profile must have an HTTPS protocol.
2. Click ![]() (located to the right of the "Authorization Profile" field) to open a list of the available authorization profiles.
(located to the right of the "Authorization Profile" field) to open a list of the available authorization profiles.

3. Click ![]() (located to the right of the table) to open the properties window of the new authorization profile.
(located to the right of the table) to open the properties window of the new authorization profile.

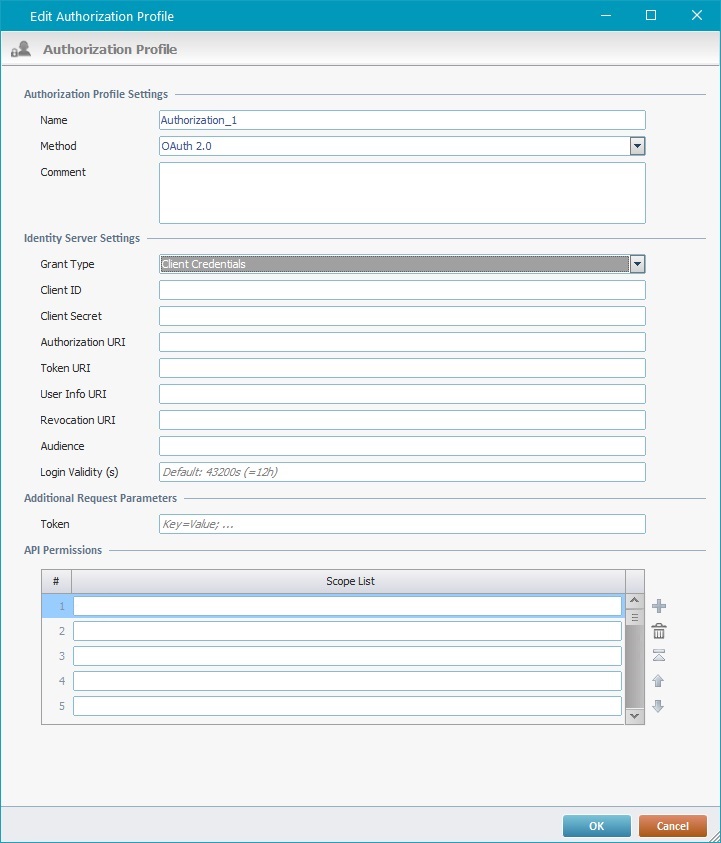
4. Fill in the following options:
Authorization Profile Settings |
|
Name |
Enter a name for the new authorization profile (ex: Auth2.0_Auth_Code) or maintain the suggestion. |
Method |
Select the "OAuth 2.0" method from the drop-down (this enables the "Identity Server Settings" and "API Permissions" sections).
|
Comment |
As an option, add comments to the authorization profile. |
5. Select the best grant type for your authorization profile.
There are 3 grant types available - "Authorization Code", "Password" and "Client Credentials":
Authorization Code - This grant type takes advantage of the device browser (external to the application) to negotiate an authorization code with the Identity Server. This very secure method avoids the application to be aware of the user credentials (handled exclusively in the browser). Once the application has access to the authorization code, it can request a token so it can, then, call the resource server APIs.
Authorization Code Flow

1.The operator initiates the log in via a web browser to request an authorization code from the Identity Server that has the list of authorized operators and their access permissions – (1); (2)
2.The Identity Server analyzes the request and provides the necessary authorization code once it identifies the operator - (3); (4)
3.The application sends the authorization code to the Identity Server, so it can ask for a token – (5)
4.The server provides the access token which can, then, be used for a pre-determined period of time – (6)
Password - This grant type allows the user to provide his password credentials directly to the application. The application can, then, request a token to the Identity Server so it can later call the resource server APIs. This grant type flow is less secure than the Authorization Code flow.
![]() Because of its limitations, this grant type should only be used in very specific situations, like keeping compatibility with old servers.
Because of its limitations, this grant type should only be used in very specific situations, like keeping compatibility with old servers.
Password Flow

1. The operator enters the password credentials into the application – (1)
2. The application forwards the password credentials to the Identity Server. Those are analyzed and the access token is returned to the application – (2);(3)
Client Credentials - This Grant type allows the application to store the authorization credentials. The application can then request a token to the Identity Server so it can later call the resource server APIs. This grant type flow is less secure than the Password flow.
![]() Be careful when handling the client credentials in the application as it can be visible in the source code and "mauth" file. The alternative is to store them in an element that is encrypted by MCL-Designer (an element that has been exported to Library using the “MCL-Script (executable)” mode. See To Export a Global Procedure to Library.).
Be careful when handling the client credentials in the application as it can be visible in the source code and "mauth" file. The alternative is to store them in an element that is encrypted by MCL-Designer (an element that has been exported to Library using the “MCL-Script (executable)” mode. See To Export a Global Procedure to Library.).
Client Credentials Flow

1.The application sends the client credentials to the Identity Server. Those are analyzed and the access token is returned to the application – (1);(2)
Check the step-by-steps below for more information on how to apply each grant type.
1. Select "Authorization Code" from the "Grant Type" drop-down.
2. In the "Client ID" option, fill in the client_id of the application that is supplied by the identity server when registering the application. Ex: ZYDPLLBWSK3MVQJSIYHB1OR2JXCY0X2C5UJ2QAR2MAAIT5Q.
3. The "Use Discovery URI" option is checked by default.
If you keep it checked, you must define the following settings:
When defining the intended URL(s), use "https". HTTPS is the only supported protocol for OAuth 2.0 authentication.
If you uncheck the "Use Discovery URI" option, it means you have to specify all the required URls:
When defining the intended URL(s), use "https". HTTPS is the only supported protocol for OAuth 2.0 authentication.
4. If required, define additional custom parameters in the "Additional Request Parameters" section. This way, if these are required values, it is not necessary to insert them every time the application requests communication with a web service via the current authorization profile.
These additional parameters will generate 2 new sections in the "*mauth" file to be used, if necessary.
Examples
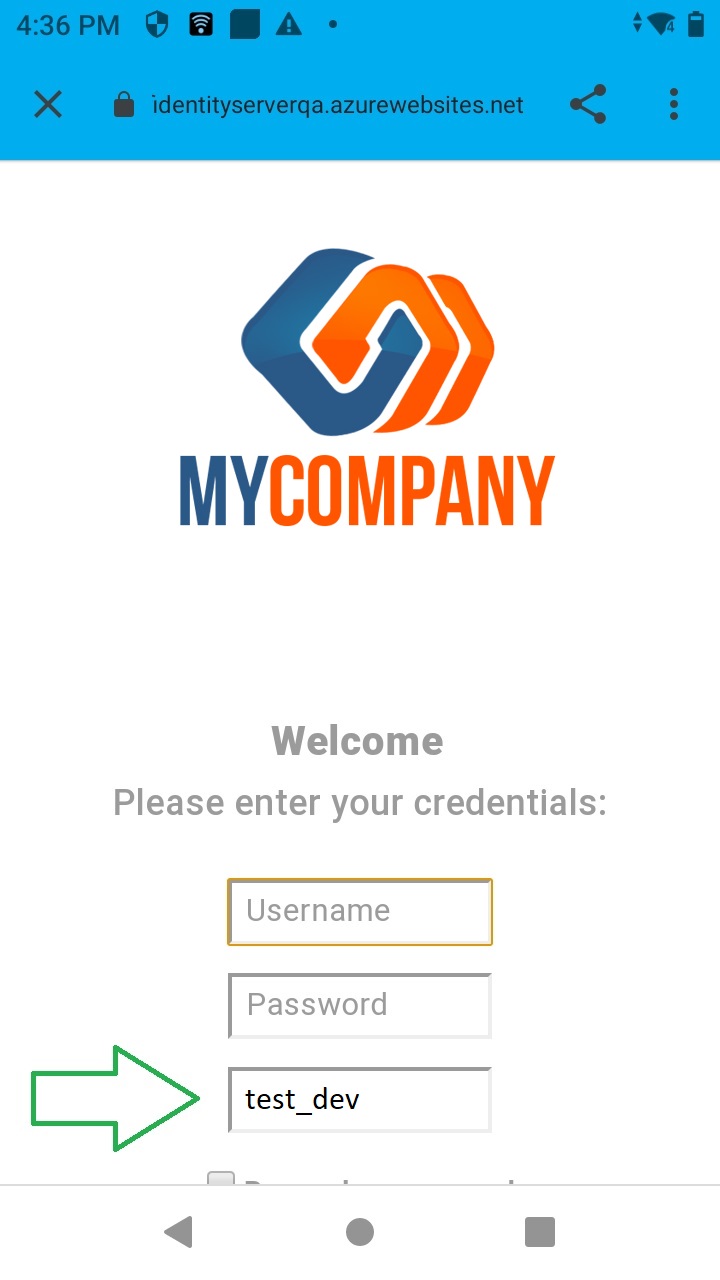
Example of a "*.mauth" file with both Custom Parameters
[AUTH_PARAMS] acr_values=tenant:test_dev
[TOKEN PARAMS] mykey=test_key
Example of an "Authorization" parameter defined for an authorization Profile:
5. In the "API Permissions" section, define the scope of the "authorization code" grant type, meaning, which elements of the user's account can be accessed (ex: profile, email, backoffice.api, etc.). There is already a default scope - "openid". If, for instance, you intend to retrieve user profile information via a "Retrieve ID Token" or "Get User Info" process, you must have this scope defined in this grant type authorization profile. If it is not required, you can remove it from the "Api Permissions" list.
6. Click
|
1. Select the "Password" option from the "Grant Type" drop-down.
2. Fill in the available options in the "Identity Server Settings" section.
When defining the intended URL(s), use "https". HTTPS is the only supported protocol for OAuth 2.0 authentication.
3. If required, define a custom parameter in the "Additional Request Parameters" section. Fill in the "Token" option with the intended token parameter (ex: mykey=test_key).
This way, if this value is needed to communicate with a web service, it is no longer necessary to keep inserting the token value every time the application makes a request to that web service via the current authorization profile.
This additional parameter will generate a new section in the "*mauth" file to be used, if necessary.
Example of a "*.mauth" file with the Custom Parameter
[TOKEN PARAMS] mykey=test_key
4. In the "API Permissions" section, define the "password" grant's scope, meaning, which elements of the user's account can be accessed (ex: profile, email, backoffice.api, etc.).
5. Click
|
1. Select "Client Credentials" from the "Grant Type" drop-down.
2. Fill in the available options in the "Identity Server Settings" section.
When defining the intended URL(s), use "https". HTTPS is the only supported protocol for OAuth 2.0 authentication.
3. If required, define a custom parameter in the "Additional Request Parameters" section. Fill in the "Token" option with the intended token parameter (ex: mykey=test_key).
This way, if this value is needed to communicate with a web service, it is no longer necessary to keep inserting the token value every time the application makes a request to that web service via the current authorization profile.
This additional parameter will generate a new section in the "*mauth" file to be used, if necessary.
Example of a "*.mauth" file with the Custom Parameter
[TOKEN PARAMS] mykey=test_key
4. In the "API Permissions" section, define the "client credentials" grant's scope, meaning, which elements of the user's account can be accessed (ex: profile, email, backoffice.api, etc.).
5. Click
|
Once you have created your authorization profile, you are returned to the "Authorization Profile List" window.
6. Click ![]() to go back to the "Web Service/Web Site" type Host profile.
to go back to the "Web Service/Web Site" type Host profile.
7. Proceed with defining the host's settings and, when you are done, click ![]() to apply the host profile and corresponding authorization profile creation.
to apply the host profile and corresponding authorization profile creation.
To Edit an Authorization Profile
An authorization profile is always associated to a Host profile.
There are 2 ways to access the existing authorization profiles:
•Via the "Host/Aux" tab (a project properties tab). It provides access to all the Host profiles and associated authorization profile within the current project.
•Via a Web Services process, meaning, via its properties window. In this case, you ONLY have access to the Host profiles (and attached Authorization Profile) that are compatible with the selected process.
Choose the most appropriate step-by-step to access the authorization profile you want to edit.
Step-by-Step
1. Open the "Project" menu (located in the Menu Bar), select the "Properties" option and open the "Host/Aux" tab. The authorization profile is displayed attached to the "Web Service/Web Site" Host profile that uses it (check the "Auth. Profile" column).
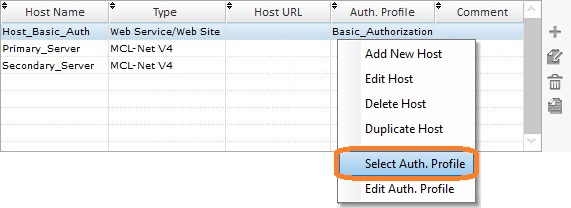
2. Right-click the authorization profile you want to edit (ex: Basic_Authorization) and select the "Edit Auth. Profile" option.
This opens the selected authorization profile's properties window.
3. Edit the required options.
4. Click
5. Keep clicking
|
Step-by-Step
1. Click
2. Right-click the authorization profile you want to edit (ex: Basic_Authorization) and select the "Edit Auth. Profile" option.
This opens the selected authorization profile's properties window.
3. Edit the required options.
4. Click
5. Click
|
To Delete an Authorization Profile
To delete an authorization profile you must, first, access the Host Profile it is associated to.
Use the "Host/Aux" tab (a project properties tab displaying all the host profiles and associated authorization profiles created within the current project) OR open the properties window of a Web Services process to access a table with Host Profiles (and related Authorization Profiles) that are compatible with that process.
Choose the most suitable step-by-step to access the authorization profile you want to delete.
Step-by-Step
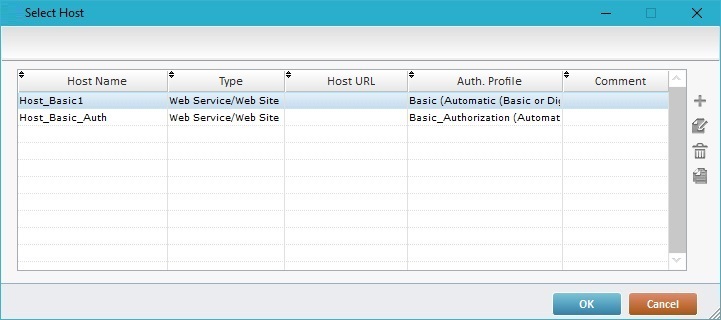
1. Open the "Project" menu (located in the Menu Bar), select the "Properties" option and open the "Host/Aux" tab. The existing authorization profiles are displayed in a table (see the "Auth. Profile" column).
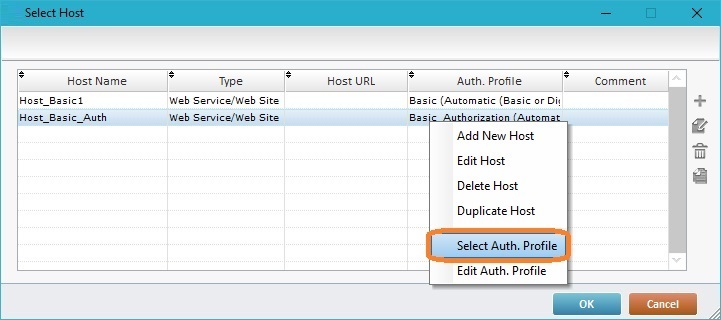
2. Right-click the authorization profile you want to delete (ex: Basic_Authorization) and select the "Select Auth. Profile" option.
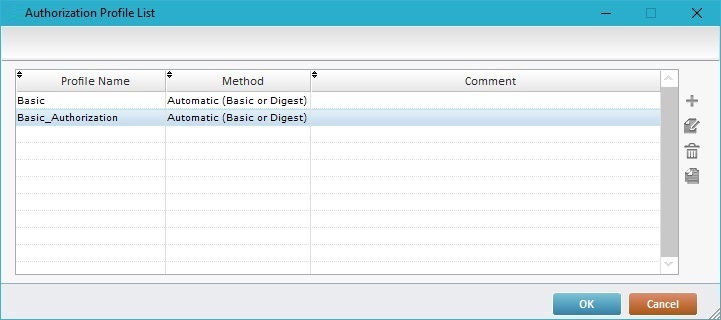
This opens a window with the available authorization profiles.
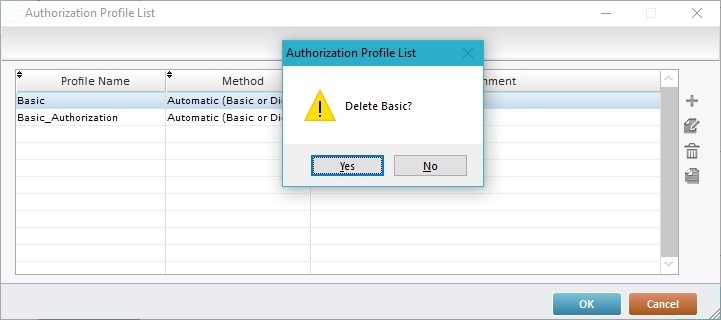
3. Select the authorization profile you want to delete (ex: Basic).
4. Click
5. Click
|
Step-by-Step
1. Click
2. Right-click the authorization profile you want to delete and select the "Select Auth. Profile" option.
This opens the "Authorization Profile List" window.
3. Select the authorization profile you want to delete (ex: Basic).
4. Click
5. Click
|