Working with Call & Parse Process
Process Purpose
The "Call & Parse" process is used to call a web service and parse its response into variables and/or into a data file.
The web service response (body) to be parsed within this process can be obtained through the testing of the current HTTP request or you can copy/paste a body you had saved from a previous call/transaction.
You can parse up to 50 "path names" in one single process.
When you add a process, you are required to define its settings. This occurs in the process's properties window which is displayed automatically after having added the "Call & Parse" process. In this case, the properties window includes five tabs - "Call", "Parse Simple", "Parse to File", "Advanced" and "Error".
If any subsequent edition is required, double-click the process to open its properties window and enter the necessary modifications.
"Call" tab

Fill in the following options:
HTTP Request |
|||||||||
URL |
Define the URL of the web service you want to call. Enter it directly OR click As an alternative, you can use a variable to define the URL (use the "Variable Select" option that is accessed if you right-click this box). |
||||||||
Method |
Select the method for the request from the drop-down OR click |
||||||||
Headers |
If necessary, define the header(s) for the request OR click |
||||||||
Body to Send |
|||||||||
Source |
If it is necessary to add a body to the request, select the source for the body. The selection of the source (Variable/Text/File) affects the related option (located below). The default source is "None", in which case, there will be no more options visible. |
||||||||
Variable/Text/File |
Only visible if a source is selected. Depending on the selected body source, you will access the corresponding field:
|
||||||||
Content-Type |
Only visible if a source is selected. Select the Content-Type from the drop-down OR click |
||||||||
If you want to test the URL you just defined, click ![]() . It opens the "Test Web Service" window. This option not only tests the request, it also obtains/displays the request's response and feeds a related window named "Body to Use for Parsing" with information.
. It opens the "Test Web Service" window. This option not only tests the request, it also obtains/displays the request's response and feeds a related window named "Body to Use for Parsing" with information.
Within this process, it is a floating window, meaning, it does not block MCL-Designer's flow(ex: you can change tab focus) and its content changes depending on context/open tab.
See The Test Web Service window (called from the "Call" tab).
Ex: If the "Test Web Service" window is open in the "Call" tab and you go to the "Parse Simple" or "Parse to File" tab, it becomes the "Body to Use for Parsing" window with the corresponding information (the body of the request's response). If you return to the "Call" tab, it will change back to its original content. See The "Body to Use for Parsing" window.

"Parse Simple" tab

Fill in the following options:
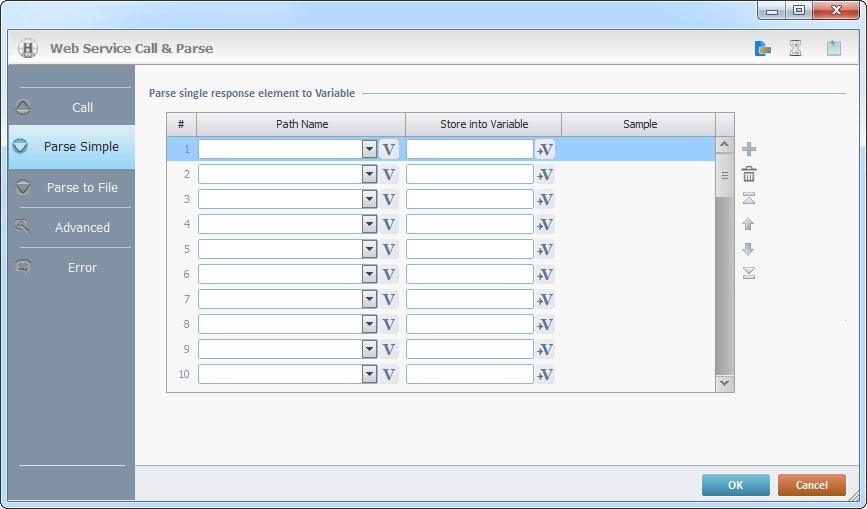
Parse single response element to Variable |
|
Path Name column |
Define the response's elements you want to store into variables. Select the path name(s) from the drop-down list OR click |
Store into Variable column |
Click the corresponding |
Sample column |
NOT editable. Displays a sample of the corresponding data (the selected path name). |
Use the editing icons to the right of the table to move the rows up and down and to delete or add more rows.
The ![]() button (that opens the "Test Web Service" window) is not available in this tab. It is replaced with the
button (that opens the "Test Web Service" window) is not available in this tab. It is replaced with the ![]() button which calls the "Body to Use for Parsing" window. This window focuses on the response's body and enables the drag-and-drop of the array/keys into the "Path Name" related fields. See The "Body to Use for Parsing" window.
button which calls the "Body to Use for Parsing" window. This window focuses on the response's body and enables the drag-and-drop of the array/keys into the "Path Name" related fields. See The "Body to Use for Parsing" window.
"Parse to File" tab

Fill in the following options:
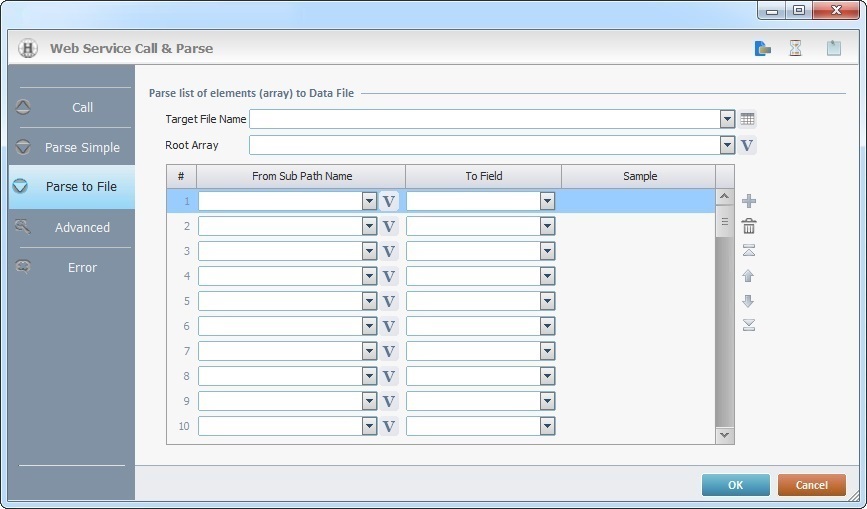
Parse list of elements (array) to Data File |
|
Target File Name |
Define the target data file from the drop-down. If you need to edit the selected data file, click |
Root Array |
Select the Root Array from the drop-down OR click |
From Path Name column |
Define the elements you want to store into data file fields. Select the Path Name(s) from the drop-down OR click If you have defined the root array with the use of the "Body to Use for Parsing" window, you may already have these fields filled in (the Drag-and-Drop of the array from the "Body to Use for Parsing" window allows for the automatic retrieval of the existing path names and the filling in of this column. |
To Field column |
Select the data file fields that will receive the information from the drop-down. |
Sample column |
NOT editable. Displays a sample of the corresponding data (the selected path name). |
Use the editing icons to the right of the table to move the rows up and down and to delete or add more rows.
![]()
When parsing the body of a JSON or XML response, do NOT create complex structures because they are not supported.
Simple Array (Recommended Structure) |
Multiple Arrays (Not Supported Structure) |
{ "Person": [ { "FirstName":<Data_Field_FirstName>, "LastName":<Data_Field_FirstName>, "Street":<Data_Field_Address_Street>, "Number":<Data_Field_Address_Number> } ] } |
{ "Person": [ { "FirstName":<Data_Field_FirstName>, "LastName":<Data_Field_FirstName>, "Address": { "Street":<Data_Field_Address_Street>, "Number":<Data_Field_Address_Number> "FirstName":<Data_Field_FirstName>, "LastName":<Data_Field_FirstName>, "Address": "Street":<Data_Field_Address_Street>, "Number":<Data_Field_Address_Number> { } } ] } |
Click![]() (located on the tab's upper right corner) to open the "Body to Use for Parsing" window. This is a useful window because you can view the web service response and use the Drag-and-Drop mechanism to define the displayed response's parsing in the related tabs. See The "Body to Use for Parsing" window.
(located on the tab's upper right corner) to open the "Body to Use for Parsing" window. This is a useful window because you can view the web service response and use the Drag-and-Drop mechanism to define the displayed response's parsing in the related tabs. See The "Body to Use for Parsing" window.
If you open a "Test Web Service" window (via the ![]() icon) in the "Call" tab and leave it open while proceeding to the "Parse to File" or "Parse Simple" tabs, the window will be replaced with the "Body to Use for Parsing" window.
icon) in the "Call" tab and leave it open while proceeding to the "Parse to File" or "Parse Simple" tabs, the window will be replaced with the "Body to Use for Parsing" window.

"Advanced" tab

![]()
If you intend to reuse the obtained response in a "Parse Response" process, you have to store the response body to a variable or file.
Fill in the following options:
Response (Body) |
|||||||
Store Body to |
Select the target for the response's body. The selection of the target (Variable/File) affects the related option (located below). |
||||||
Variable/File |
Depending on the selected target, you will access the corresponding option:
|
||||||
Content Type |
Click |
||||||
Response (Header) |
|||||||
Full Header |
Click |
||||||
Status Code |
Click |
||||||
"Error" tab

Fill in the following options:
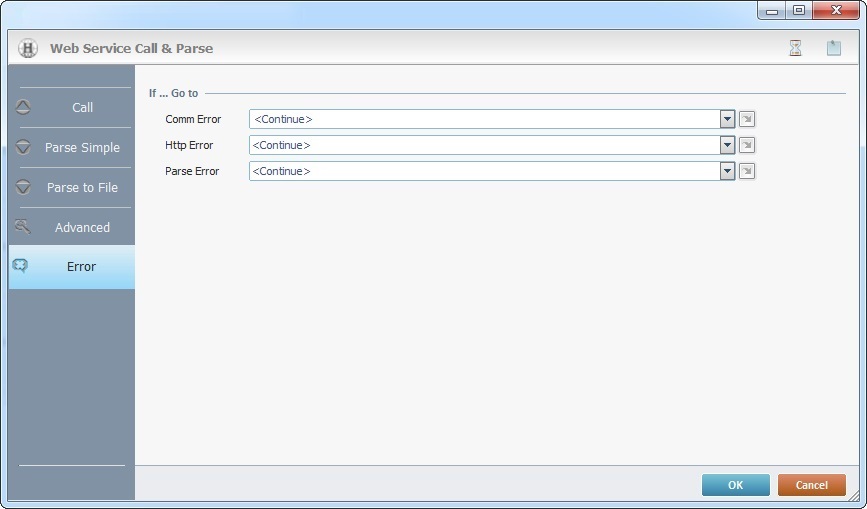
If ... Go to |
|
Comm Error |
Select a target location from the drop-down or
|
Http Error |
Select a target location from the drop-down or
|
Parse Error |
Select a target location from the drop-down or
|
Detail of a ![]() window:
window:

"S:Menu" is a screen included in the same program as the process.
"R:Routine_1" is a routine included in the same program as the process.
If required, use the icons on the upper right corner of the properties window:
•Click ![]() to define a time out. See Time Out.
to define a time out. See Time Out.
•Click ![]() to attach any relevant notes to this process. Click it and enter your notes in the resulting text box. These notes will be displayed in the corresponding "Actions" tab or "Process" window (in the "Notes" field) and in the "Developer Report".
to attach any relevant notes to this process. Click it and enter your notes in the resulting text box. These notes will be displayed in the corresponding "Actions" tab or "Process" window (in the "Notes" field) and in the "Developer Report".
When you are done filling in/editing the tabs of the properties window, click ![]() to apply.
to apply.
The added process is displayed in the corresponding "Actions" tab or "Process" window.
If you want to view this process applied within an application, check our "Sample Book Catalog" in Sample Applications.
If you want to view this process applied within an application, see Sample Applications.
The "Test Web Service" window (called from the "Call" tab)
The "Call" tab provides the ![]() icon (in the upper right corner) so you can access a "Test Web Service" window. Use this option to retrieve/expose the web service's response (header and body). This allows for an easier manipulation of that data (ex: defining path names via the "Body to Use for Parsing" window and the Drag-and -Drop mechanism).
icon (in the upper right corner) so you can access a "Test Web Service" window. Use this option to retrieve/expose the web service's response (header and body). This allows for an easier manipulation of that data (ex: defining path names via the "Body to Use for Parsing" window and the Drag-and -Drop mechanism).
The window's content/information display depends on the context (the calling tab) and on the means used to define the request's web service:
Medium A - the immediate use of the web service's URL.
Medium B - the use of a response body. This medium is mainly used when it is not possible to access the intended web service.
Step-by-step
1. In the "Call" tab, define the URL for the HTTP request (enter it or use the URL assistant
2. Click
Since you have already defined a URL, the window automatically tests the referred web service and displays the corresponding header(s) and body.
3. If required, click
4. If required, edit the window's content with the use of the right-click options or keyboard keys and click
Use this window's editing capabilities, if you want to parse different responses from the same web service.
5. If the defined URL includes variables, use the
6. At this point, you can leave the "Test Web Service" window open (this is a floating window with a content that changes according to context/active tab) OR click If it remains open and you proceed to the "Parse Simple" or "Parse to File" tabs, the window will change into the "Body to Use for Parsing" window. This window focuses on the web service's response body and you will be able to manipulate the displayed arrays/keys. See The "Body to Use for Parsing" window.
|
Step-by-step
1. Define a web service's URL In the "Call" tab.
2. Click
3. In case of a failed connection (because you are offline), the system may retrieve any previous content or you may view a failed request message. Empty the window, before proceeding.
4. Copy/paste the content of the header/body of the intended web service from an outside source into the corresponding boxes.
5. The
6. If required, edit the window's content with the use of the right-click options or keyboard keys and click
7. If you are back online, click
8. If the defined URL includes variables, use the
Use this window's editing capabilities, if you want to parse different responses from the same web service.
9. At this point, you can leave the "Test Web Service" window open (this is a floating window with a content that changes according to context/active tab) OR click
|
![]() If you want to use a label as a target destination, you can use the "Auto-Label" mechanism. This alternative to the "Set Label" process allows you to create a label in the properties window of a process - specifically, in the fields used to define target destinations (ex: the "If Error..." type fields). See To Automatically Create a Label.
If you want to use a label as a target destination, you can use the "Auto-Label" mechanism. This alternative to the "Set Label" process allows you to create a label in the properties window of a process - specifically, in the fields used to define target destinations (ex: the "If Error..." type fields). See To Automatically Create a Label.
![]()
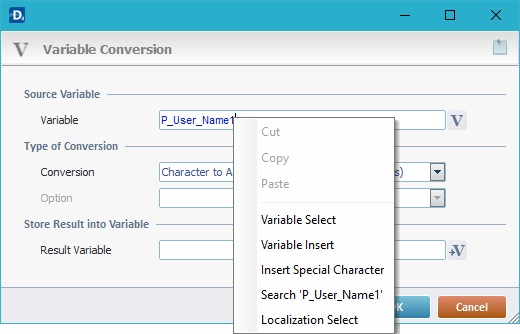
Use the right-click in MCL-Designer's input boxes to access some related options as well as the general "Cut", "Copy"; "Paste"; "Search" actions (active/inactive according to the current context).
Ex: If you right-click the "Variable" input box (included in a "Conversion's" properties window), you are provided with general editing/search actions and other more specific options such as "Variable Select" (see "Variable Select"); "Variable Insert" (see "Variable Insert"); "Insert Special Character" (see To Insert Special Characters into a Control's Text Input Field) and "Localization Select" (see Localization List).
If you right-click another input box, it may provide other possibilities.
