|
Working with Outbox / Post Message Foreground Process |
  
|
Working with Outbox / Post Message Foreground Process
|
Working with Outbox / Post Message Foreground Process |
|
Process Purpose
This is a Messagebox Service related process.
The "Outbox / Post Message Foreground" process is used to synchronously post messages into a specific topic - the back-end is polling the topic to retrieve the posted messages.
This communication is handled in the foreground, meaning, the application handles the call/message posting into the topic and it stops its workflow until the message is delivered.
When you add a process, you are required to define its settings. This occurs in the process's properties window which is displayed automatically after having added the "Outbox / Post Message Foreground" process.
If any subsequent edition is required, double-click the process to open its properties window and enter the necessary modifications.
In this case, the properties window includes two tabs - "Message" and "Error".
"Message" tab
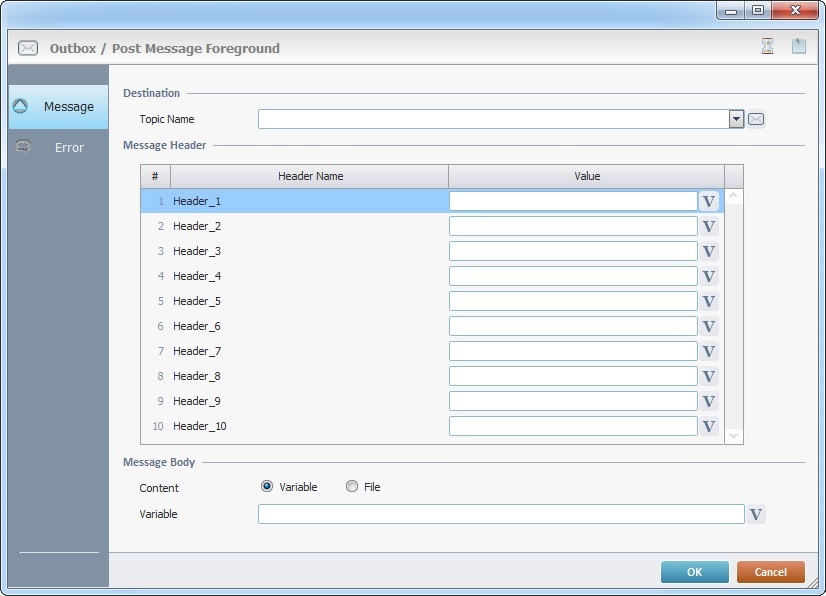
Fill in the following options:
Destination |
|||||||
Topic Name |
Select the required topic profile from the drop-down. If necessary, click |
||||||
Message Header |
|||||||
Header Name column |
This column automatically displays the headers that were defined in the selected topic profile. It is NOT editable. |
||||||
Value column |
This column automatically displays the default value for each header that was defined in the selected topic profile. If required, define a new value for the selected header. Enter it OR click |
||||||
Message Body |
|||||||
Content |
Define the content type for the message's body - "Variable" (default selection) OR "File". This selection affects the related option (located below). Select the content type for the message's body. The selection of the target (Variable/File) affects the related option (located below). |
||||||
Variable/File |
Depending on the selected content type, you will access the corresponding field:
|
||||||
Proceed to the "Error" tab.
"Error" tab

Fill in the following options:
If ... Go to |
|
Comm Error |
Select a target location from the drop-down or |
Http Error |
Select a target location from the drop-down or |
Status Code |
Define the variable that stores the status code of the HTTP response. Click |
Detail of a ![]() window:
window:

"S:Menu" is a screen included in the same program as the process.
"R:Routine_1" is a routine included in the same program as the process.
If required, use the icons on the upper right corner of the process properties window:
![]() Use it to set up a time out. See Time Out.
Use it to set up a time out. See Time Out.
![]() Use the icon to attach any relevant notes to this process. Click it and enter your notes in the resulting text box. These notes will be displayed in the corresponding "Actions" tab or "Process" window (in the "Notes" field) and in the "Developer Report".
Use the icon to attach any relevant notes to this process. Click it and enter your notes in the resulting text box. These notes will be displayed in the corresponding "Actions" tab or "Process" window (in the "Notes" field) and in the "Developer Report".
After filling in the required options, click ![]() to conclude or
to conclude or ![]() to abort the "Outbox / Post Message Foreground" process.
to abort the "Outbox / Post Message Foreground" process.
The added process is displayed in the corresponding "Actions" tab or "Process" window.
![]()
When creating a file, we recommend you use the related best practices (ex: do NOT use special characters).
For more detailed information, register/log in to our MCL Community and access MCL's Knowledge Base ("File Name Best Practices").
![]() If you want to use a label as a target destination, you can use the "Auto-Label" mechanism. This alternative to the "Set Label" process allows you to create a label in the properties window of a process - specifically, in the fields used to define target destinations (ex: the "If Error..." type fields). See To Automatically Create a Label.
If you want to use a label as a target destination, you can use the "Auto-Label" mechanism. This alternative to the "Set Label" process allows you to create a label in the properties window of a process - specifically, in the fields used to define target destinations (ex: the "If Error..." type fields). See To Automatically Create a Label.
![]()
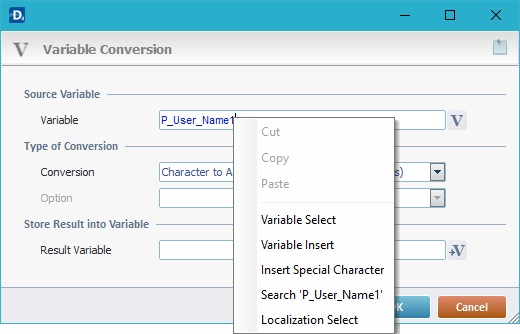
Use the right-click in MCL-Designer's input boxes to access some related options as well as the general "Cut", "Copy"; "Paste"; "Search" actions (active/inactive according to the current context).
Ex: If you right-click the "Variable" input box (included in a "Conversion's" properties window), you are provided with general editing/search actions and other more specific options such as "Variable Select" (see "Variable Select"); "Variable Insert" (see "Variable Insert"); "Insert Special Character" (see To Insert Special Characters into a Control's Text Input Field) and "Localization Select" (see Localization List).
If you right-click another input box, it may provide other possibilities.