Overview
Applications are, by default, shared by the account, meaning, it does not matter which site carries out the uploading, the application is available to all sites included in the account. However, if you do not want to make it available to other sites, you can restrict access to it. It is also possible to append files to the application. These actions can be determined when you are adding an application to the account or later on (so long as the application has not already been included in a configuration or deployment). See Editing an Application and Appending Files to an Application.
Step-by-step
1. In the Site Dashboard's "Control Panel", click ![]() and, in the resulting row below, select
and, in the resulting row below, select ![]() . Clicking it opens the "Applications" page.
. Clicking it opens the "Applications" page.

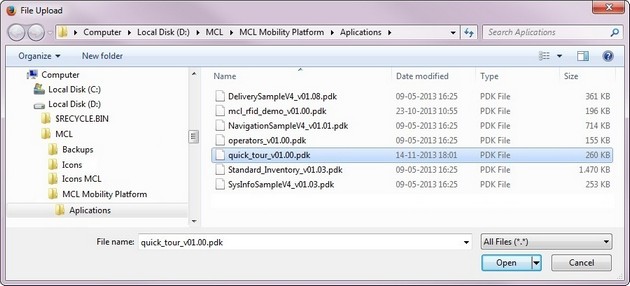
2. Click ![]() to open an OS file explorer window.
to open an OS file explorer window.

3. Select the required application.
![]()
The selected file must have a .pdk extension.
4. Click ![]() to upload the application.
to upload the application.
![]() Make sure you do not already have an application with the same name as the application you want to upload.
Make sure you do not already have an application with the same name as the application you want to upload.
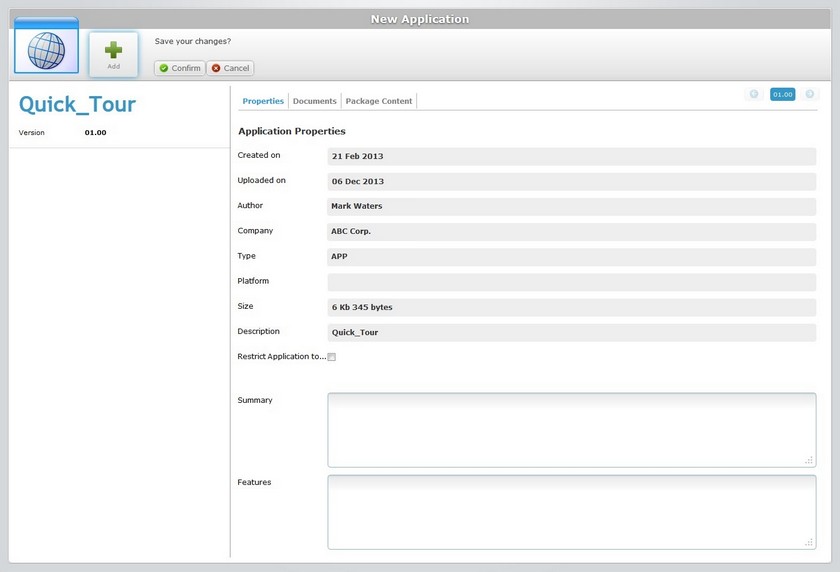
The application is uploaded automatically and opens the following page in the "Properties" tab. If you get an error message, check Possible Error Message(s).

5. Edit the available fields. The only editable fields in this tab are the following:
Restrict Application to...(this Site) |
Check this option if you want to limit application access to this site. This means that the application is only available for this site. |
Summary |
If relevant, add information regarding the application. |
Features |
If relevant, add information regarding the application's features. |
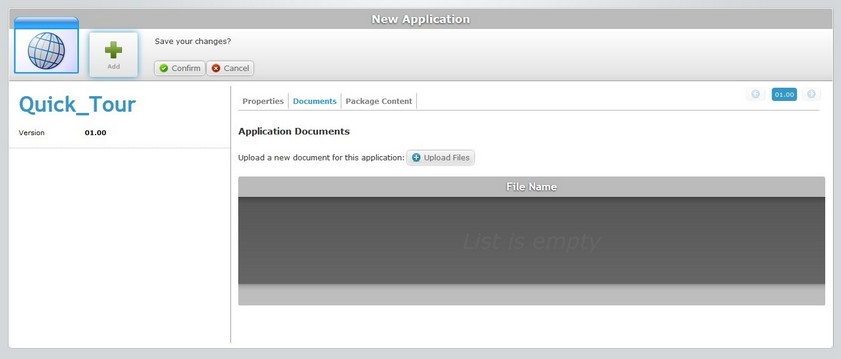
6. Proceed to the "Documents" tab.

7. If required, attach files to the newly uploaded application (ex: user guide). Click ![]() to upload the appropriate additional files. See Appending Files to an Application.
to upload the appropriate additional files. See Appending Files to an Application.
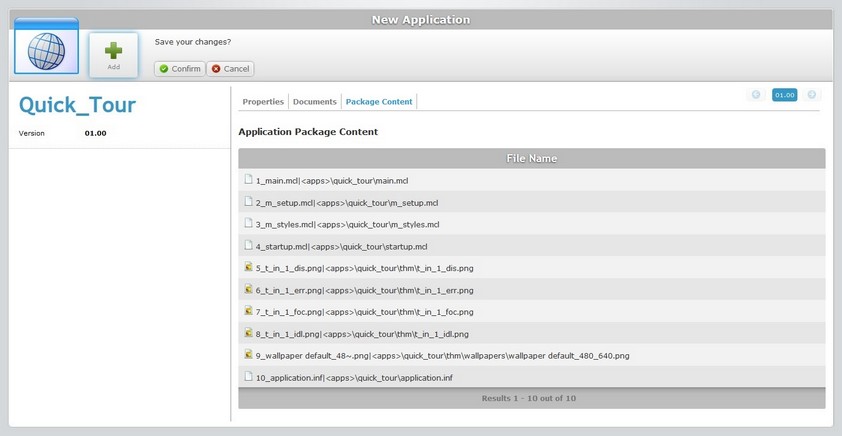
8. Go to the "Package content" tab to check the application's files.

This tab is NOT editable.
9. Conclude the application upload by clicking ![]() .
.
![]()
Occurrence: When defining the application to be uploaded.
Cause: The account already includes an application with the same name as the application being uploaded.
Action: Change the name of the application being uploaded OR delete the application already in the account. Then, repeat the application selection and upload.
![]()
Occurrence: When defining the application to be uploaded.
Cause: All uploaded applications must have a .pdk extension.
Action: Select a file with a .pdk extension and repeat the upload.