Overview
When planning a deployment (see Creating a Deployment), you can schedule it "As soon as possible" or for a specific date and time.
Since you can plan a deployment in other contexts, not just in the "Deployment" sub-module, the following presents all the possible options to open a "Deployment Plans" window:
a. In the "Deployment Plans" page, click ![]() . For more information, see Creating a Deployment.
. For more information, see Creating a Deployment.
b. In the "Deployment Plans" page, click the planned deployment date (displayed in light blue). For more information, see Editing a Deployment.
c. In the "Configurations" page, click ![]() . For more information, see Assigning a Configuration to a Device Group.
. For more information, see Assigning a Configuration to a Device Group.
d. In the "Device groups" page, click ![]() . For more information, see Planning a Deployment for a Device Group.
. For more information, see Planning a Deployment for a Device Group.
e. In the "Device Group Details" page, click ![]() .For more information, see Planning a Deployment for a Device Group.
.For more information, see Planning a Deployment for a Device Group.
![]() Depending on the path used to open a "Deployment Plans" window, the window may display different options to select from.
Depending on the path used to open a "Deployment Plans" window, the window may display different options to select from.
Ex: If you open a "Deployment Plans" window using ![]() (on the "Deployment Plans" page), you have to select the target device group, the configuration, the mode and planning date.
(on the "Deployment Plans" page), you have to select the target device group, the configuration, the mode and planning date.
However, if you are currently on a specific "Device Group Details" page and click ![]() , ,it is no longer necessary to select a device group. Only the configuration, the mode and planning date options are available.
, ,it is no longer necessary to select a device group. Only the configuration, the mode and planning date options are available.
Once you have opened the "Deployment Plans" window and select the target device group and/or the configuration (depending on the window's available options), you are provided access to the "Planning date" option.
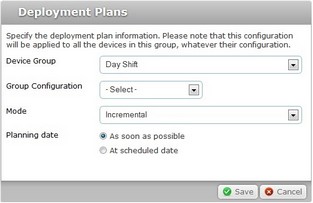
| • | If you check the "As soon as possible" option, the deployment will start as soon as the devices, included in the target device group, contact the account. |
| • | If you check the "At scheduled date", a new option is activated to allow you to schedule the deployment. |
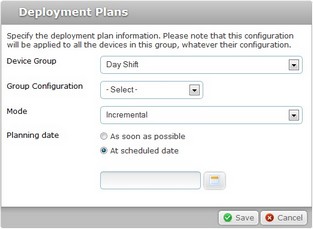
To define a specific date/time for the deployment, proceed as follows:
Step-by-step
1. Click ![]() to display a calendar.
to display a calendar.
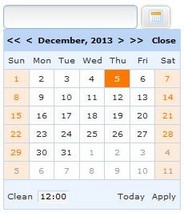
The calendar highlights the current day.
2. Select the intended day for the deployment. Use the <</</>/>> to navigate the months/years.
If you want to deploy on the day you are scheduling the deployment, click ![]() .
.
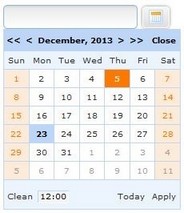
3. To define the hour for the deployment (default hour is 12:00), click the box with the hour. This provides further options.
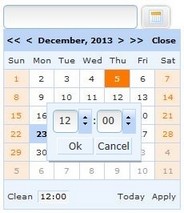
4. Select the desired hour/minutes with the scroll arrows (ex: 15:00) or enter the information in the corresponding boxes.
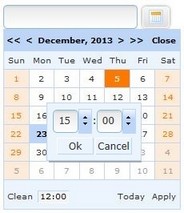
5. Click ![]() to apply or
to apply or ![]() to abort the hour selection.
to abort the hour selection.
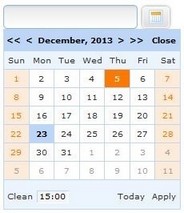
If you want to clear all your options, click ![]() and start over (steps 2, 3, 4 and 5).
and start over (steps 2, 3, 4 and 5).
If you want to exit the calendar, click ![]() .
.
6. When the date/time is defined, click ![]() and your choices are displayed in the "Planning date" field of the "Deployment Plans" window.
and your choices are displayed in the "Planning date" field of the "Deployment Plans" window.
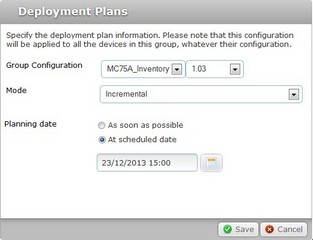
7. Conclude the deployment planning operation by clicking ![]() .
.
![]() As an alternative, enter the desired date and time for the deployment in the
As an alternative, enter the desired date and time for the deployment in the ![]() box and click
box and click ![]() .
.
Enter the information with the following format - DD/MM/YYYY(space)HH:MM. Ex: ![]() .
.