Overview
A Deployment is the task responsible for sending and uploading a configuration into a device group. Even though configurations are available to all sites in the account, deployments are tasks which are limited to the site they are created in.
![]()
A deployment always implies the previous creation of a configuration and a device group.
For more detailed information, see Creating a Configuration and Creating a Device Group.
![]() Before creating a new deployment, check the "Deployment Plans" page to avoid creating incompatibilities or duplicated deployments.
Before creating a new deployment, check the "Deployment Plans" page to avoid creating incompatibilities or duplicated deployments.
Step-by-step
1. To access the Deployments sub-module, click ![]() (in the Control Panel) and, in the resulting row below, click
(in the Control Panel) and, in the resulting row below, click ![]() .
.
This opens the "Deployment Plans" page.

2. Click ![]() to open the "Deployment Plans" window.
to open the "Deployment Plans" window.
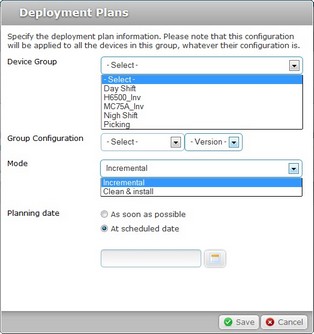
3. Fill in the options available.
Device Group |
Select the target device group for this deployment from the drop down list. |
|---|---|
Group Configuration |
Select the configuration and version to be deployed from the drop-down list (the list only displays compatible configurations for the selected device group). |
Mode |
Select the deployment mode: Incremental: Only components present in the deployed configuration, that are not present on the device, will be implemented. Clean & install: Deletes all the applications/firmwares and forces the installation of the components present in the deployed configuration. |
Planning date |
Select a type of scheduling: As soon as possible: the deployment will happen as soon as the device contacts the account and the deployment criteria are met. At scheduled date: Click |
4. After defining all the available details, click ![]() .
.
Check the Possible Error Message(s), if an error occurs.
![]()
Deployments can be planned in other contexts and sub-modules. If you use any of the options below, you also open a "Deployment Plans" window:
| • | In the "Deployment Plans" page, click the planned deployment date (displayed in light blue). For more information, see Editing a Deployment. |
| • | In the "Configurations" page, click |
| • | In the "Device groups" page, click |
| • | In the "Device Group Details" page, click |
![]() Depending on the context, a "Deployment Plans" window may display different options to select from.
Depending on the context, a "Deployment Plans" window may display different options to select from.
Ex: If you open a "Deployment Plans" window in the "Deployment Plans" page, you have to select the target device group, the configuration, the mode and planning date.
However, if you are currently on a specific "Device Group Details" page and open a "Deployment Plans" window, it will only provide the configuration, the mode and planning date options since it is no longer necessary to select a device group.
![]()
Occurrence: When clicking ![]() .
.
Cause: No configuration version is selected.
Action: Select a configuration version from the available choices, in the "version" drop-down box and click ![]() .
.
At Device Level
Once a deployment is created, and depending on the selected “Planning date” option ("as soon as possible" or a specific date), all the devices belonging to the selected device group will receive the defined configuration (if the deployment criteria are met). Depending on the device's Operating System (Windows Mobile or Android), the deployment's screen sequence will be different:
Screen Sequence of a Deployment in a Windows Mobile Device
![]() To start a deployment, the target device(s) must be in the cradle, connected to external power (a default deployment criteria for windows mobile devices).
To start a deployment, the target device(s) must be in the cradle, connected to external power (a default deployment criteria for windows mobile devices).
![]() Each device must have MCL-Agent already installed. For more information, see Installing MCL-Agent into a Windows Mobile Device.
Each device must have MCL-Agent already installed. For more information, see Installing MCL-Agent into a Windows Mobile Device.
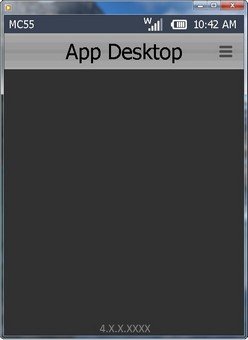
1. Initial App Desktop state before starting the deployment.
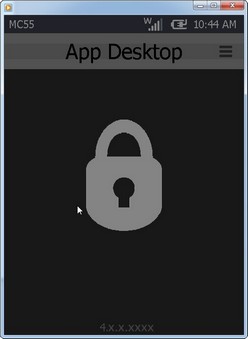
2. During the deployment, the screen is locked and displays the image of a padlock.
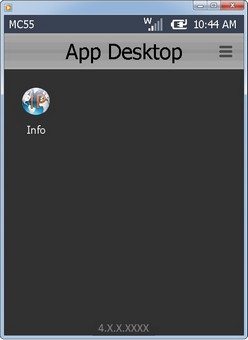
3. Once the deployment is concluded, the screen is unlocked and, if the deployment includes an application, the "App Desktop" displays that application's shortcut icon.
Screen Sequence of a Deployment in an Android Device
![]() Each device must have MCL-Agent already installed. For more information, see Installing MCL-Agent into an Android Device.
Each device must have MCL-Agent already installed. For more information, see Installing MCL-Agent into an Android Device.
1. Initial App Desktop state before starting the deployment.

2. Once the deployment criteria are met, the App Desktop closes and displays the last OS open area.
(The deployment downloads and installs its components.)
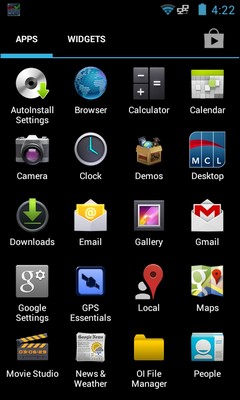
3. The App Desktop starts again.

4. Final App Desktop state once the deployment is finished.
