Overview
The following steps describe how to execute the "Pairing" of an Android ![]() device.
device.
![]()
The "pairing" operation will occur simultaneously on the device and on the MCL-Mobility Platform account because you are registering a device in your account with information provided by the device's MCL application (MCL-Agent).
![]() Make sure the Android device's system date is set later than 2010 before initializing the paring process.
Make sure the Android device's system date is set later than 2010 before initializing the paring process.
![]() Connect your Android device to the Internet by Wifi.
Connect your Android device to the Internet by Wifi.
![]()
Confirm if the destination site for the pairing operation includes a compatible device group. If there is none, you must create it. For more information, see Creating a Device Group.
Step-by-step
![]() If the Android device's "APP Desktop" is already launched and connected to the Internet, go to Step 4.
If the Android device's "APP Desktop" is already launched and connected to the Internet, go to Step 4.
1. Start by making sure that the Android device has MCL-Agent installed. If it is not, install it. For more information, see Installing MCL-Agent into an Android Device.
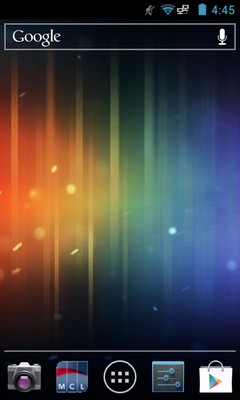
2. Launch "App Desktop" by clicking ![]() .
.

3. There are two ways to initiate the "Pairing" operation:
a. By clicking ![]() (on the screen's upper right corner).
(on the screen's upper right corner).
b. By clicking the "Menu button" (![]() ) (a software or hardware key on the Android device).
) (a software or hardware key on the Android device).
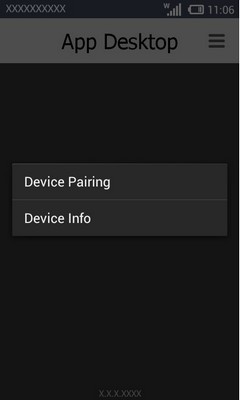
4. Click ![]() .
.
5. Wait a few moments for the device's MCL-Agent to generate an 8 numbers sequence PIN.
The Android device displays the pin code to be entered in your MCL-Mobility Platform account.
If you want to abort the "pairing" operation, click ![]() .
.
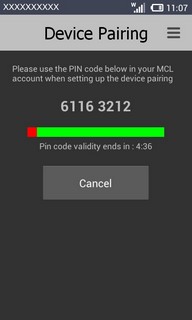
![]() Be aware of the 5 minutes countdown warning you to continue and conclude the "Pairing" procedure in those 5 minutes.
Be aware of the 5 minutes countdown warning you to continue and conclude the "Pairing" procedure in those 5 minutes.
6. Open the MCL-Mobility Platform site with the device group you want to include this device in.
7. Click ![]() (located on the "Control Panel").
(located on the "Control Panel").
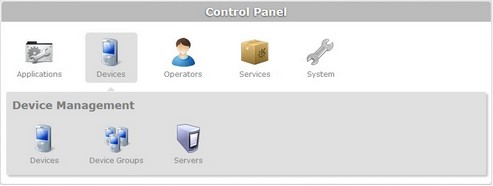
8. In the resulting row below, click ![]() to access the "Devices" page.
to access the "Devices" page.

9. Click ![]() .
.
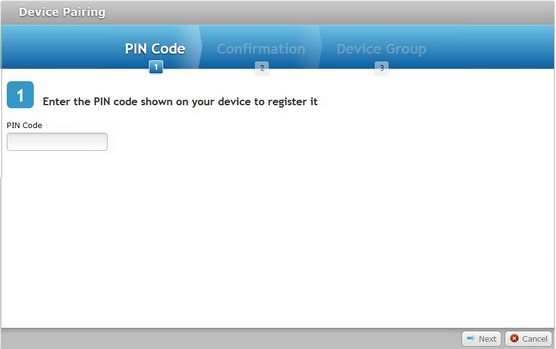
10. Enter the PIN Code (8 numbers) provided by the Android device's MCL-Agent.
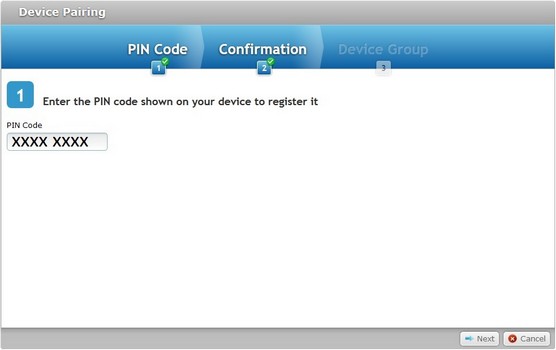
11. Click ![]() .
.
If an error message appears, check Possible Error Message(s) to know how to proceed.
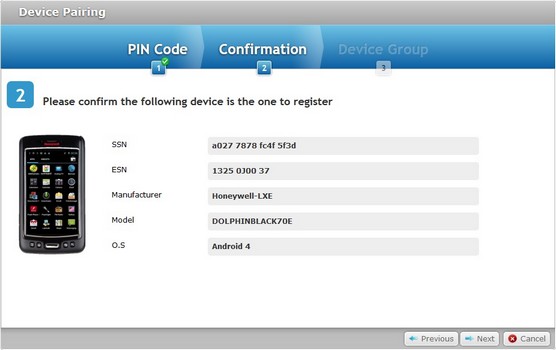
12. Check the information about the device.
SSN |
The device's software serial number. |
|---|---|
ESN |
The device's manufacturer serial number. |
Manufacturer |
The device's manufacturer. |
Model |
The device's model. |
O.S. |
The device's Operating System. |
13. Click ![]() to proceed.
to proceed.
If you want to return to the previous window and restart, click ![]() .
.
If you want to abort the operation, click ![]() .
.
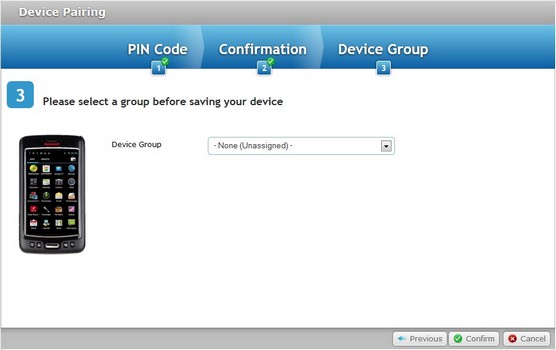
14. Select the appropriate device group. The drop-down list only displays device groups that are compatible with the Android device.
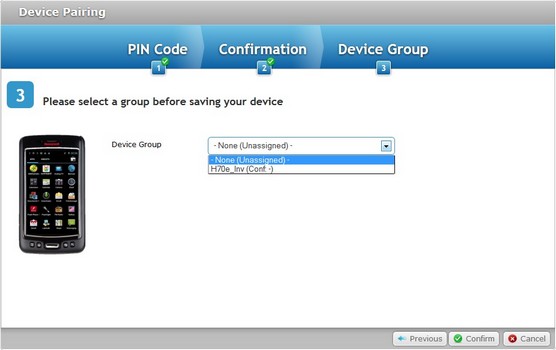
15. Click ![]() to conclude the pairing operation in MCL-Mobility Platform.
to conclude the pairing operation in MCL-Mobility Platform.
If you want to return to the previous window, click ![]() .
.
If you want to abort the operation, click ![]() .
.
Once you click ![]() , the corresponding "Device Details" page opens.
, the corresponding "Device Details" page opens.
![]()
The device has a "disabled" status, by default. To change it, see Changing a Device's Status.
16. Return to your Android device.
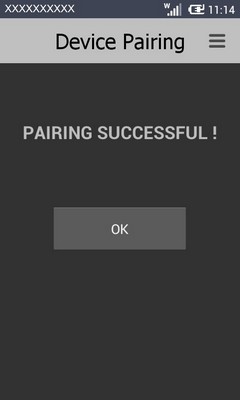
18 Click ![]() to conclude the pairing operation in the Android device and return to the "App Desktop".
to conclude the pairing operation in the Android device and return to the "App Desktop".
In MCL-Mobility Platform:
![]()
![]()
Occurrence: After entering the Pin and clicking ![]() .
.
Cause: The entered Pin is incorrect.
Action: Make sure the PIN code is correct, enter it in the appropriate field and click ![]() .
.
In the Android ![]() device
device
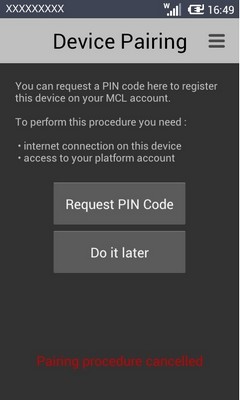
Occurrence: After clicking ![]() in the screen that displays the generated Pin Code (step 5).
in the screen that displays the generated Pin Code (step 5).
Cause: Aborted pairing operation.
Action: Click ![]() to return to the "App Desktop" OR click
to return to the "App Desktop" OR click ![]() to resume the pairing operation.
to resume the pairing operation.
Installing MCL-Agent into an Android ![]() device
device
![]() Download the most appropriate Android MCL-Agent Package:
Download the most appropriate Android MCL-Agent Package:
For more information, check our MCL-Technologies download website.
![]() The device images may vary according to the installed Android version.
The device images may vary according to the installed Android version.
1. Turn on the device.
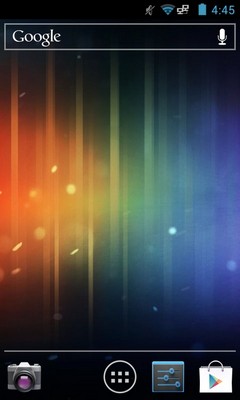
2. Connect the device to a computer, via USB. Your Android device will automatically detect the USB connection.
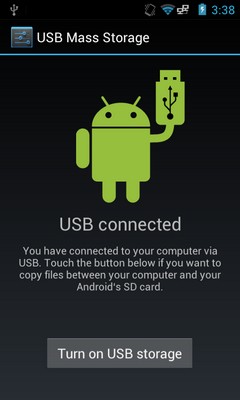
3. Click ![]() .
.
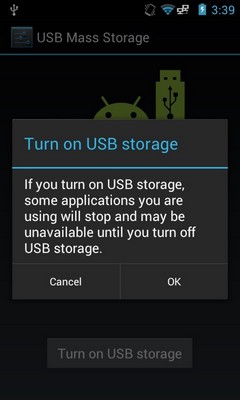
4. Click ![]() .
.
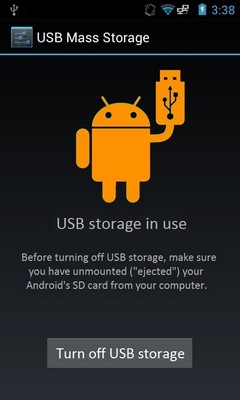
Once the USB connection is established, you view a "USB storage in use" message on the screen.
5. In your PC, a window opens warning you that the device is ready (if Autoplay options are set to do it).
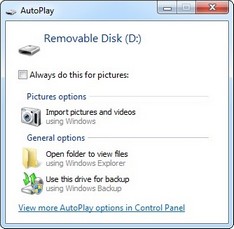
If Autoplay options are not set to open/execute, use the OS browse window to check for the "Removable Disk" that represents the Android device.
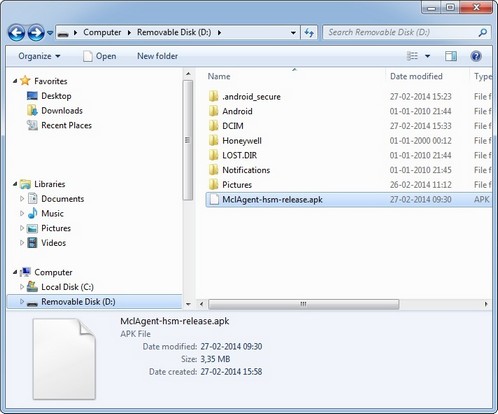
a. Use the OS browse window to go to the folder where you downloaded the Android MCL-Agent Package file into.
b. Select and copy the file.
c. Back in the Android device (referred has "Removable Disk"), paste the copied Android MCL-Agent Package file into a location of your choice.
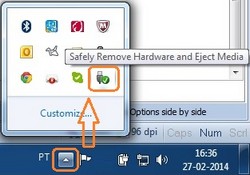
6. Use the "Safely Remove Hardware and Eject Media" tool, on your PC, to safely disconnect the Android device from your PC.
The screen of your Android device displays ![]() .
.

7. In your Android device, click ![]() to end the USB connection.
to end the USB connection.

8. Remove the USB cable from your Android device.
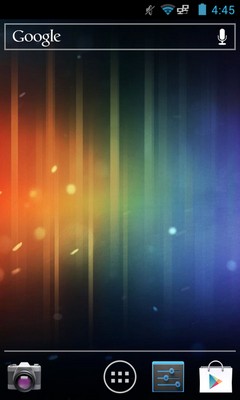
9. Click the "Apps" button (![]() ).
).
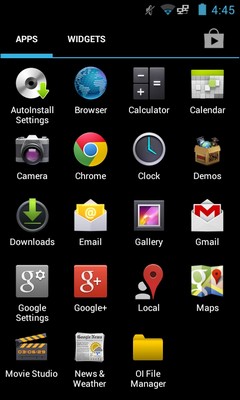
10. Click ![]() and open the Android File Manager to locate the Android MCL-Agent Package file you have copied.
and open the Android File Manager to locate the Android MCL-Agent Package file you have copied.

11. Execute the Android MCL-Agent Package file by pressing it.
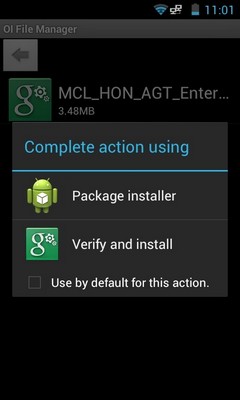
12. Click the ![]() option.
option.
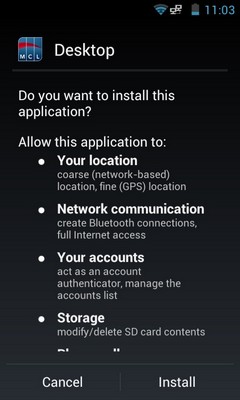
13. Click ![]() to continue.
to continue.
|
|
|
14. Click ![]() .
.

15. Proceed to register the device in the account (Pairing).