|
Working With SOAP Process |
  
|
Working With SOAP Process
|
Working With SOAP Process |
|
Process Purpose
The "SOAP" process is used to connect and use any available/defined SOAP Web Services to send data and parse responses from those SOAP Web Services.
You can parse up to 160 "param names" (In and OUT parameters) in one single process.
This process does not support requests/responses with arrays or complex structures.
![]()
If the SOAP request and/or expected SOAP response you intend to use in the project consists of arrays or other complex structures, use the "HTTP Request" process with an "XML to File" or an "XML to Variable(s)" process instead of the "SOAP" process. These 2 processes will establish the communication between the application and the web service and ensure the parsing of the response's data, however complex.
For more detailed information and examples, register/log in to our MCL Support Portal and access MCL's Knowledge Base.
When you add a process, you are required to define its settings. This occurs in the process's properties window which is displayed automatically after having added the "SOAP" process. In this case, the properties window includes five tabs - "General", "In", "Out", "Fault" and "Error".
If any subsequent edition is required, double-click the process to open its properties window and enter the necessary modifications.
"General" tab

Fill in the following options:
Web Service (SOAP) Request |
|
End Point |
Select a host profile from the drop-down OR click See To Create a Host Profile OR To Edit a Host Profile . As an alternative, you can use a variable to define the End Point (use the "Variable Select" option that is accessed if you right-click this box). |
Web Service |
Select a "Web Service" profile from the drop-down OR click |
Comment |
If relevant, add notes to the label. |
Operation |
Select an operation provided by the selected Web Service profile from the drop-down. |
Information |
Not editable. Receives the Web Service info when it is created. |
Proceed to the "In" tab.
"In" tab
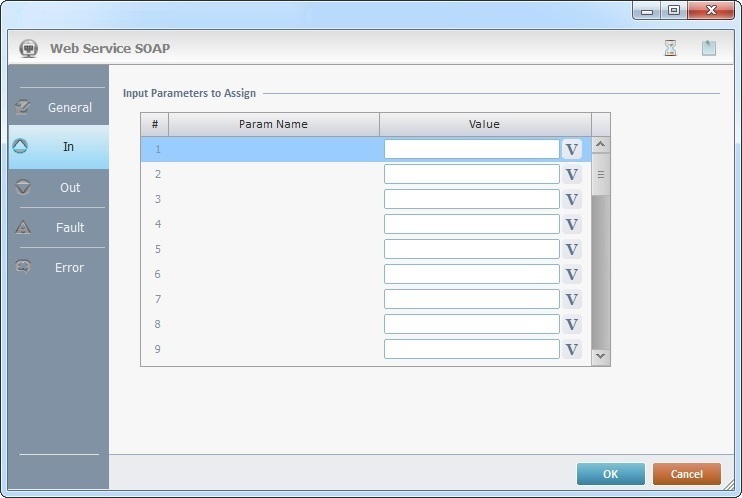
The "In" tab represents the SOAP web service request.
Fill in the following options:
Input Parameters to Assign |
|
Param Name column |
Not editable. Depending on the selected web service profile and operation (in the "General" tab), this column displays that web service's available parameters. You can parse up to 80 "In" parameters. |
Value column |
Insert a value for the input parameter for the the web service request OR click |
![]()
If the SOAP request contains arrays or complex structures, they will not be supported/exposed as "In" parameters.
Proceed to the "Out" tab.
"Out" tab
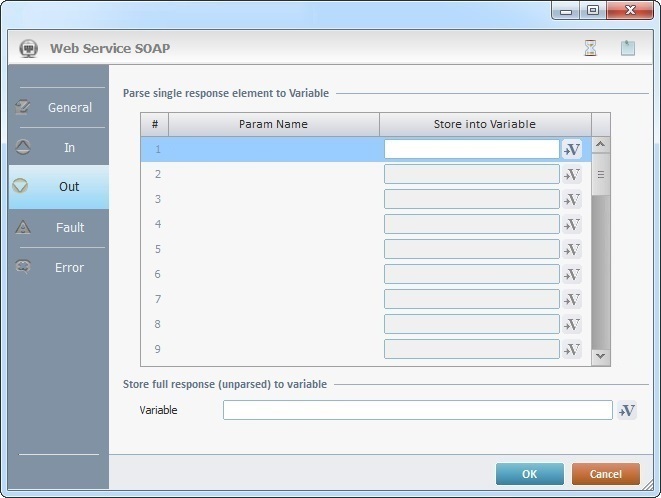
The "Out" tab represents the SOAP web service response.
Fill in the following options:
Parse single response element to Variable |
|
Param Name column |
Not editable. Depending on the selected web service profile and operation (in the "General" tab), this column displays that web service's available parameters. You can parse up to 80 "Out" parameters. |
Store into Variable column |
Click |
Store full response (unparsed) to variable |
|
Variable |
Click |
![]()
If the SOAP response contains arrays or complex structures, they will not be supported/exposed as "Out" parameters.
Proceed to the "Fault" tab.
"Fault" tab
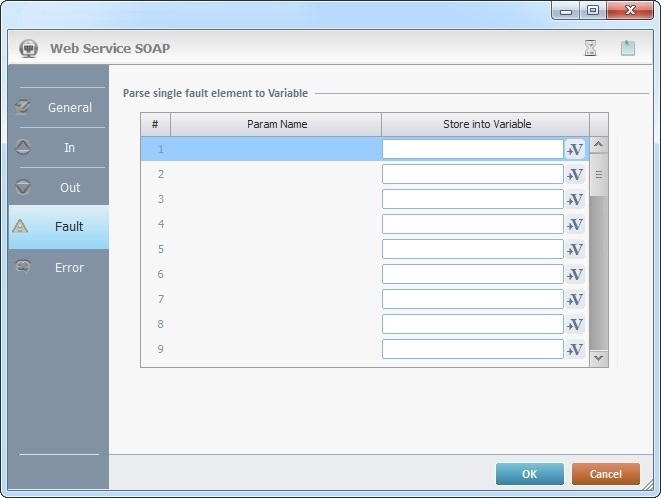
The "Fault" tab represents the SOAP web service fault occurrence which is parsed, in case an error occurs while processing the message (request and response).
Fill in the following options:
Parse single fault element to Variable |
|
Param Name column |
Not editable. Depending on the Web Service profile selected in the "General" tab, this column displays that web service's available parameters. |
Store into Variable column |
Click |
Proceed to the "Error" tab.
"Error" tab

Fill in the following options:
Store HTTP header response to Variable |
|
Full Header |
Click |
Status Code |
Click |
If...Go to |
|
Comm Error |
Select a target location from the drop-down or
|
Http Error |
Select a target location from the drop-down or
|
Detail of a ![]() window:
window:

"S:Menu" is a screen included in the same program as the process.
"R:Routine_1" is a routine included in the same program as the process.
If required, use the icons on the upper right corner of the properties window:
•Click ![]() to define a time out. See Time Out.
to define a time out. See Time Out.
•Click ![]() to attach any relevant notes to this process. Click it and enter your notes in the resulting text box. These notes will be displayed in the corresponding "Actions" tab or "Process" window (in the "Notes" field) and in the "Developer Report".
to attach any relevant notes to this process. Click it and enter your notes in the resulting text box. These notes will be displayed in the corresponding "Actions" tab or "Process" window (in the "Notes" field) and in the "Developer Report".
Click ![]() to conclude and apply the choices made in both tabs or select
to conclude and apply the choices made in both tabs or select ![]() to abort the operation.
to abort the operation.
The added process is displayed in the corresponding "Actions" tab or "Process" window.
![]() If you want to use a label as a target destination, you can use the "Auto-Label" mechanism. This alternative to the "Set Label" process allows you to create a label in the properties window of a process - specifically, in the fields used to define target destinations (ex: the "If Error..." type fields). See To Automatically Create a Label.
If you want to use a label as a target destination, you can use the "Auto-Label" mechanism. This alternative to the "Set Label" process allows you to create a label in the properties window of a process - specifically, in the fields used to define target destinations (ex: the "If Error..." type fields). See To Automatically Create a Label.
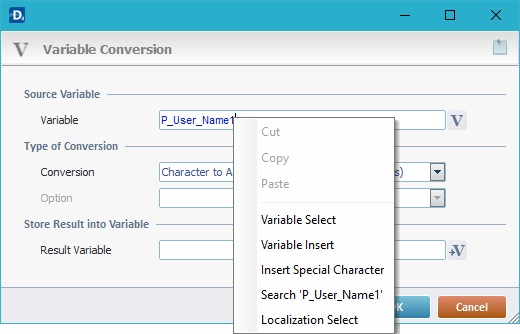
![]()
Use the right-click in MCL-Designer's input boxes to access some related options as well as the general "Cut", "Copy"; "Paste"; "Search" actions (active/inactive according to the current context).
Ex: If you right-click the "Variable" input box (included in a "Conversion's" properties window), you are provided with general editing/search actions and other more specific options such as "Variable Select" (see "Variable Select"); "Variable Insert" (see "Variable Insert"); "Insert Special Character" (see To Insert Special Characters into a Control's Text Input Field) and "Localization Select" (see Localization List).
If you right-click another input box, it may provide other possibilities.