|
Remote Database |
  
|
Remote Database
|
Remote Database |
|
Overview
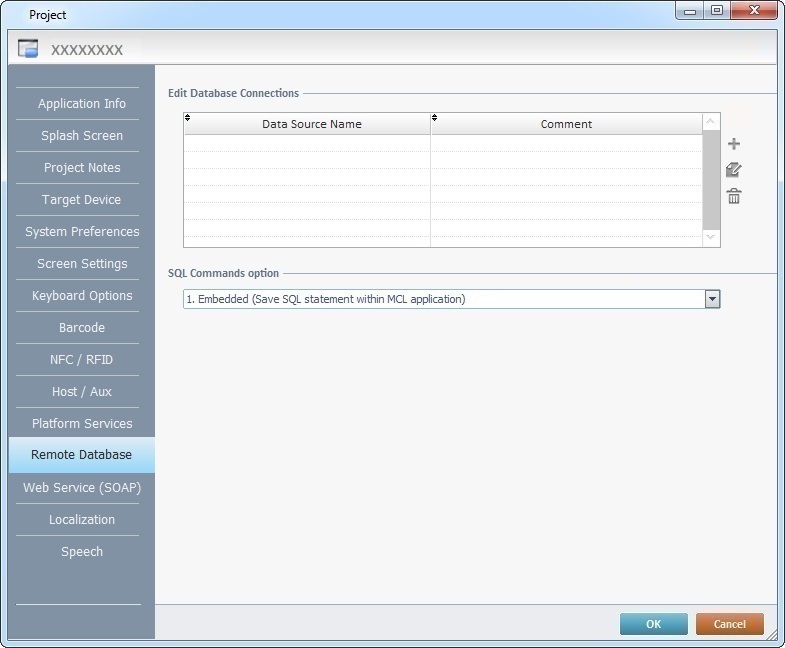
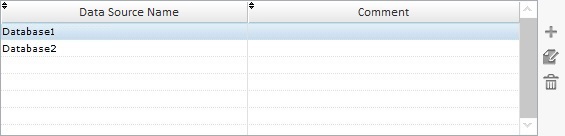
The "Remote Database" tab contains a table with the remote database profiles being used by the current project. They are available in the Remote Database processes group (see Working with the Remote Database Processes Group) and in the "Remote Database" module (see Navigating the Remote Database Module).
The purpose of a remote database profile is to mirror the structure of a remote database so it can be used by the current project and avoid time consuming network connections whenever its data is called for.
The displayed options can only be edited during project development (published projects cannot have their settings edited).
Database profiles can be added (![]() ), deleted (
), deleted (![]() ) or edited (
) or edited (![]() ).
).
Define the "SQL Commands" in the drop-down:
Embedded
If selected, this option saves all SQL statements within the MCL application. It does not require the existence of an MQD file on the server.
Server
If selected, the SQL statements are saved within an MQD file, which is required on the server.
Click ![]() to apply the modifications OR proceed to another tab.
to apply the modifications OR proceed to another tab.
For more information, see:
To Create a Remote Database Profile
To Edit a Remote Database Profile
To Create a Remote Database Profile
Step-by-step
1. Use one of the following methods to open the window where you can create a remote database profile:
a. In the "Remote Database" tab, click ![]() (located to the right of the table).
(located to the right of the table).
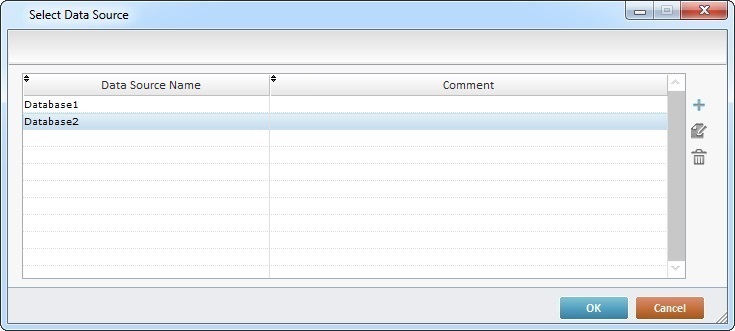
b. Click ![]() , wherever available (ex: in any Remote Database process). In the resulting "Select Data Source" window (which is similar to the table displayed in the "Remote Database" tab), click
, wherever available (ex: in any Remote Database process). In the resulting "Select Data Source" window (which is similar to the table displayed in the "Remote Database" tab), click ![]() .
.
c. In the "Remote Database" module, right-click the empty space or an existing remote database profile and select "Add New Remote Database".

Whatever the selected option, it opens a "Remote Database Connection Properties" window. The "General" tab is open, by default.
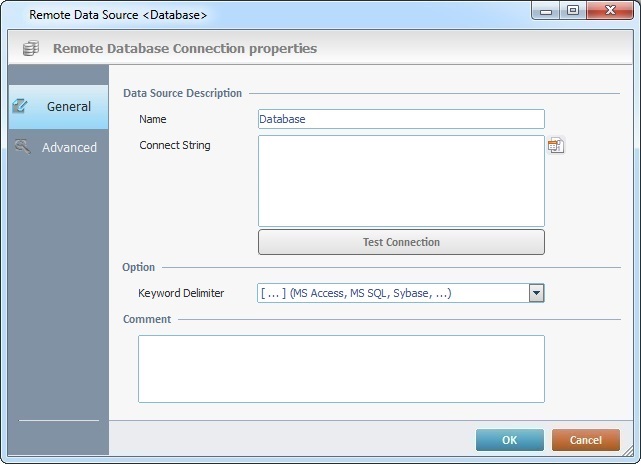
2. In the "Name" box, enter the name for the new remote database profile (ex: Database).
3. Click ![]() to create a connection string. The resulting OS "Data Link Properties" window opens with the "Connection" tab.
to create a connection string. The resulting OS "Data Link Properties" window opens with the "Connection" tab.

![]()
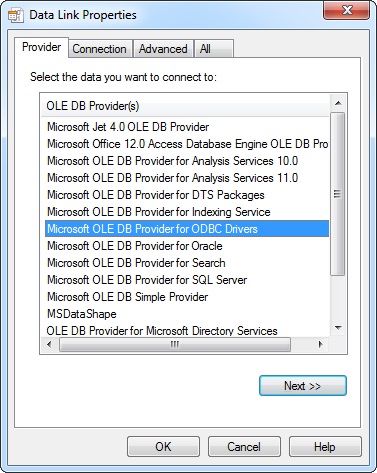
By default, the selected provider (in the "Provider" tab) is "Microsoft OLE DB Provider ODBC Drivers" but it can be changed. Depending on the selected provider, the configurations in the "Connection", "Advanced" and "All" tabs will be different.
![]()
We recommend you select an OLE DB provider that is compatible with the type of remote database you want to use to ensure a correct communication between the application and the selected remote database.
If the OLE DB provider's list does not include the provider you require, install the driver provided by the corresponding manufacturer (ex: for an Oracle based database, download/install the corresponding “Oracle Provider for OLE DB” provided by ORACLE).
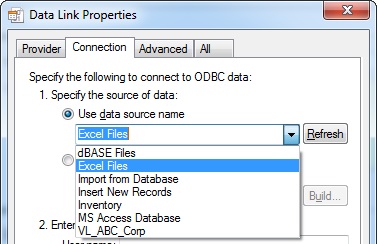
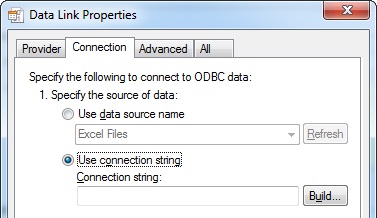
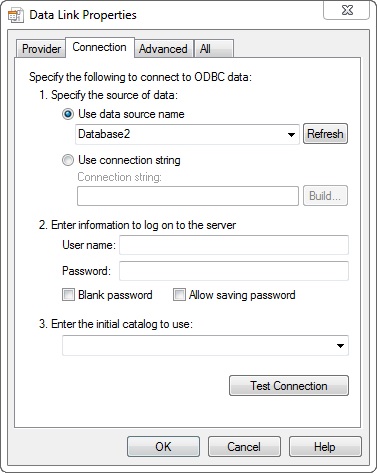
4. In the "Connection" tab (parameter 1), either check the "Use data source name" and select a data source from the drop-down OR check "Use connection string" and build a connection string.
Use data source name |
Use connection string |
|
|
5. If required, enter information to log on to the server, in parameter 2.
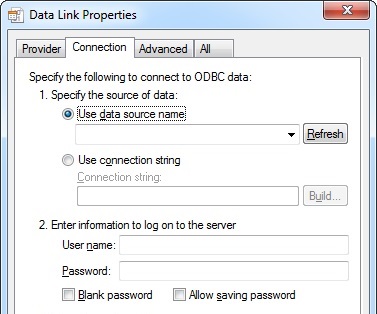
User name |
Enter a user name. |
Password |
Enter a password. |
Blank password |
Check this option to allow a blank password. |
Allow saving password |
Check this option to enable password saving. |
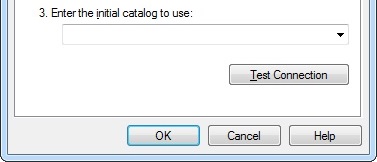
6. As an option, in parameter 3, enter or select the initial catalog to use from the drop-down.
7. If required, go to the "Advanced" tab and define:
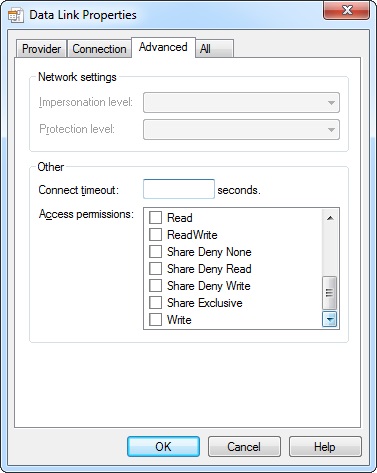
Connect timeout |
Enter a time out (in seconds)for the connection. |
Access permissions |
Check the required permissions from the available options. |
8. Click ![]() to conclude and return to the "General" tab in the "Remote Database Connection Properties" window.
to conclude and return to the "General" tab in the "Remote Database Connection Properties" window.
![]()
Before exiting, you can go to the "Connection" tab and test the defined connection by clicking ![]() .
.

9. All the defined settings are, now, in the "Connect String" box and can be tested by clicking ![]() .
.
10. If required, configure the remaining options in the “General” tab ("Option" and "Comment" sections).
Option |
|
Keyword Delimiter |
Select the appropriate surround characters from the drop-down. |
Comment |
|
Enter any relevant information concerning the remote database. |
|
11. Go to the "Advanced" tab.
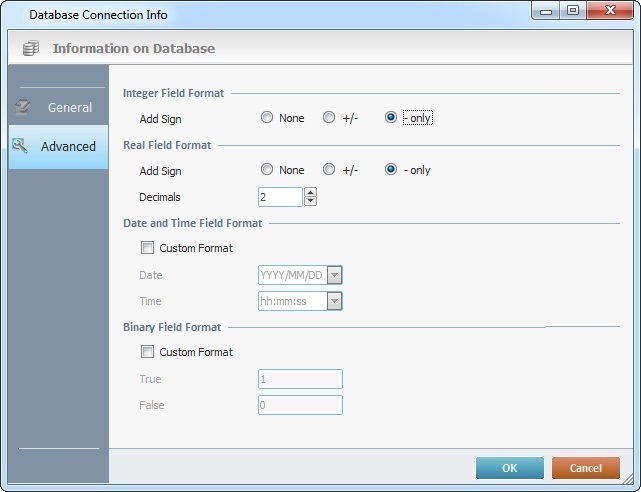
12. If needed, configure the available options.
13. Click ![]() to conclude or
to conclude or ![]() to abort the operation. The newly created remote database profile is, now, listed in the "Select Data Source" window.
to abort the operation. The newly created remote database profile is, now, listed in the "Select Data Source" window.
![]() This operation does not get the remote database structure/tables. It just creates the link between the project and the remote database.
This operation does not get the remote database structure/tables. It just creates the link between the project and the remote database.
See Getting a Remote Database's Structure.
To Edit a Remote Database Profile
1. Use one of the following methods to access the remote database profile you want to edit:
a. In the "Remote Database" tab, double-click the remote database profile you want to edit OR select it and click ![]() .
.
b. Click ![]() (in any "Remote Database" process) to open a window with the existing remote database profiles. Double-click the remote database profile you want to edit OR select it and click
(in any "Remote Database" process) to open a window with the existing remote database profiles. Double-click the remote database profile you want to edit OR select it and click ![]() .
.
c. In the "Remote Database" module, right-click the remote database profile you want to edit and select "Edit".

Whatever the selected option, it opens a "Remote Database Connection Properties" window. The "General" tab is open, by default.
2. Maintain or edit the available options in the "General" tab, as required by the project.
3. If the "Connect String" option requires editing, click ![]() to open the "Connection" tab in the "Data Link Properties" window.
to open the "Connection" tab in the "Data Link Properties" window.
4. Define a different data source:
a. Select a different database from the corresponding drop-down.
OR
b. Enter a new connection string for a remote database in the corresponding box.
5. Edit or maintain the information referred in parameters 2 and 3:
User name |
Maintain or edit the user name. |
Password |
Maintain or edit the password. |
Blank password |
Check/uncheck this option to allow a blank password. |
Allow saving password |
Check/uncheck this option to enable password saving. |
Enter the initial catalog to use |
Maintain or edit the initial catalog to be used. |
6. Click ![]() in the "Data Link Properties" window to apply your choices and return to the "General" tab.
in the "Data Link Properties" window to apply your choices and return to the "General" tab.
7. If required, click the "Advanced" tab and edit the available options.
8. Click ![]() to conclude or
to conclude or ![]() to abort the operation.
to abort the operation.